Repurposed Snowman

This cute snowman was quickly repurposed into a cat. (Photo by Charlotte Ekker Wiggins)

This cute snowman was quickly repurposed into a cat. (Photo by Charlotte Ekker Wiggins)

Repurposed Snowman

I was at one of my favorite thrift stores Saturday when a lady with a shopping cart full of home decor items said she really shouldn’t be buying more, she already had a lot of Christmas decorations at home. And she wished she could keep them up after the holidays were over.

Although the Christmas season is a lot about tradition, we all have items at home that hold memories and are hard to part with, whether it be the end of the holiday season or to clean house. Some that have fallen out of favor or lost their glow can be repurposed with a little thought, and a dab or two of paint. If you have kids helping, even better.

For example, tired-looking Christmas ornaments can get a new life with a little creativity and paint, as long as they are not family heirlooms.

Some Christmas decor can also get a second life and stay out long after the holidays are over. Some former colleagues have a whole snow theme that follows Christmas into spring, which is a nice way to celebrate the cold and ice of winter. I thought about some of their office snowman decorations when I found this little smiling snowman. His orange nose was worn off, which I knew I could easily fix. The knit cap made his transformation possible with the following:

Orange craft paint

White felt

Needle with white thread

Pink craft paint

Black magic marker

Elmer’s clear glue

Found this snowman for a quarter at a local thrift shop, had to add orange to his worn off nose. (Photo by Charlotte Ekker Wiggins)

Found this snowman for a quarter at a local thrift shop, had to add orange to his worn off nose. (Photo by Charlotte Ekker Wiggins)

I love whimsy. This snowman ringing a bell reminded me of the bells on the collars of my two cats. One cat, who gets into a lot of trouble, sounds like a herd of reindeer. He has earned all of those bells on his collar.

The other cat only has one bell on her collar and yes, she’s very well behaved. Or she’s good at getting out of the way and letting the other cat take the blame.

Their collar bell sounds are quite distinct so I know which one is coming by the sound they make. I decided to make this snowman into a snowcat so he could join my little collection of framed Christmas cat cards, then stay out after I put away the holiday items.

I started by adding white felt ears. The knit cap made the white felt ears easy to add with a few stitches.

After sewing the ears on, I dabbed each with pink paint.

Two white felt ears sewn to the cap with a dab of pink paint. (Photo by Charlotte Ekker Wiggins)

Two white felt ears sewn to the cap with a dab of pink paint. (Photo by Charlotte Ekker Wiggins)

Next was a white felt tail, which was glued to the snowman’s back side. I wanted the tail to peek around the bottom so I had to trim the tail a couple of times to get the right length.

Another piece of white felt added a tail. (Photo by Charlotte Ekker Wiggins)

Another piece of white felt added a tail. (Photo by Charlotte Ekker Wiggins)

Finally, the whiskers, added with a black magic marker and a steady hand.

Snowmancat is now ready to keep me company after the holidays. (Photo by Charlotte Ekker Wiggins)

Snowmancat is now ready to keep me company after the holidays. (Photo by Charlotte Ekker Wiggins)

This little Christmas decor now greets me every morning. It keeps my framed cat cards company, reminding me that the bells getting rung are my real cats getting into trouble. After the holidays are over, I will keep this little whimsical figurine where he will continue to greet me through winter.

I could just as easily made this into a snowman dog with floppy ears and a skinny tail.

Two friends with cats have met my snowcat and now want me to transform one of their snowmen into a snowcat. I told them I would be glad to make the transformation as their Christmas present this year.

So take a look at worn holiday decor and see how you can easily refurbish and repurpose it. Not all of it can be changed but you may find some gems and enjoy them past this holiday season.

Well, except for keeping Christmas lights up all year. One of my brothers has the corner on why, he said he’s keeping the lights up for a UFO experiment.

Charlotte


Grow Amaryllis Bulbs

This is an Amaryllis bulb properly potted and resting before it grows again. (Photo by Charlotte Ekker Wiggins)

This is an Amaryllis bulb properly potted and resting before it grows again. (Photo by Charlotte Ekker Wiggins)

Grow Amaryllis Bulbs

They are starting to pop up all over the place, those ugly large flower bulbs often offered bare root in mesh bags and gift boxes. Recently I saw some already potted and growing; the challenge is timing it so they bloom as they are being given as gifts.

Amaryllis, the South American cousins to our North American perennial surprise lilies, are a popular holiday gift. I have a number of them living in inside pots currently resting. They will start growing and blooming again shortly, adding the beauty of their flowers to a gray January.

How to Grow Amaryllis

Amaryllis are very easy to grow. The key is to correctly plant them in a pot with only the bottom one third of the bulb covered in soil.

Once planted in a pot about an inch wider than the bulb, pat the soil firmly. Water.

I add spanish moss to cover the bulb.

Place in a warm spot with indirect light. Within a week, a green bud tip should begin to appear.

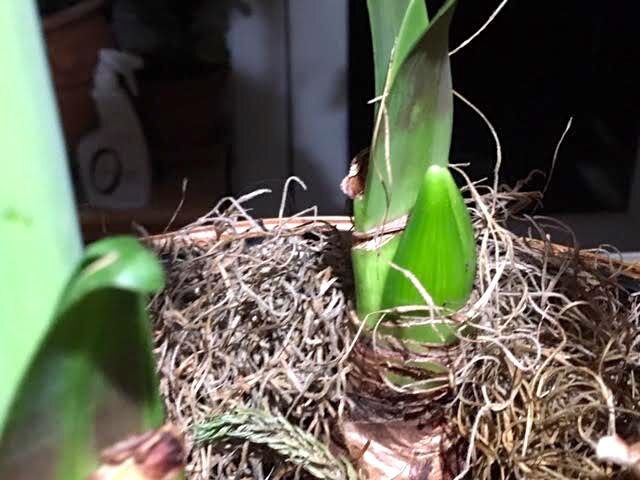
Amaryllis greenery, left, and a new bud growing out of a bulb. (Photo by Charlotte Ekker Wiggins)

Amaryllis greenery, left, and a new bud growing out of a bulb. (Photo by Charlotte Ekker Wiggins)

If the bulb has been properly nourished and rested. it will have saved enough energy in the bulb to re-bloom. Sometimes purchased bulbs are not seasoned enough and will only grow green leaves.

Within a couple of weeks, the flower stalk will grow, Water every couple of days to keep soil moist but not wet. Once the bud reaches 20 inches, a flower will appear. It’s good to stake the bud before it blooms because the weight of the flower can make it topple over.

Sometimes you may find an amaryllis bud sneaking out of the gift box, like this.

Amaryllis bulb in early bud. Once exposed to sun, the stem will grow straight. (Photo by Charlotte Ekker Wiggins)

Amaryllis bulb in early bud. Once exposed to sun, the stem will grow straight. (Photo by Charlotte Ekker Wiggins)

Popular and easy to find varieties include red, white, coral and pink and white. In this example, this is an Apple Blossom Amaryllis.

Apple Blossom Amaryllis bulbs tend to bloom for me in January. (Photo by Charlotte Ekker Wiggins)

Apple Blossom Amaryllis bulbs tend to bloom for me in January. (Photo by Charlotte Ekker Wiggins)

When the blooming is over, cut off the flower stalks but keep it watered so leaves appear. Let the leaves grow until they turn yellow on their own. The leaves are collecting sun they turn into energy and store in the bulb for blooming again.

Once all leaves are gone, let the bulb rest. Don’t water it or place in sun. After a couple of months, repot in new soil, water and wait for the magic to begin again.

Amaryllis are easy to grow and a lot of fun to watch as they go from bud to flower, seemingly growing overnight. When I see the flowers in the middle of winter, I can easily dream of meadows and of the promise of spring.

I also like that with a little care, they can keep on growing year after year. So if you see them on sale, don’t pass them up, they are worth the investment of time and effort.

Charlotte

Quilted Throws as Wall Hangings

Four Seasons Lap Quilt Throw Quilted Wall Hanging adds color to a sofa. (Photo by Charlotte Ekker Wiggins)

Four Seasons Lap Quilt Throw Quilted Wall Hanging adds color to a sofa. (Photo by Charlotte Ekker Wiggins)

Quilted Throws as Wall Hangings

Not sure how to use quilted lap quilt throws as quilted wall hangings?

Lap quilts, also called throws, may be the most flexible of all of the handmade quilts. Lap quilts throws are usually 50x60 inches, a size that covers most people sitting in a chair. Ergo the name “lap quilt” and throw.

Over the years, I have found lap quilts throws also work well to quickly change a room decor when using them as a wall hanging. They are excellent in entryways, as focal points in a room or nursery, and as a welcome at the top, or bottom, of stairs.

Four Seasons Lap Quilt Throw Quilted Wall Hanging is a personal favorite, I have one hanging at the bottom of the steps to my basement. In addition to announcing the seasons, this quilted wall hanging can help to warm up a cold wall.

Four Seasons throw makes an interesting, and warm, quilted wall hanging. (Photo by Charlotte Ekker Wiggins)

Four Seasons throw makes an interesting, and warm, quilted wall hanging. (Photo by Charlotte Ekker Wiggins)

When I want to change the decor, I remove Four Seasons Lap Quilt Throw Quilted Wall Hanging and thread a new one through the metal rod. For this season I am using the all cotton, Holiday Traditions Lap Quilt Throw Quilted Wall Hanging.

With a flick of a wrist, the entrance to my basement takes on a holiday theme.

Four Seasons throw can easily be replaced with another seasonal throw. (Photo by Charlotte Ekker Wiggins)

Four Seasons throw can easily be replaced with another seasonal throw. (Photo by Charlotte Ekker Wiggins)

And no need for extra storage for Four Seasons Lap Quilt Throw Quilted Wall Hanging. Two folds and the winter scene adds color to chair or sofa.

Two folds and Four Seasons Lap Quilt Throw Quilted Wall Hanging offers a little winter cheer. (Photo by Charlotte Ekker Wiggins)

Two folds and Four Seasons Lap Quilt Throw Quilted Wall Hanging offers a little winter cheer. (Photo by Charlotte Ekker Wiggins)

These are excellent, all cotton imported throws that are soft to curl up with on a sofa or chair.

When not hanging, the little tabs on the back lie flat against the backing fabric, almost imperceptible to the eye. I have to gently move the rod down the top to even find them.

If you have a lap quilt throw without tabs, you can easily add those. There are also quilt hangars available that will easily hold the lap quilt throws as a wall hanging.

Quilted lap quilts throws make wonderful practical gifts. So many customers write to tell us how much gift recipients enjoy our lap quilts, and that’s without them knowing how versatile they can be!

Charlotte

Dry Russian Sage

Dry Russian sage, bottom right, adds a nice pop of color to my front porch wreath full of dry greenery. (Photo by Charlotte Ekker Wiggins)

Dry Russian sage, bottom right, adds a nice pop of color to my front porch wreath full of dry greenery. (Photo by Charlotte Ekker Wiggins)

Dry Russian Sage

If you enjoy dry flower wreaths and using dry flowers in home decor, there is a perennial that can add a nice pop of bluish purple that often gets overlooked.

We all tend to look for lavenders but have you considered Russian Sage?

Russian sage is an easy to grow perennial often used as a landscape plant. (Photo by Charlotte Ekker Wiggins)

Russian sage is an easy to grow perennial often used as a landscape plant. (Photo by Charlotte Ekker Wiggins)

I see Russian Sage growing all around where I live in mid-Missouri. It is a popular landscaping plant, which means businesses tend to use them to add color. One business I know pulled them out because they were a magnet for bees, which of course I loved to see. That inspired me to add them to my garden.

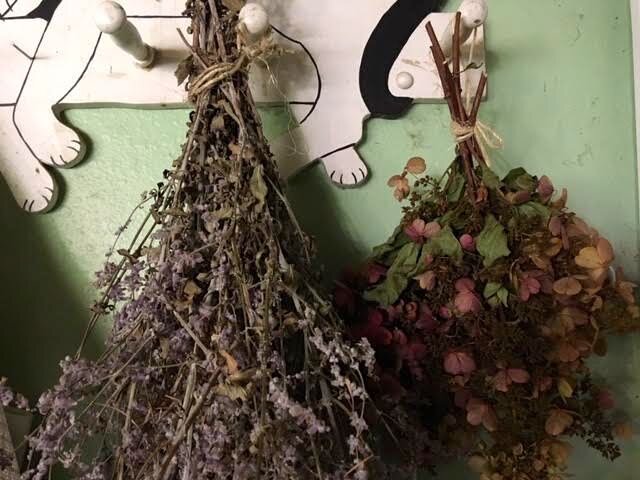
I hand bundled Russian sage in garage on coat hangars to dry. Panacle hydrangeas, right, as well. (Photo by Charlotte Ekker Wiggins)

I hand bundled Russian sage in garage on coat hangars to dry. Panacle hydrangeas, right, as well. (Photo by Charlotte Ekker Wiggins)

How to Dry Russian Sage (or any other plants)

It is easy to dry this hardy perennial. Once you cut off the blue spikes, tie with a string and hang for a few days so the greenery and stems dry.

I use coat hangars in my garage. If the weather gets cool, place them in a basket over your refrigerator, the heat of the motor provides a nice drying spot.

Once dry, you can easily incorporate Russian sage into wreaths and other dry flower arrangements.

I also have a bouquet dry Russian Sage sitting in a windowless bathroom. The bluish purple color adds a nice punch of color through winter when I won’t have fresh flowers to add.

This sprig of dry Russian Sage now decorates a corner of a bathroom. (Photo by Charlotte Ekker Wiggins)

This sprig of dry Russian Sage now decorates a corner of a bathroom. (Photo by Charlotte Ekker Wiggins)

Once dry, Russian sage also looses its scent. I don’t use oils but it occurred to me you could easily add a drop of lavender.

I added small bunches of Russian Sage to my outside grapevine wreaths, adding a nice pop of color. The grapevine wreath on my front porch has a little gourd bluebird that is fun to decorate with dried plants and branches. I’m sure the deer will let me know what they think of it.

Any day now.

Charlotte

Re-Blooming Poinsettias

One of last year’s poinsettias is now spending its days in the basement. (Photo by Charlotte Ekker Wiggins)

One of last year’s poinsettias is now spending its days in the basement. (Photo by Charlotte Ekker Wiggins)

Re-blooming Poinsettias

If you’re like me, you read about how to get poinsettias to re-bloom after Christmas, when you are deciding whether to try to keep the plants going or toss them in the composter. If the plant makes it to another Christmas, you look at the still green plant and wonder why it hasn’t turned color.

Well, the good news is its now September. This is when you need to tweak the plants to encourage their leaves to change color for the holidays.

The trick is to deny the plants light. To coax a poinsettia plant to bloom again, we are repeating the poinsettia life cycle. The color is actually the leaves changing.

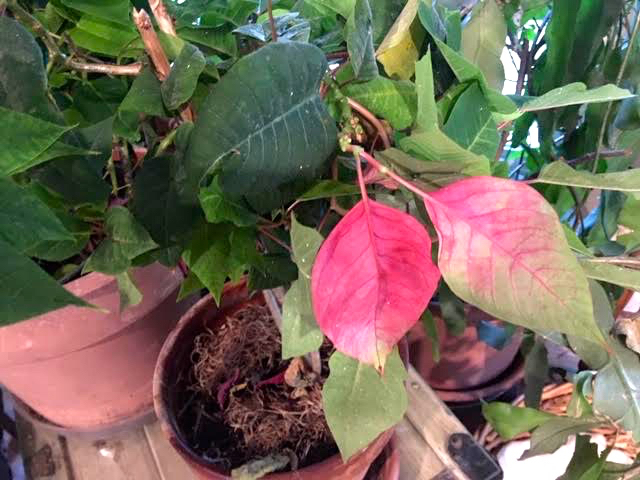
This poinsettia plant still has a couple of red leaves from last year.

This little poinsettia still has a couple of red leaves from last year. (Photo by Charlotte Ekker Wiggins)

This little poinsettia still has a couple of red leaves from last year. (Photo by Charlotte Ekker Wiggins)

These lovely plants are originally from southern Mexico. I remember growing up around huge poinsettia trees so in the right conditions, they can grow rather large.

In the US, however, they are sold as holiday decorations with little regard to keeping them going after the holidays.

Now earlier this spring, I should have cut them back but I didn’t. I wasn’t sure whether they would even make it through summer so I left them in their original pots in a shady spot in front of my house. Some broke off so I inadvertently did end up pinching some of the branches back.

Now that it is September, it’s time to bring them inside. They are now in a room in the basement, where I will end up forgetting to water them, which is a good thing for once. They will also have bright light during the day with air conditioning keeping the temperature around 70F and total darkness at night with cooler temperatures around 60F.

The leaves should start showing color within 6-8 weeks.

Once color starts to show, they can be brought into regular room lighting and get more water.

Ok, let’s see how well this works!

Charlotte

Shipping Rose of Sharon

Rose of Sharon trimmed into a tree form at the entrance to my garden. (Photo by Charlotte Ekker Wiggins)

Rose of Sharon trimmed into a tree form at the entrance to my garden. (Photo by Charlotte Ekker Wiggins)

Shipping Rose of Sharon

My brother in Virginia and I share a love of gardening. He has three flat acres compared to my one slopping hillside. Our garden concepts and designs are different but we both love having blooming plants mid to late summer.

He discovered crape myrtles; I found Missouri’s native rose mallows and their hardy cousins Rose of Sharon, a relative of the popular tropical hibiscus. The ones I have are white, pink, purple, and I discovered a double purple earlier this year.

When my brother mentioned he was looking for something else that blooms late summer, I decided to send him some of my Rose of Sharon starts for his birthday. I settled on the purplish ones to compliment his backyard full of pink, red and soft lavender crepe myrtles.

Rose of Sharon, also called Shrub Althea (Hibiscus syriacus) are old-fashioned garden staples where I live in mid-Missouri. Even some businesses use them as landscaping plants because they are hardy and will grow in less than ideal conditions. I consider them vintage flowers, like these featured in a set of vintage flowers handmade kitchen towels.

After checking if I could ship them to Virginia, I dug up small starts, wrapping the roots in wet soil and newspaper. I shook them to remove any bugs, then hosed them down and allowed them to dry. Don’t want any bugs hitchhiking their way out east.

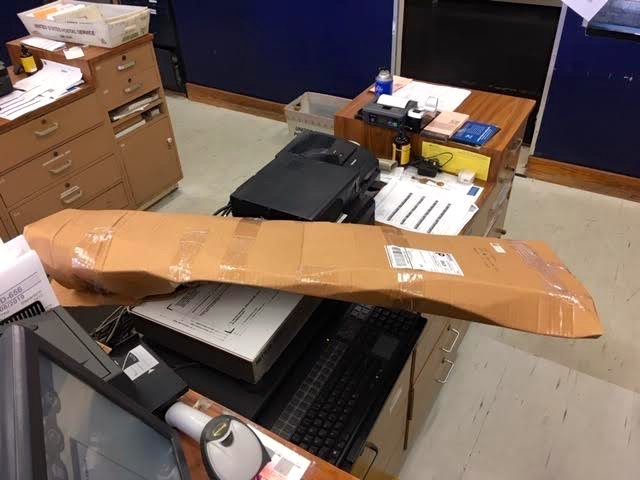
I didn’t have a box that they would fit in so I made a shipping container out of cardboard. It was an odd shape but it worked. Believe it or not, this homemade box helped the plants get safely to Virginia.

A self-made shipping box for sending Rose of Sharon through the mail. (Photo by Charlotte Ekker Wiggins)

A self-made shipping box for sending Rose of Sharon through the mail. (Photo by Charlotte Ekker Wiggins)
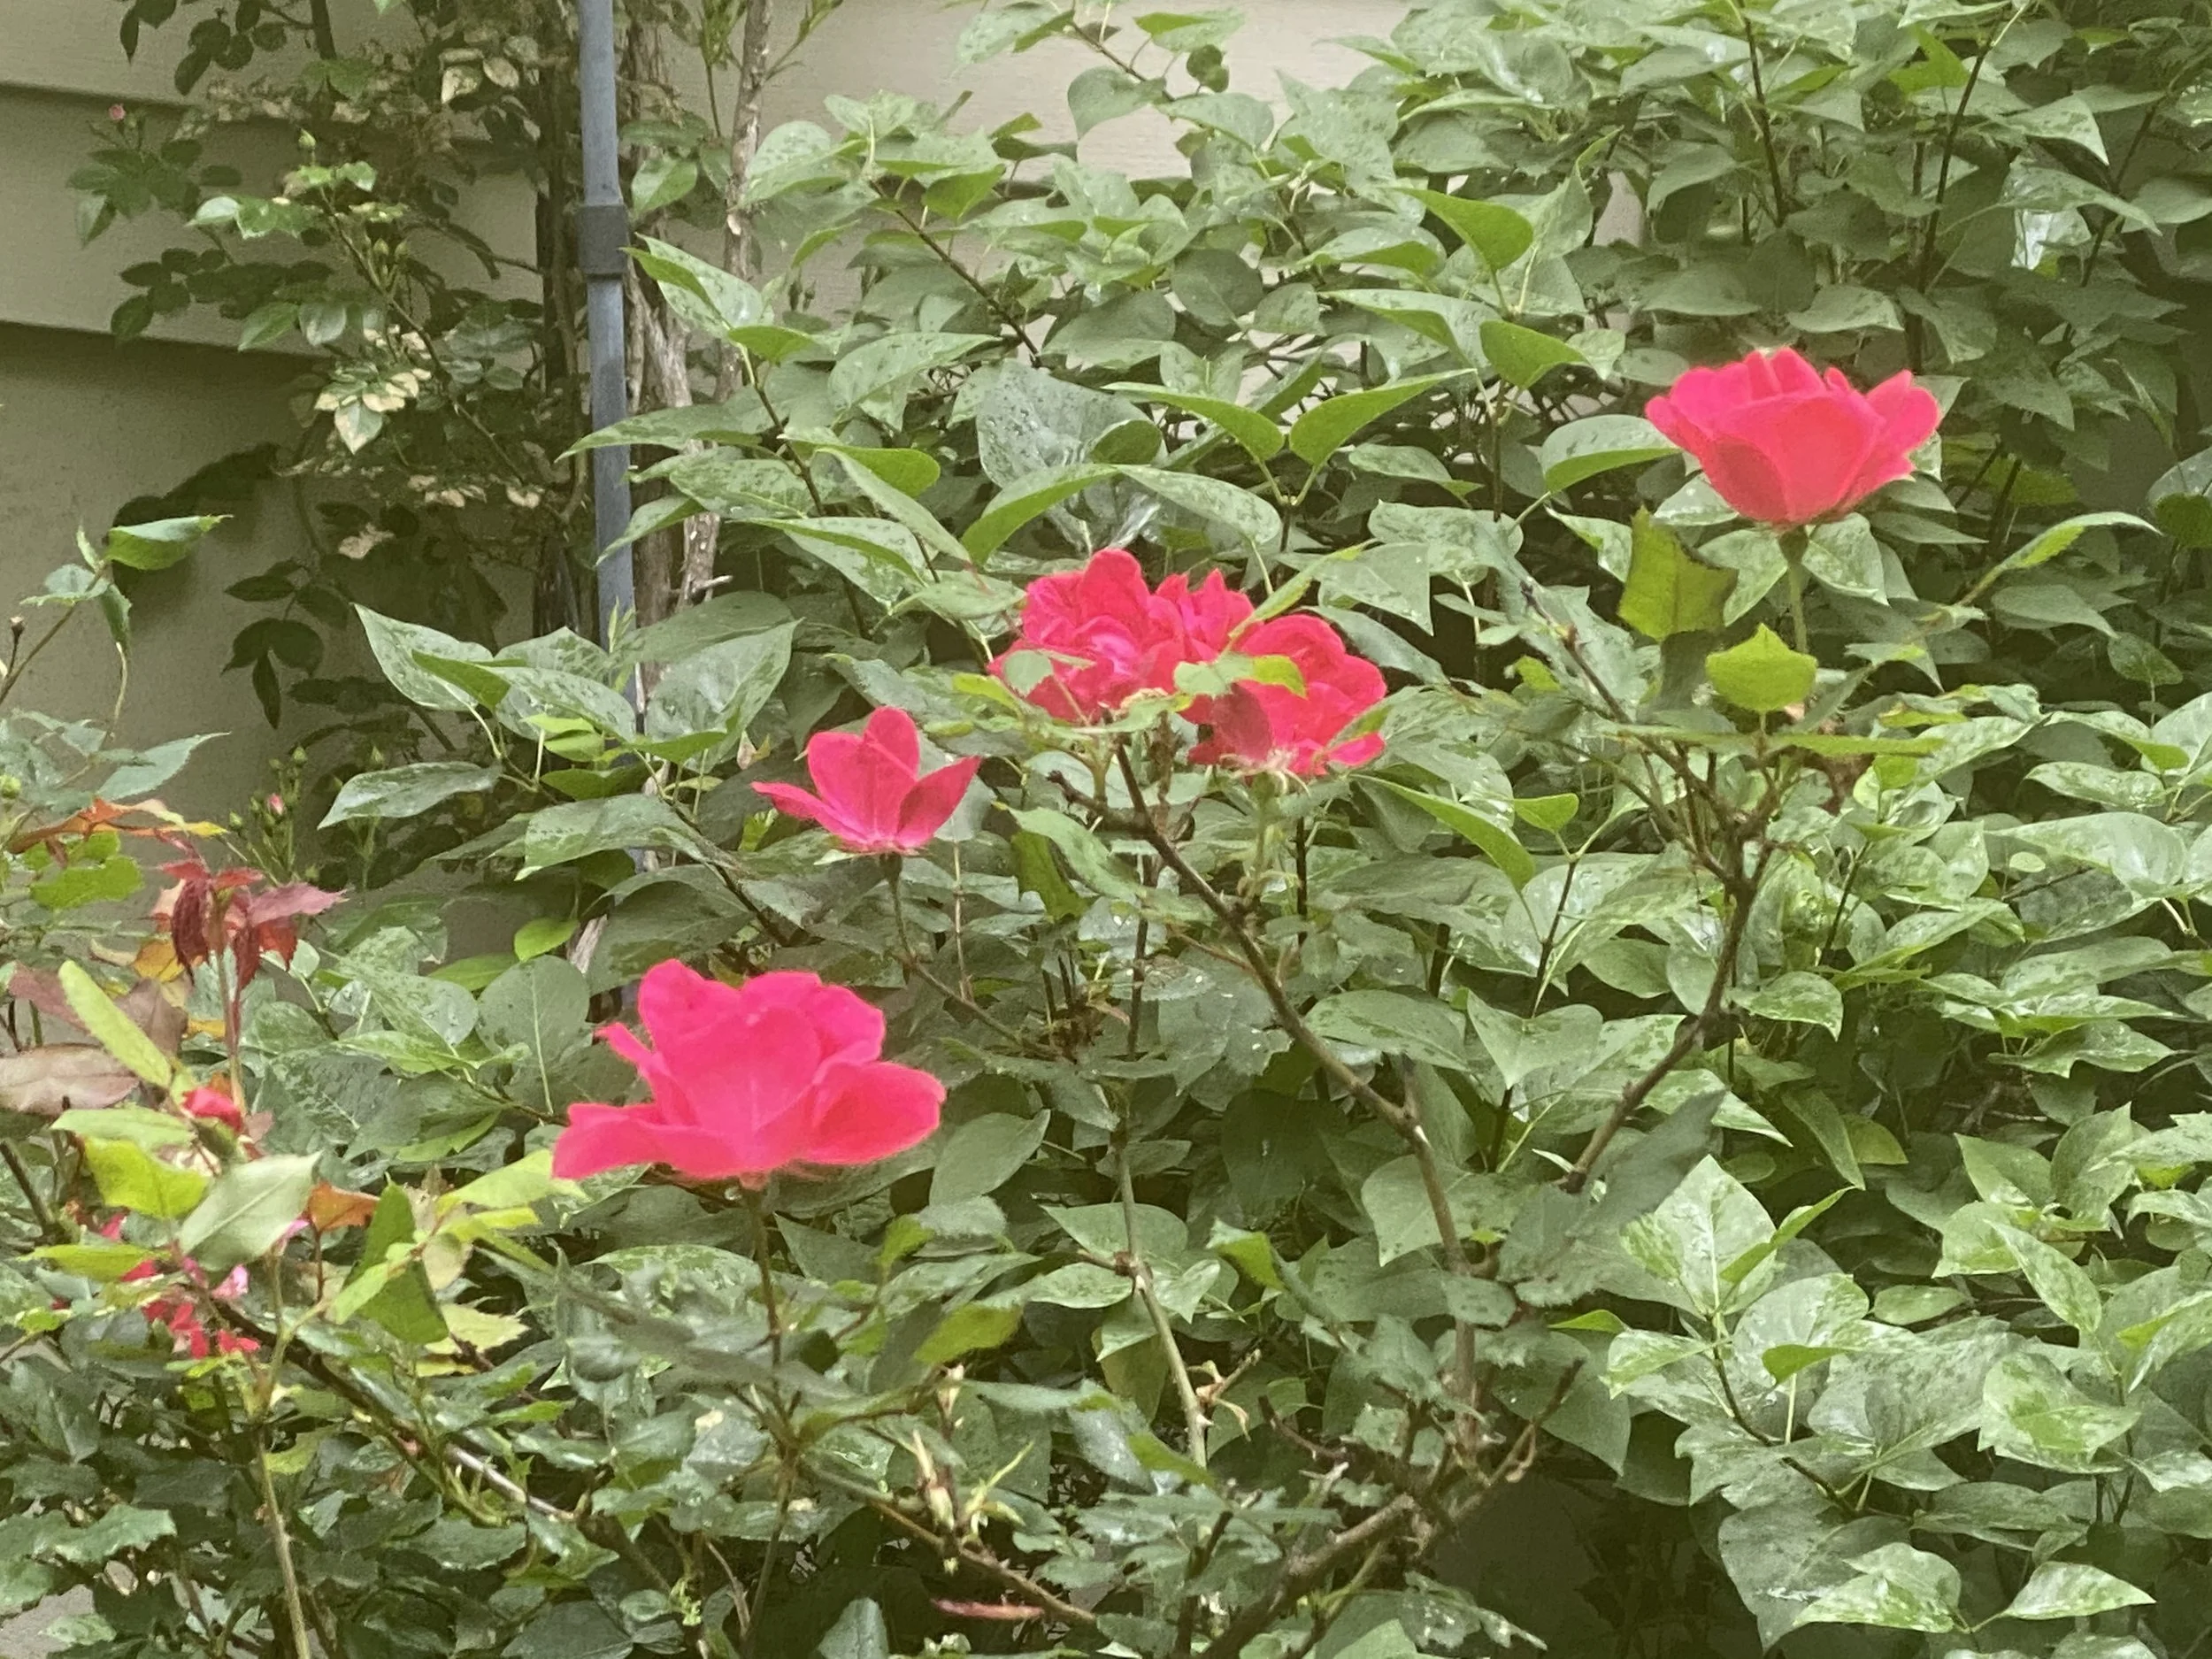
A local friend has some of the crepe myrtles my brother in Virginia has so I sent my brother a photo of the Rose of Sharon, on the left, close to red crepe myrtles, right. It helps to see the two of them together, especially when my brother didn’t know what a Rose of Sharon shrub looked like.

Rose of sharon, left, growing with crape myrtles at a friend’s house here in Rolla. (Photo by Charlotte Ekker Wiggins)

Rose of sharon, left, growing with crape myrtles at a friend’s house here in Rolla. (Photo by Charlotte Ekker Wiggins)

Once the Rose of Sharon starts arrived in Virginia, my brother said he didn’t think they were going to make it. He said only three looked good; the rest had yellow leaves or were dropping their leaves.

I usually remove the leaves once they turn yellow.

Shipped rRose of Sharon starts potted once they arrived in Virginia. (Photo by Charlotte Ekker Wiggins)

Shipped rRose of Sharon starts potted once they arrived in Virginia. (Photo by Charlotte Ekker Wiggins)

Nonsense, I said, they are hardy. Now that they are in a pot, water daily, place in shade and wait for the new greenery to start growing.

My brother wasn’t so sure.

I knew better. I had moved three Rose of Sharon “trees” to a new spot in my garden earlier this summer. Two made it quickly but a third one on the left in photo dropped all of its leaves.

Rose of Sharon, left, dropped all of its leaves before settling into a new garden spot. (Photo by Charlotte Ekke r Wiggins)

Rose of Sharon, left, dropped all of its leaves before settling into a new garden spot. (Photo by Charlotte Ekke r Wiggins)

I wasn’t discouraged, I had moved these before. The trick is to keep the roots mulched and watered as the Rose of Sharon settles in. In these record hot summer temperatures, I carried water to this garden spot to make sure the Rose of Sharon roots stayed hydrated.

About three weeks later, new growth started to appear on my moved Rose of Sharon.

New leaf growth is a sign the Rose of Sharon has settled into its new garden spot. (Photo by Charlotte Ekker Wiggins)

New leaf growth is a sign the Rose of Sharon has settled into its new garden spot. (Photo by Charlotte Ekker Wiggins)

A good month later, my brother said the Rose of Sharon starts I shipped him not only all pulled through but they are doing quite well.

Now my brother said he has to find spots for ALL of them in his garden.

Shipped Rose of Sharon starts recovering in their new Virginia home. (Photo by Charlotte Ekker Wiggins)

Shipped Rose of Sharon starts recovering in their new Virginia home. (Photo by Charlotte Ekker Wiggins)

Not only are they pretty and a good bee plant but Rose of Sharon are hardy and easy to grow. I have most of mine trimmed into tree shapes. They can also grow as shrubs to fence off areas. They do drop their leaves over winter.

Happy belated birthday, David!

Charlotte


Front Door Wreath

Inspiration to make a simple and inexpensive decorative door wreath. (Photo by Charlotte Ekker Wiggins)

Inspiration to make a simple and inexpensive decorative door wreath. (Photo by Charlotte Ekker Wiggins)

Front Door Wreath

Years ago, I kept a small dried wreath on my front door with dried flowers I picked during my walks. One day I opened the door to find a small deer munching on the greenery. Ever since, I have kept that in mind as I decorate my front door. I tended to use natural items in case deer decided to nibble on the decor for a snack.

For a couple of years, I have decorated my front door with a small grapevine wreath cut from my Missouri hillside garden. For some reason this year I became restless about that wreath and decided to replace it.

After shopping at several local home decor stores as well as craft stores, I decided I could remain restless until I found something that struck my fancy at a local thrift store. Some wreaths start at several hundred dollars and I was not interested in frustrating my grazing deer with silk greenery. I suspect they would just tear it apart trying to eat it.

Several weeks ago, I saw this square fake greenery covered wreath. I passed it the first time I saw it, then went back hoping it was still there. Even though I had a priced something similar at a crafts store, it was the shape that stayed with me. Having a different shape was a good option next to the larger, 5-foot grape vine wreath hanging nearby. Something similar to the square one was close to $50 at a crafts store.

As I was taking the green square wreath to the cash register ,I saw another smaller wreath that usually runs around $20.

The two at the thrift store, in excellent condition, cost $9.

I decided to replace the grapevine wreath on the left. (Photo by Charlotte Ekker Wiggins)

I decided to replace the grapevine wreath on the left. (Photo by Charlotte Ekker Wiggins)

I tucked the smaller round wreath inside the larger, square one. I thought about attaching it but if my deer decide to nibble on it, this way they can remove it without taking the whole door. Or at least the rest of the square wreath.

My biggest challenge was where to place the '"home sweet bees” sign, and the little skep, in relation to the rest of the two wreaths.

The sign is attached with two small wires on either end so I turned the wreaths over to attach the sign. There are several spots along the back of the square wreath to easily attach the wires.

Wires on the back of the square wreath are good for attaching signs. (Photo by Charlotte Ekker Wiggins)

Wires on the back of the square wreath are good for attaching signs. (Photo by Charlotte Ekker Wiggins)

I found the little skep, or tiny basket that beekeepers once used to use to keep bees, for a quarter. I have it on a thin mental strand so that I can easily add it to wreaths or what strikes my fancy. Some years it has paid a Christmas tree a short visit.

This was the front door wreath version with the skep on the top and the sign attached to the front instead of the back of the wreath.

I moved the wire through the greenery to secure it to the back of the wreath.

The Home Sweet Bees sign is attached to the back of the square wreath. (Photo by Charlotte Ekker Wiggins)

The Home Sweet Bees sign is attached to the back of the square wreath. (Photo by Charlotte Ekker Wiggins)

Then I tried the sign at the top of the wreath as I dabbed burgundy paint on some of the tiny foam balls that make up the fake berries.

The foam makes these substantial-looking wreaths lightweight, making them usable on door hooks.

See the metal ring in the upper right? This wreath can also be hung in a diamond shape thanks to that hook. Love having that option, makes this front door wreath even more versatile.

A few minutes of dabbing paint and the worn spots are covered. (Photo by Charlotte Ekker Wiggins)

A few minutes of dabbing paint and the worn spots are covered. (Photo by Charlotte Ekker Wiggins)

After looking at both options and removing the extra paint on my fingers, I decided this is the version I like best.

This is the current placement of the sign on the wreath. (Photo by Charlotte Ekker Wiggins)

This is the current placement of the sign on the wreath. (Photo by Charlotte Ekker Wiggins)

One of these days I will get a better sign made but, in the meantime, I am very happy with the combination of square green wreath with the inside garland and skep.

The wreath colors pick up the chartreuse colors in deck pillows and compliment the rest.

My “new” square green door wreath fits in nicely on my front deck. (Photo by Charlotte Ekker Wiggins)

My “new” square green door wreath fits in nicely on my front deck. (Photo by Charlotte Ekker Wiggins)

Now tomorrow, who knows. I may move the sign again.

Or maybe the deer will. What am I saying, we now have black bear sightings in the area, it could also be a bear!

Charlotte

Adding Bookcase Legs

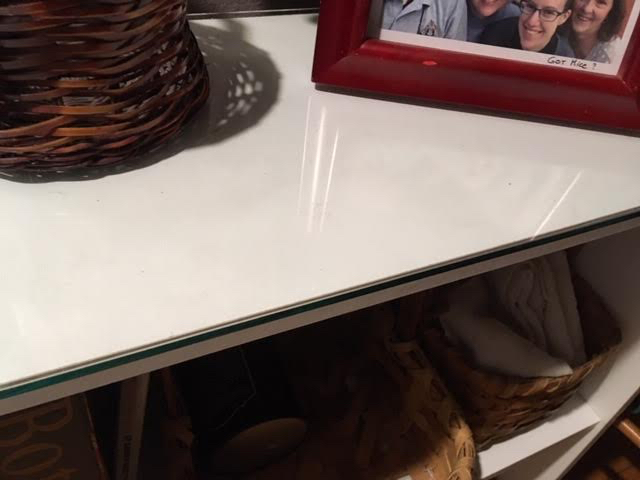
One long 2 inch by 2 inch painted piece gives this bookcase some height. (Photo by Charlotte Ekker Wiggins)

One long 2 inch by 2 inch painted piece gives this bookcase some height. (Photo by Charlotte Ekker Wiggins)

Adding Bookcase Legs

You see them all over home decor, home remodeling sites and home renovation shows, special mud rooms with room to hang coats, store boots and maybe even do crafts. They usually include cubby holes and bins to store backpacks and other items, either in a dark grey or white finish.

This is one of those white pre-fabricated cabinets that can easily provide shelving and storage. These pre-fabricated cabinets are delicate so they can’t hold much weight, such as books, but they do make nice little storage bins.

This small bookcase was left over from re-organizing a closet. Although not impressive as a stand alone piece of furniture, I easily updated the piece by simply adding legs. The legs were made from 2-inch by 2’inch pieces I cut the length of the book case and glued along the ridge on the inside edge of the bookcase..

Titebond III wood glue is excellent for bee hives as well as home wood projects!

I can’t use nails or screws because the particle board sides and shelves will splinter under the pressure of using nails and screws. Glueing on the legs, however, was easy.

I used the piece of wood along the full edge of the book case to cut down on the number of cat toys that get kicked under the piece.

You can also paint the are that looses the covering strip. It will take a couple of coats of paint; this is the first one. (Photo by Charlotte Ekker Wiggins)

You can also paint the are that looses the covering strip. It will take a couple of coats of paint; this is the first one. (Photo by Charlotte Ekker Wiggins)

See the little missing piece bottom right? This is easy to fix with a few coats of a good paint. Here I have only applied the first layer to test whether the particle board will absorb it.

So here is the book case with legs sitting next to my front door giving me a tiny mudroom-like storage space.

The book case is now a little mudroom by my front door. (Photo by Charlotte Ekker Wiggins)

The book case is now a little mudroom by my front door. (Photo by Charlotte Ekker Wiggins)

There is a closet to the left of the front door so this little storage unit helps to expand the front area into a pseudo mud room. The little bookcase now looks more like a free standing furniture piece and I have the necessities I need close to my front door: fish food; a botanical reference book; muslin kitchen towels, my crocs and the blanket for the front porch sofa when temperatures turn cool.

I have added a couple more layers of paint to seal that one spot on the right and, you will be happy to know, the cats stood by carefully watching me. As soon as the bookcase was back in place, they volunteered to test the new legs with their soccer games. So far, only one toy made it through the goal.

One more addition; a glass top to protect it from heavy use. (Photo by Charlotte Ekker Wiggins)

One more addition; a glass top to protect it from heavy use. (Photo by Charlotte Ekker Wiggins)

I also added a quarter inch piece of glass to the top to protect it from heavy use. I tend to drop baskets full of items on it, sometimes towels and plants I want to bring inside. For about $15, the top is now protected and becomes yet another place I can use.

I would say this little hack turned out quite well, wouldn’t you?

Charlotte


Giving Stargazer Lilies

Stargazer Asiatic lilies carry pollen at the end of their protruding stamens. (Photo by Charlotte Ekker Wiggins)

Stargazer Asiatic lilies carry pollen at the end of their protruding stamens. (Photo by Charlotte Ekker Wiggins)

Giving Stargazer Lilies

One of the advantages of having a Missouri hillside pollinator garden is that I can share some of the flowering residents with friends. It’s fun to get floral jewelry like this gold orchid pin, too, but there is no substitute for the real fresh flowers.

In early July, my little collection of Stargazer lilies bloom, one of the most aromatic of my summer blooming perennials.

I picked up the bulbs on sale last year, not expecting many of them to survive but I have been pleasantly surprised.

The biggest issue with these lovely blooms is that they may need to be staked. The flower stalks are thick but not strong enough to hold up the lovely flowers.

History of Stargazer Lilies

Stargazer lilies are, in a word, dramatic. The almost 6-inch wide individual flowers can easily command a room in a flower vase so they are fun to share.

The Stargazer was developed in 1978 by Leslie Woodruff. He cross-pollinated an Oriental lily and Asiatic lily bringing together the fragrance and shapely flowers of an Asiatic lily and bright colors as well as ‘hardy’ habits of an Oriental lily. Since the flowers open towards the sky, they were named Stargazers.

The most common stargazer lily species has petals of bright pink color and speckles in yellow and white hues. Pink, white and yellow are also available. The fragrance of the hybrid lilies is bold yet pleasant and heady. The flowers stay fresh for longer time and thanks to their sturdy stem, they are a fantastic choice as cut flowers and long-stemmed flower arrangements.

Remove Pollen

Before taking them inside, however, cut off the pollen at the end of the long stamens. The pollen will permanently stain anything and everything it touches, including the flower petals.

To remove the pollen, cut off the pollen from the end of the stamens.

At first I thought cutting off the pollen would completely change the look of the flower but I was wrong. They still look nice and, even better, still smell as lovely as ever.

Cut off the protruding stamens to minimize pollen stains. (Photo by Charlotte Ekker Wiggins)

Cut off the protruding stamens to minimize pollen stains. (Photo by Charlotte Ekker Wiggins)

I do the trimming outside so the pollen can fall into the garden instead of covering my inside table surfaces as well as my hands.

Although I love the pollen for my pollinators, I do cut them off from gift flowers.

Here are the Stargazer lilies now in flower vases ready for the trip to their new homes.

These Stargazer Asiatic lilies are ready to be shared. (Photo by Charlotte Ekker Wiggins)

These Stargazer Asiatic lilies are ready to be shared. (Photo by Charlotte Ekker Wiggins)

To cut the Stargazer Asiatic lilies, make a 45-degree cut at the approximate length they will fit in a flower vase. Remove the bottom leaves so they don’t sit in the water.

If you are not sure the gift recipient will be around when you deliver them, add a gift card. I save the ones I get from florists so I can recycle them with one of my business cards.

Finally, to make sure the gift flowers arrive safely, I store them in one of my blue paint buckets with towels tucked inside around the flower vases to keep them from falling over and spilling water all over my car seats.

Ask me how I know that can happen.

Gift Stargazer Asiatic lilies travel in a blue bucket to make sure they arrive safely. (Photo by Charlotte Ekker Wiggins)

Gift Stargazer Asiatic lilies travel in a blue bucket to make sure they arrive safely. (Photo by Charlotte Ekker Wiggins)

So much fun to share these lovely wonders. I left one on a friend’s desk this summer. She thought I had purchased them from a florist instead of growing them myself.

Don’t forget to save one for yourself; I put them in my bathrooms so that I can enjoy the scent when I am relaxing in the tub.

Charlotte

How to Personalize a Gift

Can you tell how this personalized custom gift was personalized? (Photo by Charlotte Ekker Wiggins)
Can you tell how this personalized custom gift was personalized? (Photo by Charlotte Ekker Wiggins)
How to Personalize a Gift

Personalized gifts are very popular. From custom embroidery on gifts such as a handmade quilt to special gift-wrapping, there are several ways to easily personalize a gift.

First, try a different way to tie the ribbon. Instead of tying it in the center, off set the bow so that it is at one end of the package. To increase the bow volume, make a double loop before tying it.

Secondly, make the gift card special. It can be a handmade gift card or a gift card where something custom is added, such as this little stick on honey bee.

See the honey bee? (Photo by Charlotte Ekker Wiggins)
See the honey bee? (Photo by Charlotte Ekker Wiggins)

If you have stamps, you can stamp a honey bee, butterfly, hearts and initials in a circle in the same spot, the idea is to add something that will be special to the gift recipient.

The way we personalize gifts is we add personalized gift cards designed by a local artist that include a ladybug somewhere on the featured native Missouri wildflower with flower identification printed on the front. Customers can tell us what they want written inside of the native flower gift card, which we add to the gift-wrapped gift.

Our label gets added to the other side of the ribbon and voila, each gift-wrapped handmade quilt, throw and gift set is now extra special.

But then, we think it’s special even before they are gift-wrapped…

Charlotte

Fixing Love Seat

See any problem with this love seat, besides the disappearing cat? (Photo by Charlotte Ekker Wiggins)

See any problem with this love seat, besides the disappearing cat? (Photo by Charlotte Ekker Wiggins)

Fixing Love Seat

Let’s face it, any seating that has separate cushions is an opportunity for a disaster - or in my case, a disappearing cat.

This love seat is den central, the favorite sitting area and evening work station, which means my lap top computer is nearby. It’s a standard two seat love seat with two cushions on the bottom and two, saggy back pillows. The pillows are cat favorites because they can shape themselves into the pillows but they are not good for back, or head support for a sitting person.

I shopped around looking for something in a similar size but a solid bottom with no luck. I even considered replacing the love sofa with two easy chairs but then the two cats who like to sit with me would quarrel over the limited chair space.

So I had the love seat reupholstered. The lady who did the work was a little curious about why I wanted the bottom in one piece but she understood why I needed the backing to be solid.

“These pillows barely would hold anything,” she said as she moved the original, smushy pillows around.

After selecting a nice neutral cream fabric that is complimentary to the rest of the den, I hauled the love seat to the upholstery shop. When I returned, two cats were sitting where the love seat used to sit, looking at me as if I had just made their favorite spot in the world disappear.

A few weeks later, the finished love seat was back.

I was thrilled. It now has a solid backing and I no longer sit between the two cushions with pillows stuffed in the separation.

Oh, you thought the cat sat there?

No, the cats each like to have one side of me so I was the one sitting in the middle. This way I have a comfortable spot and each cat can claim a side all to themselves. See, Boo Boo already is claiming his spot in front of Cat Mischief Lap Quilt Quilted Wall Hanging.

Back and love seat bottom now solid pieces. For some reason, the cat doesn’t look impressed. (Photo by Charlotte Ekker Wiggins)

Back and love seat bottom now solid pieces. For some reason, the cat doesn’t look impressed. (Photo by Charlotte Ekker Wiggins)

If you are wondering if there is a connection between the cat’s name “Boo Boo” and cat mischief, let me put it this way. If I hear something getting knocked over, I don’t even have to look, I just say 'Boo Boo Bartholomew Trouble!”

And yes, cats do know their names.

Charlotte

Fresh Picked Early Daffodils

After 3 days from being picked, the early daffodils are starting to bloom. (Photo by Charlotte Ekker Wiggins)

After 3 days from being picked, the early daffodils are starting to bloom. (Photo by Charlotte Ekker Wiggins)

Fresh Picked Early Daffodil

The forecast was for record-breaking cold weather with a dollop of snow after the forecasters said we would have an early spring in mid-Missouri, USA. Greenery was starting to pop up in my garden including one of my favorite spring flowers, the early, old-fashioned daffodils sprinkled through my one-acre hillside garden.

These daffodils have been rescued from several old house sites with the owner’s permission. They are not big, or fancy, their claim to my heart is that they are the first daffodils to bloom in spring, a promise of more flowers to come.

When I heard the forecast, I headed outside to see if there were any daffodils getting ready to bloom. Although they can often make it through snow, I wasn’t so sure about record cold temperatures so I picked a few already in bud form.

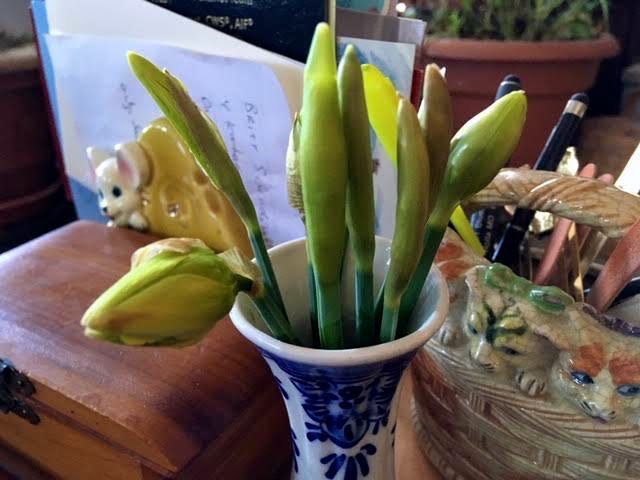
Once inside, I trimmed their stems to the same length and placed them in a 5-inch porcelain flower vase that easily fits on a tray on my den coffee table.

These are the early daffodils right after they were picked. (Photo by Charlotte Ekker Wiggins)

These are the early daffodils right after they were picked. (Photo by Charlotte Ekker Wiggins)

After the first couple of days inside, the early daffodil buds started to show progress as the sweet yellow flowers made it to the blooming stage.

I have two kinds of very old-fashioned daffodils in the vase. One is the small, early daffodils and the second is a double daffodil no longer available on the market. The double daffodils are not as reliable as cut flowers, you can see the one on the bottom left is drying up faster than the one in the center. Although I know the double ones sometimes don’t develop as cut flowers, I included these two in case they made it.

Second day of sitting in my tiny flower vase. (Photo by Charlotte Ekker Wiggins)

Second day of sitting in my tiny flower vase. (Photo by Charlotte Ekker Wiggins)

I also gave a friend a tiny bouquet of these early daffodil buds for her kitchen table. She said they are all open now and greatly cheered her up during this last winter storm.

There’s a third different kind of daffodil getting ready to bloom. (Photo by Charlotte Ekker Wiggins)

There’s a third different kind of daffodil getting ready to bloom. (Photo by Charlotte Ekker Wiggins)

Wait, looks like I have a third kind of daffodil getting ready to bloom with the early daffodils. See the white daffodil bud?

Fun to try to guess what color this will be once it blooms.
Early daffodils are one of those wonderful spring blessings like in this spring blessings lap quilt throw, a sign that cold weather should be almost over and a promise of warm days in the garden ahead.

Charlotte

Pantone 2019 Color: Living Coral

This is the closest I will get to finding living coral in the midwest. (Photo by Charlotte Ekker Wiggins)

This is the closest I will get to finding living coral in the midwest. (Photo by Charlotte Ekker Wiggins)

Pantone 2019 Color: Living Coral

Not that this makes any difference to how I decorate my ecclectic house and practical wardrobe but I do find the color of the year selections interesting. Pantone, the self-proclaimed global authority on color, has declared "Living Coral" the color of the year for 2019.

"Just as coral reefs are a source of sustenance and shelter to sea life, vibrant yet mellow, Pantone 16-1546, Living Coral embraces us with warmth and nourishment to provide comfort and buoyancy in our continually shifting environment," according to Pantone’s news release.

New Jersey-based Pantone picks a new color each year based on socioeconomic conditions, fashion trends, new technologies, as well as new trends in the realms of lifestyle, art, music, travel, and of course, social media.

This year, with technology and social media ever encroaching on our daily lives, Pantone thought it was the appropriate time to turn to nature and its beautiful colors. Not surprisingly, colors in nature have been the choice for the past few years.

If you struggle with the actual color, here is a bag that has both the pink color at the bottom and coral at the top.

For my brothers who wonder about some colors, the coral is at the top. (Photo by Charlotte Ekker Wiggins)

For my brothers who wonder about some colors, the coral is at the top. (Photo by Charlotte Ekker Wiggins)

"Color is an equalizing lens through which we experience our natural and digital realities, and this is particularly true for Living Coral," Leatrice Eiseman, Executive Director of the Pantone Color Institute, said in a statement. "With consumers craving human interaction and social connection, the humanizing and heartening qualities displayed by the convivial Pantone Living Coral hit a responsive chord."

According to Pantone, the engaging nature of living coral "welcomes" and "encourages" lighthearted activities, and its authenticity enables connection and intimacy.

"In its glorious, yet unfortunately more elusive, display beneath the sea, this vivifying and effervescent color mesmerizes the eye and mind," Pantone said in the news release. "Lying at the center of our naturally vivid and chromatic ecosystem, Pantone Living Coral is evocative of how coral reefs provide shelter to a diverse kaleidoscope of color."

Sherwin Williams 2019 Color: Cavern Clay

This paint company’s take on the coral trend for walls. (Photo by Charlotte Ekker Wiggins)

This paint company’s take on the coral trend for walls. (Photo by Charlotte Ekker Wiggins)

Now a couple of decades ago when I was re-modeling my house, I asked the designer helping me with wall colors to pick a warm, inviting, a bit of a “hug” color for my bedroom. The color she picked was terracotta, which is a lighter version of the Sherwin Williams 2019 color.

Cavern Clay SW 7701A “is a nod to midcentury modern style, but with the soul of the American Southwest, which together creates a desert modern aesthetic.

“This warm, earthy hue is both casual and refined. It can be the backdrop of a playful, welcoming dining room or kitchen when paired with bright tiles, warm stone and sculptural greenery. Complementary materials include leather, simple woodgrains and indigenous cacti in contemporary, sleek gardening planters.

Cavern Clay is an easy way to bring the warmth of the outdoors in. Envision beaches, canyons and deserts, and sun-washed late summer afternoons—all of this embodied in one color.” It’s not a coral color but it sure is close.

We have one handmade quilt that has a coral tone to it, Embroidered Sunbonnet Baskets. If you like to stay on trend with color, this is a quick surefire way to update your bedroom in style!

Charlotte

Personalized Beekeeper Nutcracker

The finished beekeeper nutcracker with bee hives in the background. (Photo by Charlotte Ekker Wiggins)

The finished beekeeper nutcracker with bee hives in the background. (Photo by Charlotte Ekker Wiggins)

Personalized Beekeeper Nutcracker

The soldier nutcracker is one of my favorite Christmas ornaments among the holiday traditions. I attend at least one “Nutcracker” ballet during the Christmas season and watch it on television whenever it is broadcast. Last year, I decided my bee buddy and gardening friend both deserved to get beekeeping nutcrackers but I couldn’t find any. I did find some soldier nutcrackers so I decided to make them into beekeepers.

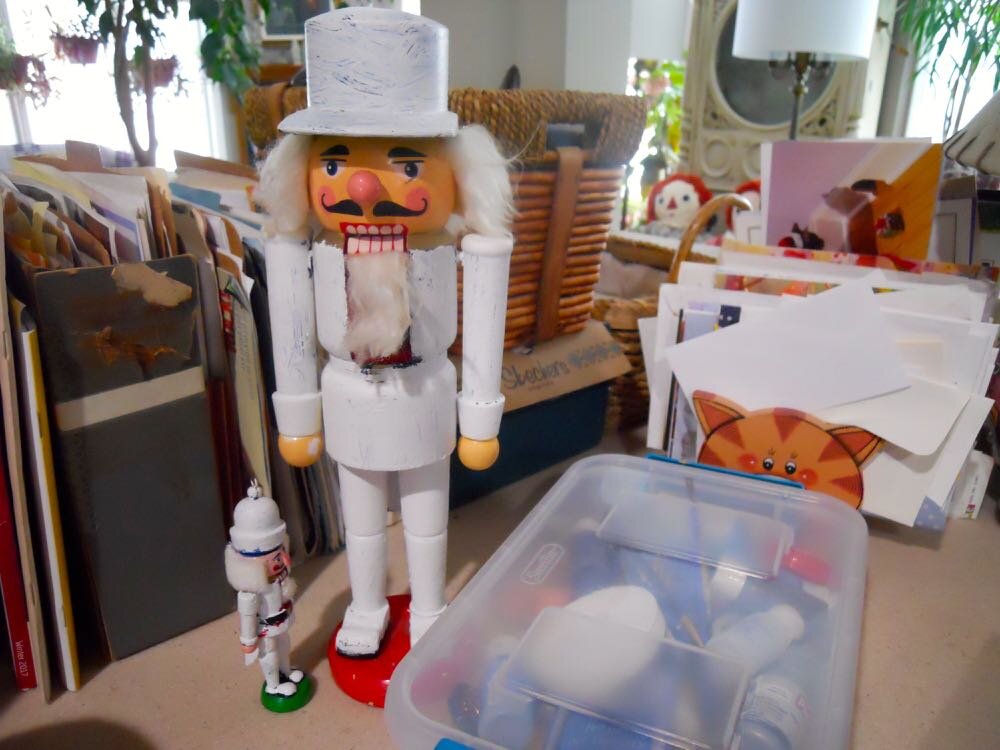
Taking the traditional soldier nutcrackers, I painted them all white so I could add beekeeper details. Since we all wear a white beekeeping jacket over jeans, it was easy to outline what parts of the wooden beekeepers needed further painting.

Nutcrackers painted all white so I can start over with their details. (Photo by Charlotte Ekker Wiggins)

Nutcrackers painted all white so I can start over with their details. (Photo by Charlotte Ekker Wiggins)

Both nutcrackers needed a detail on top to flush out their hat into a beekeeper’s veil.I measured the top hat and cut out two pieces of white cardboard to simulate a beekeeper’s veil. Black tulle fabric simulated the black mesh that protects beekeepers in their protective suits. The tulle was hot glued between the two round top cardboard pieces.

I then used black thread to gather the tulle at the bottom to cover the head.

The veil is glued between two white cardboard piecers surrounding the top. (Photo by Charlotte Ekker Wiggins)

The veil is glued between two white cardboard piecers surrounding the top. (Photo by Charlotte Ekker Wiggins)

The bottom was even more fun to customize with blue paint for jeans. Tiny cotton sock pieces simulated pulling socks over jeans to prevent bees from climbing up pants legs.

We had all met for a lunch during the lunar eclipse earlier that year so finding a wooden cat ornament that looked like one of his cats holding stars and half moons was very appropriate to add to the tableau. A tiny smoker off a keychain was perfect size so I added that to the base at the feet after painting it all green.

Little glue on bees were scattered all over.

A keychain smoker, a wooden cat ornament and socks over jeans finish the bottom. (Photo by Charlotte Ekker Wiggins)

A keychain smoker, a wooden cat ornament and socks over jeans finish the bottom. (Photo by Charlotte Ekker Wiggins)

I couldn’t resist adding some flowers so I found this old group of silk flowers that fit perfectly at a corner. I filled the back with dry hydrangeas spray painted green.

Silk flowers hot glued to the back with sprayed green dried hydrangeas. (Photo by Charlotte Ekker Wiggins)

Silk flowers hot glued to the back with sprayed green dried hydrangeas. (Photo by Charlotte Ekker Wiggins)

My bee buddy now uses a photo of the beekeeper nutcracker as his profile photo. I told him that was appropriate only now he’s going to have to grow a handlebar mustache if he wants to look just like the beekeeper nutcracker!

Charlotte

Covering Paint Stains

Simple daisy flower embroidery can cover paint stains on fleece. (Photo by Charlotte Ekker Wiggins)

Simple daisy flower embroidery can cover paint stains on fleece. (Photo by Charlotte Ekker Wiggins)

Covering Paint Stains

When I learned to embroider at age 8, it did not cross my mind that I would be using that skill decades later to save a favorite fleece jacket from a close encounter with paint. Whether it is paint, a food stain or any other mark you didn’t mean to have on fabric, the simple daisy embroidery design can easily cover the mark so you can continue to use the item.

Actually it doesn’t have to be just the daisy design. You can use butterflies, bees or other garden-inspired embroidery represented in this Buzzing Garden Baby Crib Quilt as your inspiration. The daisy design has become my go to design because it’s easy to do and can nicely cover a variety of stains.

In this example, I ended up with yellow paint on a sleeve of this favorite beige fleece gardening jacket. Since I like to wear it also shopping and not only in my garden, I set it aside for a little rehab work.

Start by choosing embroidery floss that most closely matches the color of the basic item. Matching colors will help the spot blend in.

I could have also selected an embroidery floss that matches the yellow paint. That color selection would have made the spot more prominent.

Match the embroidery floss color to the fabric. (Photo by Charlotte Ekker Wiggins)

Match the embroidery floss color to the fabric. (Photo by Charlotte Ekker Wiggins)

Once I had the matching embroidery floss, I just started the embroidery process, covering the yellow paint with the daisy flowers sewn very close together.

As you embroider, see how the matching floss color covers the paint. (Photo by Charlotte Ekker Wiggins)

As you embroider, see how the matching floss color covers the paint. (Photo by Charlotte Ekker Wiggins)

As I covered the paint, a design shaped itself over the paint.

To make the embroidery look more deliberate, I also embroidered several other patches on the jacket so that it appears to be part of the jacket look.

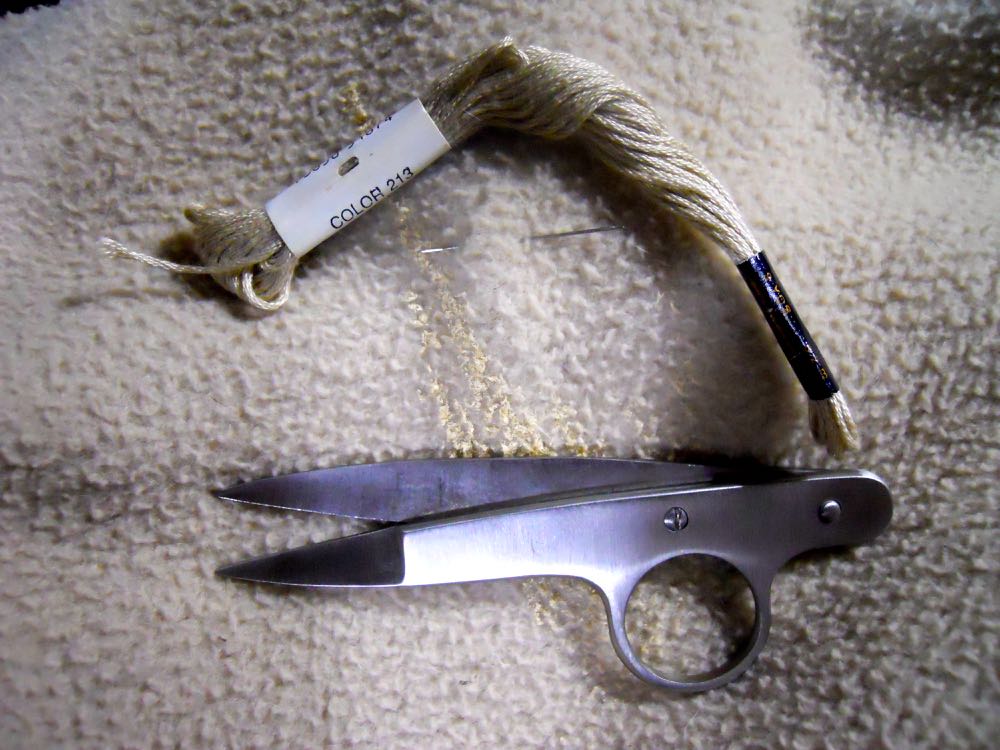
In addition, I used thread snips to carefully and gently cut off some of the remaining paint since paint solvent would not remove it.

The grouping of daisy embroidery now covers most of the pain. (Photo by Charlotte Ekker Wiggins)

The grouping of daisy embroidery now covers most of the pain. (Photo by Charlotte Ekker Wiggins)

I took the embellished jacket out for a spin earlier this week. It was nice to have it back and to be able to continue to use it!

Charlotte

How to Personalize a Baby Quilt for a Gift

A ladybug toy was added to this ninepatch ladybug baby quilt. (Photo by Charlotte Ekker Wiggins)

A ladybug toy was added to this ninepatch ladybug baby quilt. (Photo by Charlotte Ekker Wiggins)

How to Personalize a Baby Quilt for a Gift

Periodically we get a thank you card or email about a custom baby quilt gift set that raves not about the baby quilt but the toy that is part of the gift set.

I have to confess, we do put some thought into our toy pairings with the crib and baby quilts. They have to be appropriate for the age as well as safe. In addition, we want the toy to reflect and compliment the baby crib quilts.

For our Ladybugs Ninepatch baby crib quilt, that was an easy match. Ladybugs have become a more popular retail item in the last few years so it was easy to locate something small that would be appropriate for the theme.

This next baby crib quilt, however, was a different story. Camouflage is also a popular look but try to find something in hot pink!

This hot pink monkey was not easy to find! (Photo by Charlotte Ekker Wiggins)

This hot pink monkey was not easy to find! (Photo by Charlotte Ekker Wiggins)

We waited to post this Pink Camo baby crib quilt until I could find exactly the right gift. Almost a year after we had the baby crib quilt in hand, I found this charming hot pink monkey.

You can find stuffed toys at most big box stores. Also shop smaller boutique stores for the specialized toys. If you shop online, you can also find a wider variety of choices but for a baby gift, I would suggest seeing the toy personally to make sure it is appropriate for the age.

Charlotte

Reclaimed Wood Duck Book Ends

A pair of wood duck book ends for $1 for the pair. (Photo by Charlotte Ekker Wiggins)

A pair of wood duck book ends for $1 for the pair. (Photo by Charlotte Ekker Wiggins)

Reclaimed Wood Duck Book Ends

Here’s one of reasons why we offer Howard RestoraFinish and Feed N Wax in furniture refinishing kits. These two products can easily give most woods a quick pick me up without you having to completely restore them. I consider these products must haves in my small arsenal of home improvement products and here’s why.

These four wood duck book ends were found at our local Goodwill store for $1 a pair. Both sets had the same duck missing the same eye but otherwise well-loved with wear spots and scratches.

Wood filler starts giving the wood duck a new eye. (Photo by Charlotte Ekker Wiggins)

Wood filler starts giving the wood duck a new eye. (Photo by Charlotte Ekker Wiggins)

A little wood filler gave the ducks a new eye. Once dry, I painted the eye yellow, added a black center and finished with a coat of clear top nail polish.

As I was adding back an eye, I dusted the book ends before using a paper towel to cover them with Howard RestoraFinish in walnut.

Wood duck book ends with one layer of walnut Howard RestoraFinish. (Photo by Charlotte Ekker Wiggins)

Wood duck book ends with one layer of walnut Howard RestoraFinish. (Photo by Charlotte Ekker Wiggins)

I let them dry for a couple of hours while I finished another project. The wood was dehydrated so it dried quickly.

Once dry, I treated the wood with a layer of Howard Feed N Wax and allowed the pieces to sit for about half an hour.

Once buffed with an old cotton sock. the ducks were ready for a swim in my library.

Refinished wood book ends ready for use. (Photo by Charlotte Ekker Wiggins)

Refinished wood book ends ready for use. (Photo by Charlotte Ekker Wiggins)

Every time I use these products I am delightfully surprised at the results!

Charlotte

Reclaiming Scratched Cedar Box

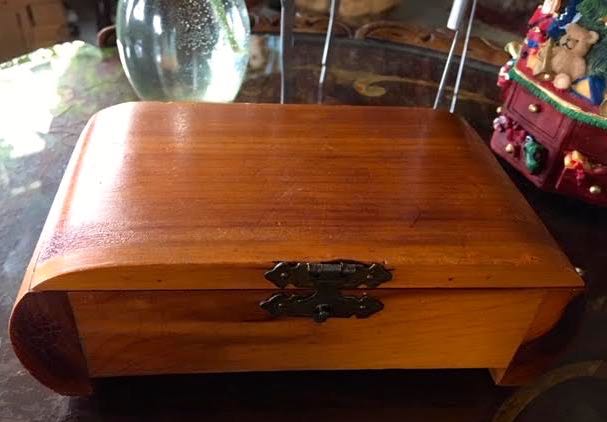
The finished scratched up cedar box ready for its debut. (Photo by Charlotte Ekker Wiggins)

The finished scratched up cedar box ready for its debut. (Photo by Charlotte Ekker Wiggins)

Reclaiming Scratched Cedar Box

With my love of boxes maybe I was indeed a cat in a previous life. I ponder that thought sometimes because I find iI find it hard to pass them up, especially unusual ones like this scratched up 6x3x2-inch curved cedar box. No markings on it, nothing terribly special about it except for the interesting little shape.

I can always use a small box to hold my sewing snips, or my earrings when I take them off sitting on a sofa and I don’t want to lose them. Or maybe I have a spot for a new box in a space in a bookcase…

Oh, you don’t see any scratches?

Let’s try this again.

Here’s the box soon after I paid $1 at a local thrift store and unpacked it at home.

The top of the cedar box was covered in scratches. (Photo by Charlotte Ekker Wiggins)

The top of the cedar box was covered in scratches. (Photo by Charlotte Ekker Wiggins)

The top was covered in a variety of scratches. None on the top were deep gauges but the scratches seemed bad enough that I considered sanding it down first.

Definitely the gouge on the side was deep enough to suggest this might need first a good sanding but I decided to skip that step and see how it turned out.

Half in gouge on the side of the scratched cedar box. (Photo by Charlotte Ekker Wiggins)

Half in gouge on the side of the scratched cedar box. (Photo by Charlotte Ekker Wiggins)

So I took the easy road and pulled out my Howard RestoraFinish in cherry and a bottle of Howard Feed N Wax, the two products we have packaged in our Howard RestoraFinish Furniture Refinishing Kit.

To show you how simple this was to do, I dusted the scratched box just to remove any residue.

Using a paper towel with Howard RestoraFinish in cherry, I covered the outside of the box and left it on paper to dry.

One coat of Howard RestoraFinish in cherry. (Photo by Charlotte Ekker Wiggins)

One coat of Howard RestoraFinish in cherry. (Photo by Charlotte Ekker Wiggins)

What about that deep gouge on the scratched cedar box side towards the front?

Not a problem, that first layer of Howard RestoraFinish in cherry nicely covered it.

Scratched cedar box gouge covered.jpg

After waiting an hour, I gave the scratched cedar box my favorite Howard furniture refinishing product, Howard Feed N Wax.

No need to use gloves here, the product not only rehydrates the wood but gives my hands a little beeswax and carnauba oil conditioning treatment.

Scratched cedar box with a layer of Howerd Feed N Wax. (Photo by Charlotte Ekker Wiggins)

Scratched cedar box with a layer of Howerd Feed N Wax. (Photo by Charlotte Ekker Wiggins)

Another half hour wait and it was time to shine it up with an old cotton sock. The half hour wait allows Howard Feed N Wax to penetrate the wood and rehydrate wood cells, which brings out the beauty of the wood.

I wouldn’t recommend polishing with a paper towel, the old sock is gentler and nicely brings out the wood luster.

Finished polishing the scratched cedar wood box. (Photo by Charlotte Ekker Wiggins)

Finished polishing the scratched cedar wood box. (Photo by Charlotte Ekker Wiggins)

That was it. Honestly, that simple. No sanding. One coat of cherry Howard RestoraFinish followed by a dab of Howard Feed N Wax, both applied with a paper towel.

The scratched cedar box now has a second life, replete with the side gouge that is barely visible.

If I had treated the scratched cedar box and decided I needed to sand it, I could have done so but delighted I didn’t have to do it.

Here it is again, finished and sitting on my den coffee table:

Finished scratched cedar box now in use. Photo by Charlotte Ekker Wiggins)

Finished scratched cedar box now in use. Photo by Charlotte Ekker Wiggins)

Now I can’t think of any other products that are this easy to use and that produce such wonderful results. Can you?

Charlotte

Handmade Thread Spool Organizer

The handmade spool organizer my brother made when he was 9 yrs old. (Photo by Charlotte Ekker Wiggins)

The handmade spool organizer my brother made when he was 9 yrs old. (Photo by Charlotte Ekker Wiggins)

Handmade Thread Spool Organizer

If you do any kind of sewing, you know how hard it is to organize, and keep organized, your spools of thread.

We grew up making a lot of things, especially for gifts, and one year my 9-year old brother made this thread spool organizer as a gift for my Mom. I still have an old hat box with some of her thread spools, forming a nice tangled mess every time I try to paw through it looking for a particular color.

My brother made the handmade thread spool organizer all by himself so you know it is relatively easy to make. And since i have it after all of these years, you also know it is practical as well as appreciated!

How to Make a Handmade Thread Spool Organizer

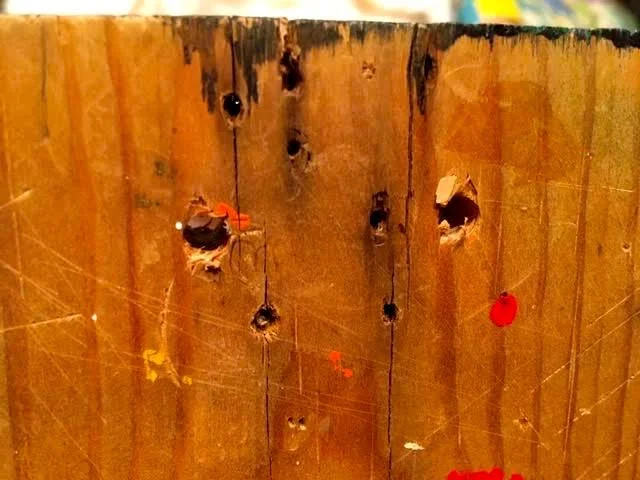
You will need a piece of wood, 1.5 inch nails, a hammer, a ruler and a pencil. This particular handmade thread spool organizer is 11x17 inches with 5 rows across and 7 rows down.

Mark the straight lines down, then across. Where the lines intersect is where you will hammer in the nails.

Not exactly straight lines but straight enough! (Photo by Charlotte Ekker Wiggins)

Not exactly straight lines but straight enough! (Photo by Charlotte Ekker Wiggins)

My brother doesn’t remember if he painted this or just recycled a piece of wood. My guess is it was recycled.

Spools of thread waiting fo their turn on the organizer. (Photo by Charlotte Ekker Wiggins)

Spools of thread waiting fo their turn on the organizer. (Photo by Charlotte Ekker Wiggins)

The back has a picture hangar so that the handmade thread spool organizer can be hung in a sewing corner.

Oops, the picture hangar must have fallen off the back. (Photo by Charlotte Ekker Wiggins)

Oops, the picture hangar must have fallen off the back. (Photo by Charlotte Ekker Wiggins)

Looks like there were several hanging options. I need to add a picture hangar to the back side, now I remember why this is leaning against the wall and still doing its work.

thread organizer on table.jpg

My mother repurpsed an old spice rack, left, for her sewing items: sewing machine needles, pins, pieces of ribbon. These two work well as my little sewing support station. You can find the spice racks at local thrift stores and vintage shops.

To make this into a personalized gift set, pair this handmade thread spool organizer with some fabrics or, better yet, a vintage sewing spools quilt!

Vintage sewing spools quilt would be a nice addition. (Photo by Charlotte Ekker Wiggins)

Vintage sewing spools quilt would be a nice addition. (Photo by Charlotte Ekker Wiggins)

If you make one, would you please share a photo?

Happy sewing!

Charlotte

Need to Personalize?

One way to personalize is by adding a custom embroidered label. (Photo by Charlotte Ekker Wiggins)

One way to personalize is by adding a custom embroidered label. (Photo by Charlotte Ekker Wiggins)

Need to Personalize?

Periodically a potential customer asks for help to personalize an item without us having the item in hand.

Sound impossible? Not really.

Our suggestion is to custom embroider the name and special date on a matching and complimentary fabric so that a label shape can be ironed before it is hand sewn onto the fabric item.

If they don’t have time to get it machine embroidered, they can hand embroider on the fabric. If they can’t hand embroider, indelible pens come in handy to write out names and special dates.

We have made the custom personalized embroidered labels to be added to clothing, quilts, handbags, fabric totes - even hats although sewing through the hat canvas was challenging without heavy duty sewing needles.

Sometimes the customer doesn’t want the custom personalized embroidery on the front of a handmade quilt, like this burgundy double wedding ring quilt so we added it to the back of a quilt corner so the name and date is on the quilt commemorating that very special day.

How have you added custom personalized embroidery to your handmade gifts?

Charlotte