How to Make Dried Wreaths

Add dried leaves to a wreath shape to quickly fill it out. (Photo by Charlotte Ekker Wiggins)

Add dried leaves to a wreath shape to quickly fill it out. (Photo by Charlotte Ekker Wiggins)

How to Make Dried Wreaths

Sometimes the prices of dried wreaths stun me but then I have been making my own for years. Whether you are making them for yourself or as a housewarming and wedding gift, or just for yourself as home decor, dried wreaths are easy to make and can be easily be updated every year.

The most challenging part is finding the dried grasses, leaves, flowers and seeds that make each wreath interesting. Great excuse to take walks in your neighborhood, and through your garden, and look at your plants with a new eye.

For example, Autumn Sedum “Joy” has interesting flowers that, once dry, make great additions to dried wreaths. When they are snow-covered, I think of them as “snow flowers.”

Autumn “Joy” Sedum dried flowers covered in snow. (Photo by Charlotte Ekker Wiggins)

Autumn “Joy” Sedum dried flowers covered in snow. (Photo by Charlotte Ekker Wiggins)

Another popular seed pod for dried wreaths are water lotus pods. Water lotus are native to Missouri.

Water lotus seed pods make elegant additions to dried wreaths. (Photo by Charlotte Ekker Wiggins)

Water lotus seed pods make elegant additions to dried wreaths. (Photo by Charlotte Ekker Wiggins)

Water lotus pods add an interesting dimension, too. They are expensive to buy at craft stores but grow free in your pond if you have the flowers.

Wild grapevine wreaths are available for sale at craft stores or may be growing in your own backyard. (Photo by Charlotte Ekker Wiggins)

Wild grapevine wreaths are available for sale at craft stores or may be growing in your own backyard. (Photo by Charlotte Ekker Wiggins)

Select a Good Wreath Foundation

You can make your own base wreath or buy one, whichever is easier. Honeysuckle makes a good basic wreath as does kudzu and English ivy. And who doesn’t need another reason to pull those two invasive plants out of the garden?!

If you check thrift stores and yard sales, you can also find a wide range of basic wreaths that you can use, from plain wire frames to wild grapevine wreaths, which I use because I have wild grape vines growing in my limestone hillside garden.

I wait until fall and the leaves are off to collect the vines and wind them into the wreath shapes. Sometimes I leave the dried leaves on for interest but then don’t last long.

Make sure you have a solid way to hang the wreath either by adding a wire at the top or using something similar to hold the vine bundle together so you can easily hang it.

Add Favorite Dried Items

You want to have some basic materials to start adding to your wreath. In one of my grape vine wreaths, a family member sent me a ladybug welcome sign that I added in the center. You can find signs at most craft stores. Farmer’s markets also have artists with signs who can also make custom signs for you. Visit Etsy.com and Pinterest.com for inspiration if you want to make your own.

Acorns still on their oak tree branches make interesting wreath additions. (Photo by Charlotte Ekker Wiggins)

Acorns still on their oak tree branches make interesting wreath additions. (Photo by Charlotte Ekker Wiggins)

You can find a variety of items in your own backyard, starting with dry leaves and seeds, such as acorns.

Local wildflowers are a wonderful source of inspiration and wreath material. Wild yellow indigo flowers along one of my walking paths leave a lovely grey foliage that became the basis for this first dried wreath. The red sumac flowers and yellowish panicle hydrangeas add some color and interest with different shapes. The pop of green is from holly bush pruning. The misty purple moving up the wreath center is from Russian sage trimmings.

I don’t add all of these items at once, I embellish through the season when I find something that will add a pop of color and interest.

This large wild grape vine wreath hangs from a dowel in the mortar. (Photo by Charlotte Ekker Wiggins)

This large wild grape vine wreath hangs from a dowel in the mortar. (Photo by Charlotte Ekker Wiggins)

You can also add other items to these wreaths. The wild grape vine wreath at the front of my house has a little bluebird birdhouse I picked up for $1 because it was missing a beak and part of a painted eye.

With a little patience, I repainted the eye and added a new orange beak. If I can find my fishing line that would work better to hang the birdhouse from the top of the wreath than the grey string I am currently using.

Periodically I do find birds checking out the birdhouse and that’s fine by me. If it gets used, I will clean it out at the end of the season and hang it back up.

Other wreath additives could be pine cones and dried fruits. One year I added dried orange peels. Another year I had some interesting grasses that were soon consumed by local deer.

This wild grape vine wreath welcomes visitors to my house. (Photo by Charlotte Ekker Wiggins)

This wild grape vine wreath welcomes visitors to my house. (Photo by Charlotte Ekker Wiggins)

The bluebird dried wreath also has some trimmed Russian sage for a pop of green. This is the first year I added the Russian sage, will be interesting to see how long that stays green and how long it lasts. I suspect my local deer herd will yank it out as they taste test the greens.

If you don’t have wildlife nibbling on your wreaths, you can spray them with a clear spray to preserve them once a year. I don’t because of the wildlife visitors but I find the wreaths last a good long while without the extra preservation. They are located under eaves and out of the elements.

No time to gather dried flowers?

Dried leaves tucked into this wreath is as simple as it gets. (Photo by Charlotte Ekker Wiggins)

Dried leaves tucked into this wreath is as simple as it gets. (Photo by Charlotte Ekker Wiggins)

Here’s very simple inspiration to make a quick dried door wreath. Find a basic wreath shape and color you like, then add a couple of dried items.

For this door wreath I found the basic berry wreath at a local thrift store for $1. I dded the grey wild indigo leaves and a few clusters of dried oak leaves from my garden. The contrasting colors were enough to make the original red and orange berry base wreath look finished.

Weeks later, I found the little woven bee skep at a thrift store for a quarter and made the center sign out of a painted paint stirrer that comes with paint cans. The sign took the most time; everything else was a matter of minutes.

Nature sometimes lends a hand, too! (Photo by Charlotte Ekker Wiggins)

Nature sometimes lends a hand, too! (Photo by Charlotte Ekker Wiggins)

Dried wreaths warm up doors and entryways, last nicely through cold winters and can easily be updated every year. They also make nice housewarming and wedding gifts. Half the fun is looking for new things to add to them!

Charlotte


Enjoy Last Flowers

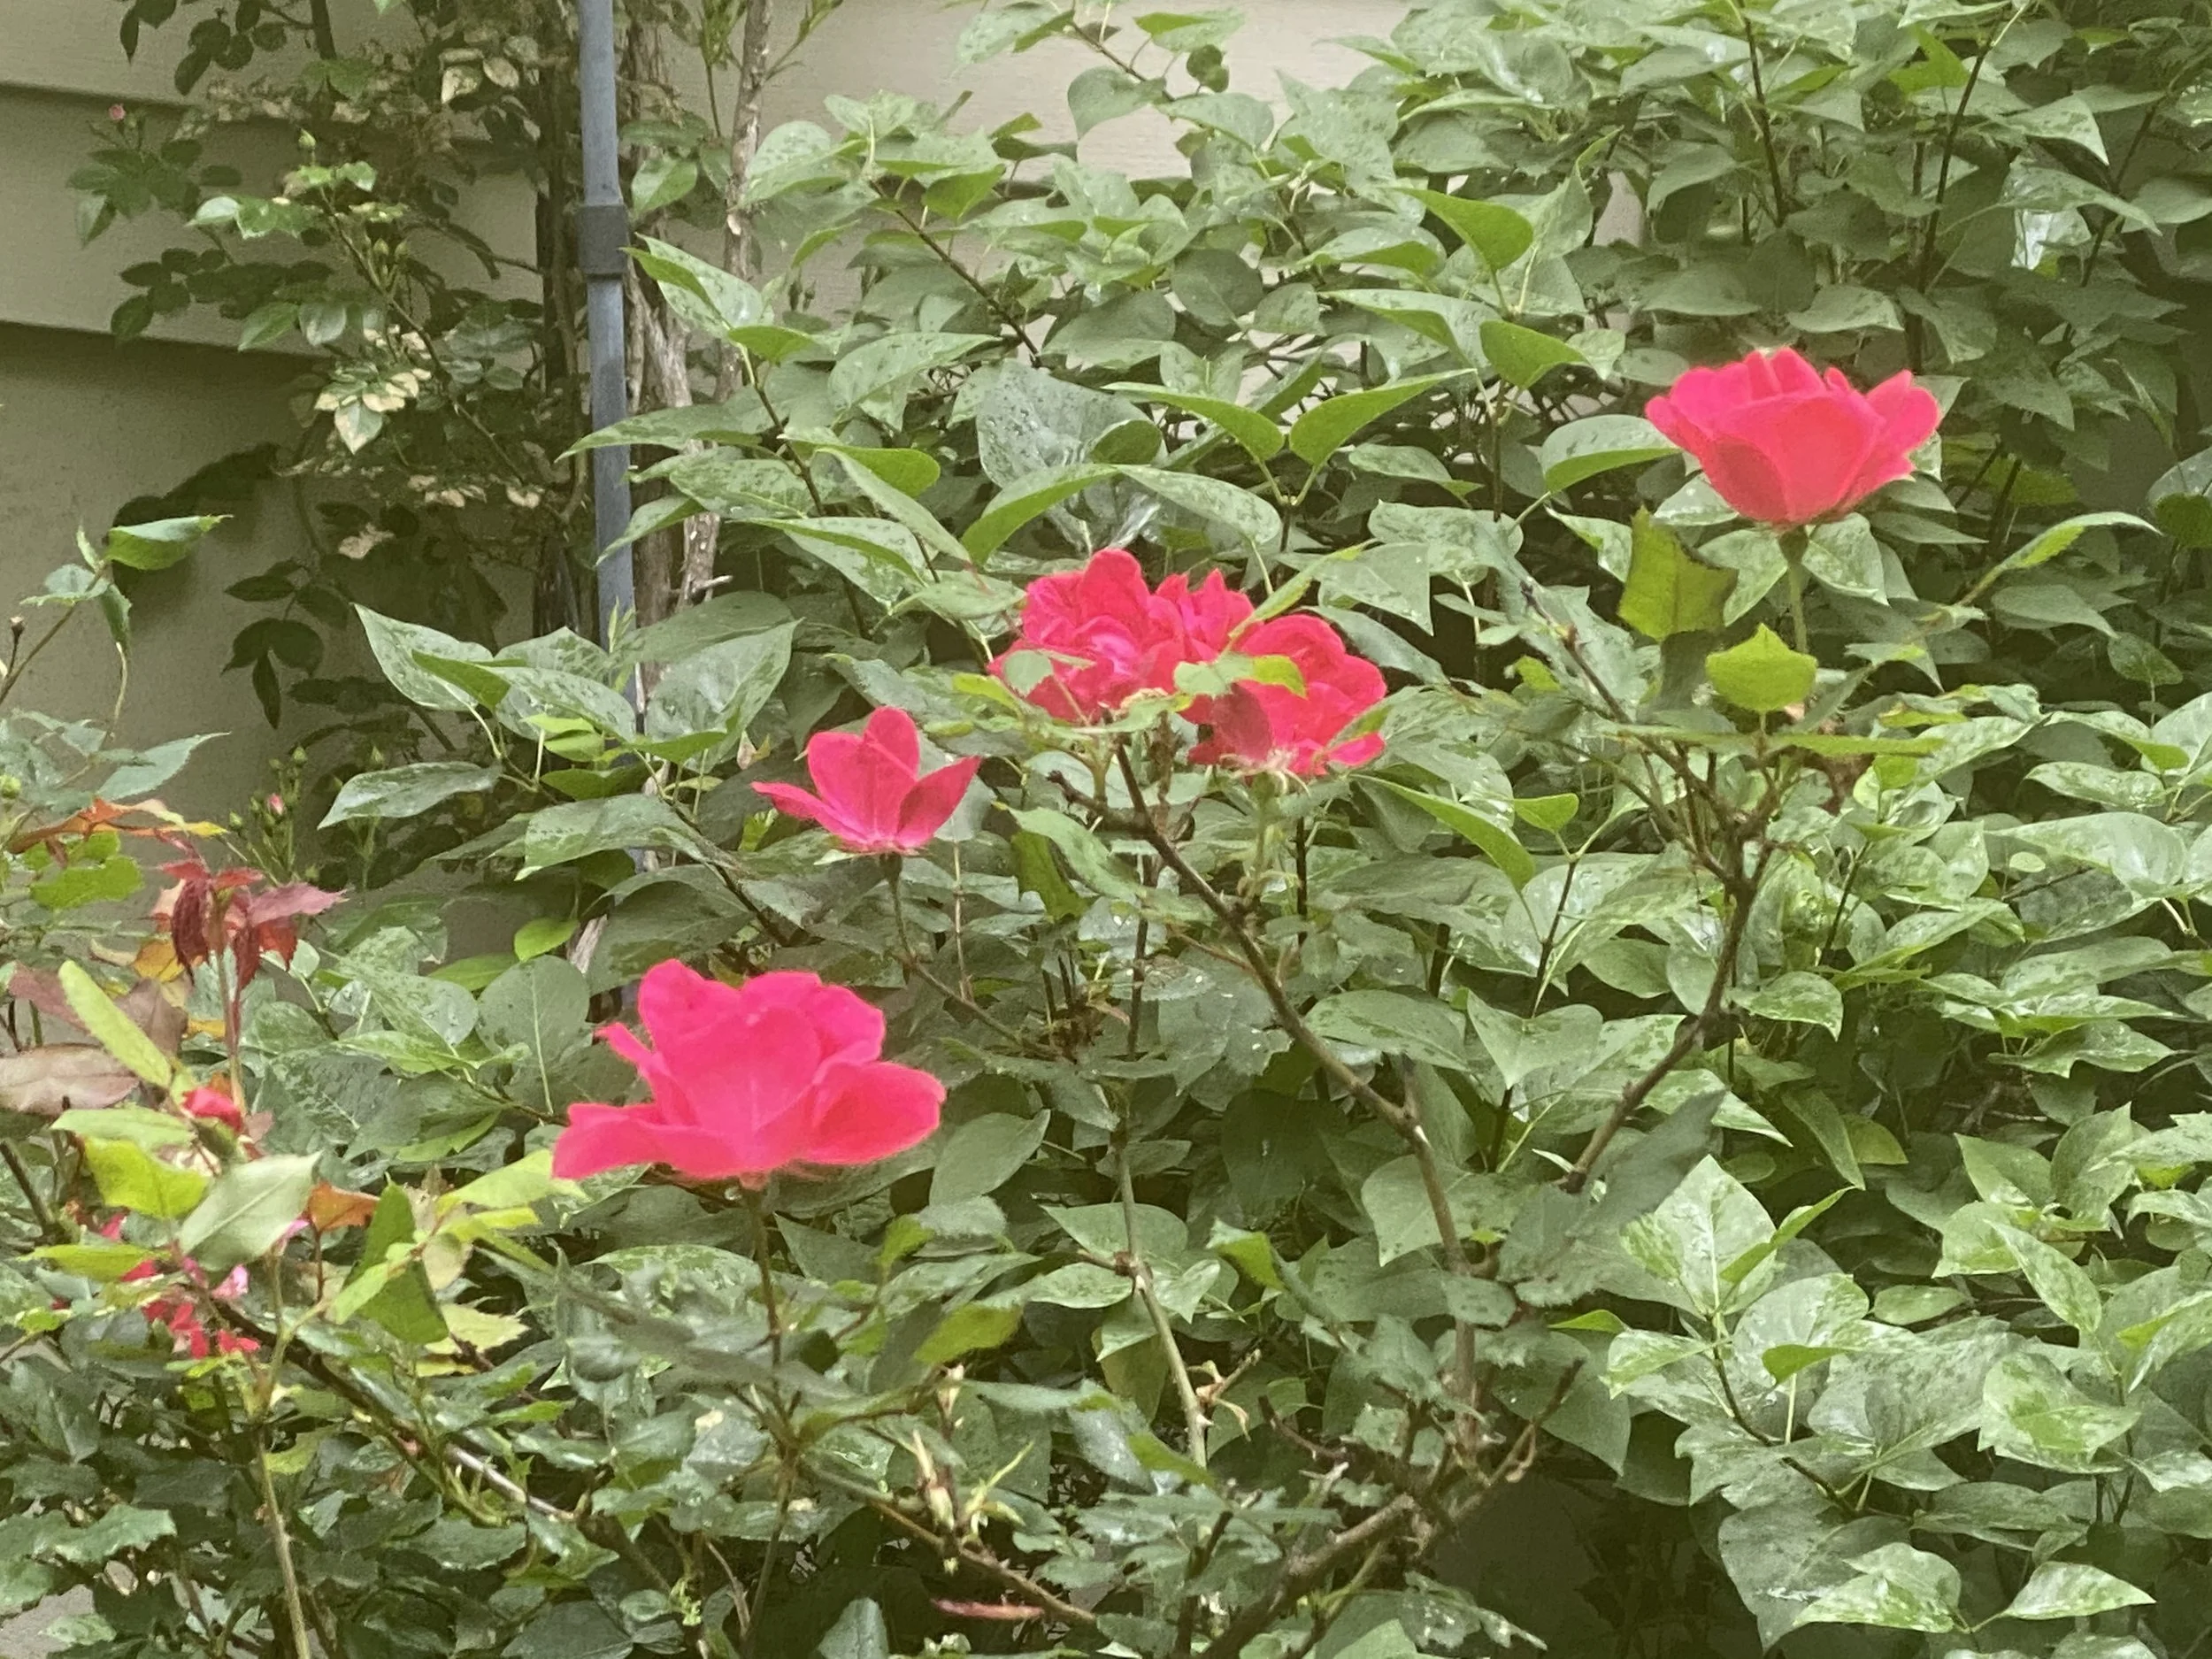
Pink Knock Out roses keeping my little coffee table office company. (Photo by Charlotte Ekker Wiggins)

Pink Knock Out roses keeping my little coffee table office company. (Photo by Charlotte Ekker Wiggins)

Enjoy Last Flowers

Have only one or two flowers still blooming in your garden? Take your cue from the Japanese and celebrate the beauty of those flowers by bringing them inside, especially if it is just one flower. One flower can look very striking in a flower vase where everyone can enjoy it. If they are small flowers, put them in a tiny vase that compliments their size.

I did not plan to bring these two pink Knock Out roses inside. They were inadvertently brushed off their mother plant, still in bud form, and I didn’t have the heart to toss them. At this time of the year I have only a few plants still flowering, giving these roses a special place amongst my wildflowers.

Brushing off a tiny, 1.5 inch water-full vase, I now have them on my den table keeping my ceramic pencil holder and ladybug candle holder company. They have opened slowly, giving me time to appreciate the simplicity and beauty of this modern rose.

The pink buds have bloomed, giving the little flower vase a burst of color. (Photo by Charlotte Ekker Wiggins)

The pink buds have bloomed, giving the little flower vase a burst of color. (Photo by Charlotte Ekker Wiggins)

When everything is in bloom, it’s easy to overlook the details of one flower. The end of the growing season is a good time to appreciate what we have and to look forward to the beauty of next year.

Charlotte

Wire Plant Stand Tables

Here’s an easy way to re-purpose wire plant stands into garden and deck side tables.

Here’s an easy way to re-purpose wire plant stands into garden and deck side tables.

Re-Purposing Wire Plant Stands Into Tables

Earlier this year, I featured several of my favorite home decor areas I called reading nooks. These areas are designed to invite people to sit down and talk, read, nap - basically slow down and enjoy the moment. One of the handy items to have for these outside nooksare usually available this time of year at our local garage sales and thrift shops. That’s where I found the ones I now use as handy side tables on my deck, and also in the hallway into my house from my garage.

Although practical for plants since the wide rungs allow water to run through, wire plant stand surfaces are not practical to hold other items without knocking them over or loosing them through the wide rungs. With a very simple addition, you can turn these sturdy wire plant stands into practical tables for use all year around.

One of the pre-used wire plant stands I re-purposed into an outside side table with plexiglass.

One of the pre-used wire plant stands I re-purposed into an outside side table with plexiglass.

This is an example of a typical wire plant stand. Some are more like small book cases, others have these three-tiered levels. You can use as is with a little patina on the paint or re-paint them with a good metal paint. I use mine after a good cleaning as I found them.

The simple trick is to have a glass store cut 1/4 inch plexiglass pieces to fit the different rungs. I took the wire plant stand in and left it with them so they could cut the custom pieces to fit. In this example, the plexiglass pieces cost around $20.

You can also get 1/4 inch glass with rounded edges cut to fit the shelves. I chose the plexiglass because this will stay outside and possibly get blown over by wind and I didn’t want to risk the glass breaking.

Glass is better if you expect a lot of use and will cost more. It will also add more weight to the wire plant stand. Plexiglass is lighter and easily scratches so choose whichever better fits your lifestyle.

Here is the wire plant stand with the top shelf covered in plexiglass. To install, I just removed the protective paper and popped the plexiglass piece right into the shelf.

Custom cut plexiglass will cover each of the wire plant stand rungs to make them solid.

Custom cut plexiglass will cover each of the wire plant stand rungs to make them solid.

Our local glass store did a nice job of cutting corners into the pieces so they easily fit.

Our local glass store did a nice job of cutting corners into the pieces so they easily fit.

Once covered in plexiglass, the wire plant stand is ready for use as a side table to deck furniture. You can also drill holes on the corners and attach them to the plant stand with wire or fishing line.

I leave mine sitting on the shelves for easy removal.

Here’s the plexiglass-covered wire plant stand as a side table with 3 different levels.

Here’s the plexiglass-covered wire plant stand as a side table with 3 different levels.

I also use the same plexiglass-covered shelving in the hallway into my house from the garage. The square wire plant stand holds my first aid basket and other handy items in a collection of baskets that sit on the plexiglass.

Similar baskets on the plexiglass-covered wire plant stand work well for handy storage.

Similar baskets on the plexiglass-covered wire plant stand work well for handy storage.

The plexiglass covered tiered-wire plant stand is now sitting next to my deck sofa. The size is perfect for the close space and now easily holds my tea tray.

Wire plant stand tables are a good size to fit into narrow spaces next to deck sofas.

Wire plant stand tables are a good size to fit into narrow spaces next to deck sofas.

The tea tray also has a piece of plexiglass to cover the bottom of the wood tray to protect it from glass and cup rings. A dab of clear glue can hold it down if you want something more permanent. I have it sitting on the tray for easy later removal and cleaning.

Plexi on tray.jpg

To make the wire plant stand table more versatile, I found a basket for the second rung that now holds some reading options.

Add baskets to the wire plant stand shelves for easy handy storage.

Add baskets to the wire plant stand shelves for easy handy storage.

I am still working on what to put on the bottom rung and hoping for a good rainy day so I can sit on the deck with a cup of hot tea wrapped up in the Cat Mischief lap quilt throw reading a good nearby book. It’s a good place to watch the garden grow, too.

My front porch reading nook now with the wire plant stand side table.

My front porch reading nook now with the wire plant stand side table.

I found new baskets for the wire plant stand table, this one expands the space as a little side desk.

My new find, a sectioned basket that can work as a small desk next to my porch swing.

My new find, a sectioned basket that can work as a small desk next to my porch swing.

On second thought, maybe I can sit down now without it raining first!

Charlotte

Homemade Laundry Detergent

Basic ingredients, and utensils, to make homemade laundry detergent.

Basic ingredients, and utensils, to make homemade laundry detergent.

Homemade Laundry Detergent Recipe

Maybe you don’t like all of those scents added to commercial laundry detergents or someone in your family has an allergic reaction. Or maybe you have a well-loved quilt you want to wash and don’t want to use more harsh chemicals on the older fabric. Whatever the reason, it’s very easy to make your own homemade laundry detergent without all of those additives. You will save money along the way, too!

The basic laundry detergent recipe is as follows:

1 bar mild soap such as Ivory or Fels-Naptha

1 cup Arm and Hammer laundry booster

1 cup 20 Mule Team Borax

1 cup OxiClean (Optional)

I have used this recipe both with and without OxiClean. Since I was trying to determine what was causing an allergic reaction, I removed the OxiClean. It worked quite well without it.

The most time-consuming part is grating the bar of soap. I ended up using a cheese grater, then crumbling the smaller soap pieces with a roller.

Use a cheese grater to make soap pieces to add to the laundry soap mix.

Use a cheese grater to make soap pieces to add to the laundry soap mix.

You can use any soap of preference. Since I was trying to eliminate possible sources of skin rashes, I use the mildest available soaps: Fels-Naptha and plain Ivory.

No time to roll the soap? Not a problem, this is how it looks when you are mixing it all together. This has both the larger soap pieces as well as the smaller crumbled ones. I include both because I was playing with the different sides of the grater.

This is how the finished mix should look with little yellow dots of soap mixed in.

This is how the finished mix should look with little yellow dots of soap mixed in.

Once done, store in a container. I repurpose old peanut containers because they have handles on the back side, making them easy to lift.

To use, it takes 1-2 scoops per full load. I use 1 scoop on my household and day clothes, 2 scoops on the gardening items where the washer water turns brown.

Store finished mix and make sure to mark it. I recycle these peanut containers for my detergent.

Store finished mix and make sure to mark it. I recycle these peanut containers for my detergent.

Earlier this year, I made a batch for a friend looking for a laundry detergent without all of the added perfumes. I picked up containers similar to these at a local big box store and added a label with her name on it. She asked for the recipe so the next time I make it for someone, I will include the recipe. She was so thrilled to get this I can say this would also make a nice housewarming gift!

Charlotte
Repairing Quilt Tears

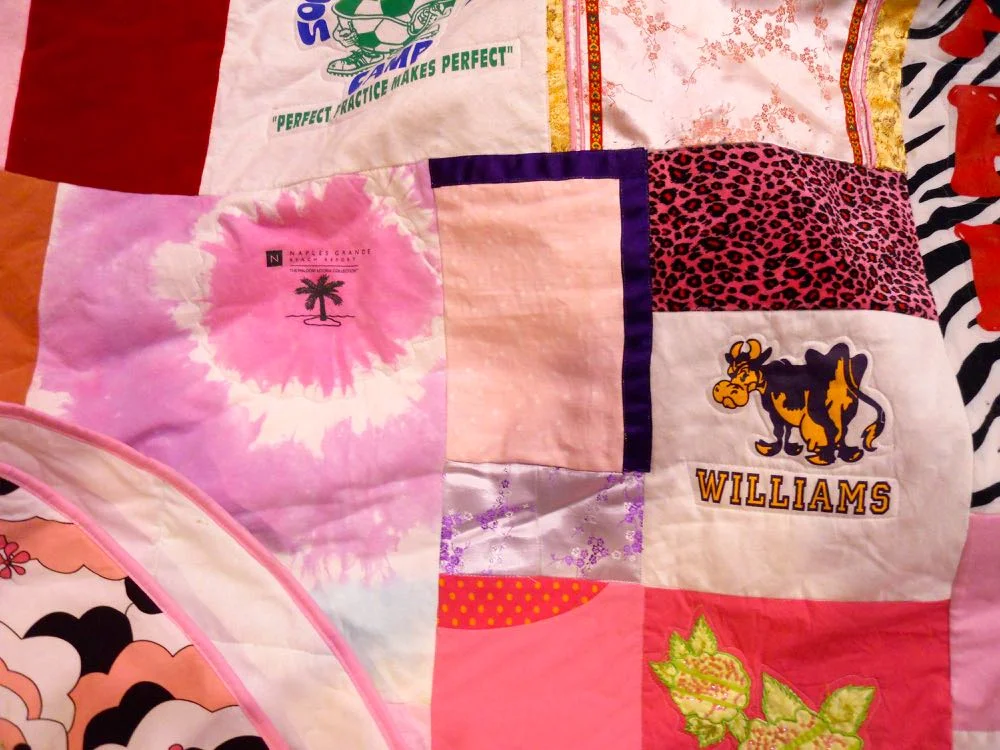
Even with stabilizing backing, stretch fabrics can develop wear spots and tears.

Even with stabilizing backing, stretch fabrics can develop wear spots and tears.

Repairing Quilt Tears

Every once in awhile, we get to see one of our custom quilts returned for repairs because they've been well-loved and used. That was the story behind this round custom quilt made out of t-shirts and other favorite clothing.

One of the shirts, a polkadot pink with white dots, tore along the longer side. Another couple of wear spots were developing on the short side of the block. The customer asked if there was some way we could replace the torn block with a new piece of clothing.

Taking a close look at the finished quilt, it was not possible to tear out the pink polkadot fabric so we did the next best thing. Selecting a piece of sturdy, all cotton gross grain cotton ribbon, I sewed the ribbon on two sides over the long tear to keep it from moving. Securing both sides will reduce either block from tearing and will hold the torn side together.

The same ribbon was sewn across the shorter side to cover the newly-developing wear spots.

Grossgrain ribbon is an excellent way to reinforce worn spots and repair tears.

Grossgrain ribbon is an excellent way to reinforce worn spots and repair tears.

Since several other quilt blocks had ribbons either in or along the side of the blocks, the purple gross grain ribbon fit right into the rest of the blocks.

If you don't want to use ribbon, you can make your own ribbon out of fabric reinforced with a stabilizer to ensure the fabric ribbon can handle the pressure.

The complimentary purple gross grain ribbon color blends right in with the rest of the blocks.

The complimentary purple gross grain ribbon color blends right in with the rest of the blocks.

It was fun to see a custom quilt back and so well-loved. As I tell customers, quilts should be used, not stored away somewhere. And if there is a tear, there's usually a way to fix it!

Charlotte

Painted Apple Gourd Birdhouses

Painted apple gourd birdhouses getting their last drying before hanging in trees. (Photo by Charlotte Ekker Wiggins)

Painted apple gourd birdhouses getting their last drying before hanging in trees. (Photo by Charlotte Ekker Wiggins)

Painted Apple Gourd Birdhouses

You are going to start seeing these gourds at local farmers markets late summer so I wanted to inspire you to think ahead. These gourds can make charming homemade gifts as hand painted birdhouses so this is how to make them into something simple: apples.

A friend gave these to me with the wren-size holes already drilled. I love wrens as well as the other birds that like the 1 1/4 inch hole entrance: tufted titmice and downy woodpeckers. If you want these birdhouses for other birds, check on what size entrance the specific bird likes. You can find a number of these guides online, here is one as an example:

Bird house hole sizes.jpg

The gourd will also need holes on the bottom to let any moisture drain. A simple drill bit 1/4 inch wide will do the trick.

Drilling holes in the bottom help the gourds stay dry. (Photo by Charlotte Ekker Wiggins)

Drilling holes in the bottom help the gourds stay dry. (Photo by Charlotte Ekker Wiggins)

Simple eye hooks securely screwed into the top will work to hang these gourds. I used copper wire from plant packaging to give the gourds a safe hanging wire.

Simple eye hooks into the top next to the stem make the gourds easy to hang. (Photo by Charlotte Ekker Wiggins)

Simple eye hooks into the top next to the stem make the gourds easy to hang. (Photo by Charlotte Ekker Wiggins)

Now paint the gourd with a good primer.

Once dry, add a coat of red. I used Valspar satin paint sample jar, cost around $2.50.

Once dry, I added two more coats, drying in between.

Green leaves on the top add dimension. (Photo by Charlotte Ekker Wiggins)

Green leaves on the top add dimension. (Photo by Charlotte Ekker Wiggins)

The green leaves where added free hand first in a solid satin dark green, those took two coats.

A lighter green gave the leaves some dimension.

The stems were painted brown; those took only one coat.

Once dry for a good 2 days, I finished by spraying with a clear plastic coat.

Painted gourds on a stick drying outside. (Photo by Charlotte Ekker Wiggins)

Painted gourds on a stick drying outside. (Photo by Charlotte Ekker Wiggins)

This gourd has a wider opening courtesy of a wintering mouse. (Photo by Charlotte Ekker Wiggins)

This gourd has a wider opening courtesy of a wintering mouse. (Photo by Charlotte Ekker Wiggins)

So two gourds will welcome wrens. The third one, with the wider opening courtesy of a wintering mouse, might be attractive to nutchatches or maybe a yellow bellied sapsucker. 

Better yet, make a painted apple gourd to add to one of our songbird throws and you will have songbirds in hand.

Now wouldn't you like to get one of these as a gift for your garden?

Charlotte


Caring for Gift Flowers

These gift roses came in pots, another way to give roses. (Photo by Charlotte Ekker Wiggins)

These gift roses came in pots, another way to give roses. (Photo by Charlotte Ekker Wiggins)

Caring for Gift Flowers

If you received gift flowers such as cut roses recently, there are several things you can do to keep them beautiful:

If they came in a vase, put them where you can enjoy them but keep them away from heat vents and sun. Don't place them on top of TVs or near electronic devices that get warm, the heat will shorten the lifespan of your beautiful flowers.

If they were in a box, get a vase and make sure to wash it with hot water and dishwashing detergent, rinse and dry, then fill vase 3/4 full with room temperature water. Add a penny to water to help keep bacteria from growing. I have also used half an aspirin. Most florists also provide floral flood packets. Don't save the packets, use them!

Measure the first stem against the vase you want to put them in and make them taller since you may be cutting them down several times. Cut the bottom of the stems under room temperature water with sharp pruners or a knife, making a 45-degree angle cut so the stem can take up water. The running water helps the stem take up the water; that helps keep the rose stay saturated.

Also remove all leaves that will be submerged in water. 

Add the florist food packet, mix, then add the remaining trimmed roses.

Whether already in a vase or you add the flower to a vase, plan on cleaning the vase, replacing the water with fresh, room-temperate water and making fresh stem cuts every 2 days.

Peruvian lilies are one, if not the longest lasting, cut flowers currently available. (Photo by Charlotte Ekker Wiggins)

Peruvian lilies are one, if not the longest lasting, cut flowers currently available. (Photo by Charlotte Ekker Wiggins)

If you received carnations, mums and Peruvian lilies, these flowers are longer lasting but also would appreciate fresh water every 2-3 days. Also trim the stems so water can get absorbed and keep the flowers in bloom.

A bouquet of Peruvian lilies I bought around Christmas lasted 9 weeks with a little extra time cutting off the stems and placing them in clean water every few days.

If your gift was a plant, remove the decorative paper immediately and place a tray under the pot to catch water. Check the soil to determine whether it is wet or not. If it is dry, give it room temperature water until the soil is saturated again but not wet.

Read the enclosed care instructions, they will tell you what kind of light conditions your plant needs. Then place the plant in appropriate lighting conditions. Most orchids, for example, like indirect light similar to African violets and English primroses.

Spring bulb gardens prefer full sunlight so the sprouting leaves can collect energy in the bulbs. Once bulb gardens finish blooming, keep watering and allow the leaves to turn yellow. The bulbs can then be planted in your garden for re-blooming after the bulbs have recharged their bulbs.

On a personal note, keep the flowers where you spend the most of your time so you can enjoy them. Even though they may appear beautiful one day, room conditions may change and speed up their fading process so don't take them for granted.

And there is nothing wrong with buying yourself a flower bouquet to brighten a room so go ahead, splurge and enjoy!

Charlotte
Making A Love Seat Cover

My front porch love seat with it's brand new blue, ever so soft love seat cover for $3.50.

My front porch love seat with it's brand new blue, ever so soft love seat cover for $3.50.

Making A Love Seat Cover

I am so tickled with the results I had to share. Do you have an outside love seat that's seen better days?

Mine wasn't bad yet but it was - well, orange. More of a terra cotta, ceramic plant kind of orange but orange, and a plastic nevertheless.

This plastic orange love seat works well in hot summers but not so much in cold winters.

This plastic orange love seat works well in hot summers but not so much in cold winters.

The front porch love seat was fine for hot summer days but it looked out of place after last year when I repainted all of my garden benches a wonderfully uplifting blue. They now stand out nicely among the greenery, or winter drab, and give Bluebird Gardens a bit of a nod.

My formerly-red garden bench had a new back added and a couple coats of blue paint.

My formerly-red garden bench had a new back added and a couple coats of blue paint.

Although I knew I would eventually have to tackle the front porch, for winter I just draped a soft tan throw over it so I could sit out on the bench and watch it snow, or rain, or just sit.

Although it was warm, the throw moved around a lot and still didn't look quite right.

A temporary tan throw over the orange love seat was hard to sit on without losing the throw.

A temporary tan throw over the orange love seat was hard to sit on without losing the throw.

How hard could it be to find a blue love seat slip cover, I thought to myself. Well, it was not an easy search. There are a number of beige, brown and black ones but few in the matching blue. I finally located one for $229 not counting $14.95 shipping.

Not wanting to spend that much money on a seat cover that may be visited by squirrels, birds and my grungy pants, I started looking through local thrift stores hoping I might find something there that was better than orange. Yes, my expectations were pretty low but anything would have been better than the plastic orange.

These two pre-owned 50x60 inch throws were the perfect blue color for $4 for both.

These two pre-owned 50x60 inch throws were the perfect blue color for $4 for both.

At the local Goodwill store, I found two 50x60 fleece throws originally from Walmart in the perfect blue color. I thought I would have to sew the two together to have enough fabric but I wasn't sure so I picked both of them up.

A few pins in the right place and I cut off all four throw edges to give it a fit at the corners.

Cutting off the 50x60 inch throw corners and sewing them gave the love seat a finished look.

Cutting off the 50x60 inch throw corners and sewing them gave the love seat a finished look.

I added elastic all around the edge. leaving each of the corners with a gap in case I needed to adjust the elastic tension:

Leaving the back of the seat cover open at the corners allows me to easily adjust the elastic.

Leaving the back of the seat cover open at the corners allows me to easily adjust the elastic.

Not only does it nicely fit in with my other garden benches, but I made two, one for when the other one is in the wash.

Total price? $7. The fleece blankets were $2 each, then I used about $3 in elastic. If I deduct that from the $245 I was initially going to spend, that leaves a nice little account to buy plants. It's a family joke, I grew up learning several different ways to do math and one of my brothers calls that my "gardening math."

I'm going outside to sit on my new front porch blue bench and dream about what new plants I will now buy. On sale, of course!

Charlotte


Pantone 2018 Color: Ultra Violet

This purple English primrose is ultra violet, the official color for 2018.

This purple English primrose is ultra violet, the official color for 2018.

Pantone Color of 2018, Ultra Violet Pantone 18-3838

Every year, Pantone, Pantone Inc. a U.S. corporation headquartered in Carlstadt, New Jersey, designates a color of the year. Their Pantone Matching System is used by a variety of agencies, primarily printing, to designate exact colors.

For 2018, Pantone designed "ultra violet" as the color of the year. "A dramatically provocative and thoughtful purple shade, PANTONE 18-3838 Ultra Violet communicates originality, ingenuity, and visionary thinking that points us toward the future.

Complex and contemplative, Ultra Violet suggests the mysteries of the cosmos, the intrigue of what lies ahead, and the discoveries beyond where we are now. The vast and limitless night sky is symbolic of what is possible and continues to inspire the desire to pursue a world beyond our own.

Enigmatic purples have also long been symbolic of counterculture, unconventionality, and artistic brilliance. Musical icons Prince, David Bowie, and Jimi Hendrix brought shades of Ultra Violet to the forefront of western pop culture as personal expressions of individuality. Nuanced and full of emotion, the depth of PANTONE 18-3838 Ultra Violet symbolizes experimentation and non-conformity, spurring individuals to imagine their unique mark on the world, and push boundaries through creative outlets.

Historically, there has been a mystical or spiritual quality attached to Ultra Violet. The color is often associated with mindfulness practices, which offer a higher ground to those seeking refuge from today’s over-stimulated world. The use of purple-toned lighting in meditation spaces and other gathering places energizes the communities that gather there and inspire connection."

Very creative writing to describe a color. I like any flowers colored purple, don't you?

Charlotte

Christmas Decor Repairs

Christmas decor repairs 1.jpg

Christmas Decor Repairs

My kitchen counter looks like a mini yard sale for Christmas decorative items, only none of them are for sale. These Christmas favorites are getting repairs before I put them away for next year.

Christmas decor repairs 1.5.jpg

As part of my after Christmas shopping, I pick up some basics to have on hand for the repairs:

Paintable wood filler

Clear glue

Permanent black marker with two different size tips

Paint set

Small paint brushes

Gold and silver spray paint

Clean small lids for mixing paint

Howard Feed 'n Wax

A variety of felt pieces, usually Christmas colors get used the most.

Paintable Wood Filler

One of my favorite items, paintable wood filler, is very versatile. I can actually replace missing tiny wooden pieces by making new ones with the wood filler, then painting the new piece to match or blend in with the rest.

Also on the list, clear glue or white glue that dries clear. Super Glue is too messy, I end up with more of the glue on my fingers than on the item I am repairing.

Christmas colors felt is also handy to have in white, Christmas red and green, and black. Little ornaments with broken heads get glued back on and wrapped in a tiny scarf to cover their broken parts.

For the wooden items, Howard Feed 'n Wax gives them a nice hydrating treatment. Actually, I keep Howard Feed 'n Wax handy whenever I move things around, the beeswax and carnauba oil helps to keep my wood beautiful with very little special care.

This wooden angel lost one wing and part of her wooden halo when she was knocked to ground.

This wooden angel lost one wing and part of her wooden halo when she was knocked to ground.

Halo and wing made from wood filler has been painted with gold paint, ready to get back to angel choir.

Halo and wing made from wood filler has been painted with gold paint, ready to get back to angel choir.

I also keep a little container of paints I can turn to for minor repairs. If I need to mix them, I use a little bottle cap to mix the amounts, rarely do I need to mix a lot. If I need more paint, then it's time to splurge on paint sample bottles!

This little wooden horse now has a new right ear and paint job. 

This little wooden horse now has a new right ear and paint job. 

Some years I have waited to make the repairs at the beginning of the holiday season but now I like doing it right after. This way I remember what repairs need to be made and they are ready to be placed into service next year as soon as the season starts.

So which one are you, do you make Christmas decor repairs before Christmas or after Christmas?

Charlotte
Tiny Santa Hats

I put my tiny Santa hat on again tonight so you can see the hat being worn. 

I put my tiny Santa hat on again tonight so you can see the hat being worn. 

Tiny Santa Hats

The forecast was for a winter storm and snow tonight, a couple of days before Christmas, so I decided to make my rounds today with honey gift jars. To get into the holiday mood, I wore a red scarf and my Santa hat, my teeny tiny Santa hat. Among the benefits of this tiny hat, no bad hair from wearing the hat and it's hard to not get a smile, or two.

Actually I tend to forget I have it on and today was no exception. Almost at every stop, someone asked where I got the tiny Santa hat so here is how to make your very own.

How to Make Tiny Santa Hats

You can make your own out of red and white felt and add a little white ball at the hat tip, or you can buy the hats ready made. This little supply was originally sold at Hobby Lobby and I found it at our local Salvation Army store for $1.

The hair clips came out of my hair accessory box but I think they originally were purchased at a local beauty salon store. The hair clips are pretty common so you should be able to find them at most big box store hair care sections.

Tiny Santa hats, hair clips and a hot glue gun or needle and thread is all you need.

Tiny Santa hats, hair clips and a hot glue gun or needle and thread is all you need.

To attach the hair clips to the hats, you can use a glue gun or sew the clips to the Santa hats.

To position the hair clip, place it inside the Santa hat so only the teeth of the clip is visible. Then either glue or sew the clip into the Santa hat.

Place the hair clip inside the hat and either hot glue sides to the clip or sew the clip to the hat.

Place the hair clip inside the hat and either hot glue sides to the clip or sew the clip to the hat.

Last year, my friend Margaret, who introduced me to the tiny Santa hats, and I made a few extras and enjoyed passing them out around St. Louis. The young ladies at store check outs were the most thrilled to be presented with one so make extras to share.

I had a few extras last year so I shared with local friends, including my friend Ina. Next thing I knew, she was loaning her Santa hat to one of her friends.

My friend Ina let her cat Oscar try on her tiny Santa hat, he's handling it well, don't you think?

My friend Ina let her cat Oscar try on her tiny Santa hat, he's handling it well, don't you think?

I don't recommend putting these on pets but love this picture of Oscar wearing his Santa hat.

So make a few more than you need and pass them out when someone asks where you got it. Half the fun is watching their faces light up when you hand them their very own.

Have a very Merry!

Charlotte
How to Give Gift of Quilting

This is the winning beginners quilt at Piece and Plenty's 2017 Quilt Show in Rolla, Mo.

This is the winning beginners quilt at Piece and Plenty's 2017 Quilt Show in Rolla, Mo.

How to Give the Gift of Quilting

It's easy to think that giving the gift of quilting could be difficult. A friend of mine who wants to learn to quilt said she assumed the first thing she should do is take a quilting class, which is not a bad idea. Giving a coupon for a quilting class is also not a bad idea but it needs to have something more useful attached to it.

One option is our quilter's honey sampler gift set, a unique custom gift set that includes not only honey samples but quilting-related gifts that can easily be added to a gift certificate for a quilting class.

Another option is to pick a collection of fabrics, like this patchwork quilt started as a gift of a fat quarter bundle featured at the 2017 Piece and Plenty Quilt Guild in Rolla, Missouri.

And this quilt from a gift of fabrics just keeps on giving, now as a finished quilt gift!

And this quilt from a gift of fabrics just keeps on giving, now as a finished quilt gift!

Exciting to see a beginning quilter category getting first place ribbons!

Exciting to see a beginning quilter category getting first place ribbons!

Regardless of the category, I like to see the quilting details that add so much dimension to each handmade quilt. In this case, the machine quilting involves lovely floral patterns. Flowers on top of floral cotton patterns make for very nice floral themes!

Close up of the machine floral quilting in this winning beginning patchwork quilt.

Close up of the machine floral quilting in this winning beginning patchwork quilt.

I would be happy to get this first quilt even if it didn't get a first place ribbon, wouldn't you?

Charlotte
Handmade Cards Art

This bluebird was painted by the signer of the card and was turned into a lovely thank you card I was lucky enough to get.

This bluebird was painted by the signer of the card and was turned into a lovely thank you card I was lucky enough to get.

Handmade Cards Art

Although it is becoming a - well, dying art - handmade thank you cards are still a favorite in my house. They are art, unique and stories in and of themselves. 

As we enter the extended holiday season, when some people still teach their children to write thank you cards, here is some inspiration to save your favorites.  To continue to appreciate these lovely pieces, there are several things you can do with these works of original art to repurpose them and keep them in your life:

1. Use as book marks. Instead of turning down the pages to mark where you last left off in a hardcover book, use a card to mark the spot. That way you can still enjoy the card and keep the book pages from getting creased.

2. Mark recipes you want to try. I love reading recipe books but don't always remember a recipe I want to locate again later. When I find one I want to find again, I pop in one of these cards so I can easily find it later.

3. Frame the cards for wall art. This is one of my favorite uses of handmade cards art, especially if you have several in the same theme, such as I did.

It doesn't have to be only a theme, find something that unifies them - maybe they are all the same color, or by the same author.

If all else fails, add a unifying element by placing them all in the same frames.

Love the elegance of this thank you card, a handpainted bird on an old book page in french.

Love the elegance of this thank you card, a handpainted bird on an old book page in french.

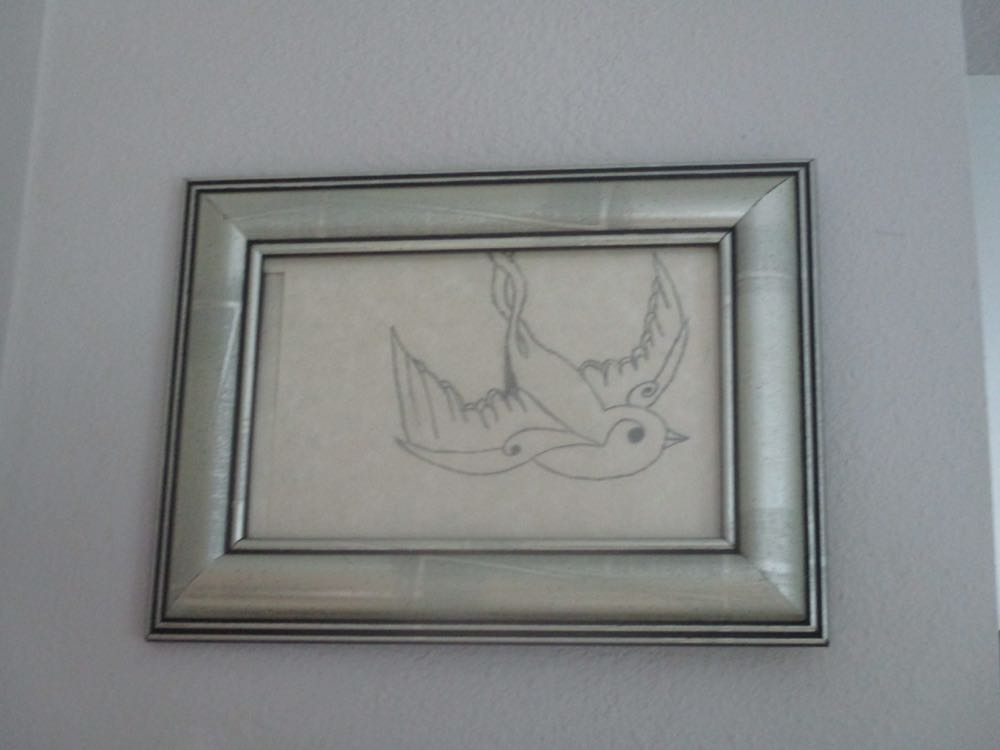
The thank you card that inspired me to shop for frames at our local thrift stores was this small bird card by a teenage boy.

I kept all of the cards intact so I can still read the inside messages.

This was a thank you from a young man who drew this bird free hand.

This was a thank you from a young man who drew this bird free hand.

Here they are, all three framed bird thank you notes hanging together off my kitchen:

The picture frames are also each different but are all in silver tones and compliment the cards.

The picture frames are also each different but are all in silver tones and compliment the cards.

Who said you had to pay a lot for original art? You probably have some right in your own mail box!

Charlotte

Basket Flowers

This tiny silver toned floral basket makes a great way to collect small flowers for a table.

This tiny silver toned floral basket makes a great way to collect small flowers for a table.

Basket Flowers

A friend recently told me she admires the fresh flowers I have around my house, especially the small bouquets tucked on tables. Come to think about it, I rarely seem to see small flowers in home improvement shows so this is going to be about how to easily incorporate those tiny gems into your home.

Right Size Container

The first step is to find the right size container that fits the space where you want to place flowers. I like having flowers on my den coffee table where I do some of my work. I also like fresh flowers on my kitchen island but I have to mitigate that location with cats that like to stop by and munch on anything that is long, skinny and green so long, skinny and you know what is out for the kitchen.

Actually I don't add long and skinny greens to my den coffee table, either, it just makes things simpler and - well, quieter. I don't have to police the flowers as much, although any greens do seem to invite trouble.

One of my favorite thrift store finds for the den is this little silvertone floral basket that is 6x4x4 inches, not counting the long handle. It has a clear plastic liner inside that holds water, or I could have popped a glass jar the size of the inside of the basket to keep the flowers hydrated if the liner had been missing. The flowers sit nicely low to the ground in this flower arrangement. I could also have cut the flowers with longer stems so they filled the space between the basket and basket handle so this gives me some versatility.

Now that the growing season is starting to slow down, I cut some geraniums from my deck plants as anchors and then started to add whatever else I could find in my garden that was small.

Geraniums from my deck add color to other tiny flowers cut from my garden.

Geraniums from my deck add color to other tiny flowers cut from my garden.

Miniature roses take center stage when they are added to these little bouquets, especially red ones. I have only one in this combination but it sits nicely in the center of the flowers, anchored on either side by the peach geraniums and purple verbena.

This was my first flower bouquet with salmon lobelia and one Black Eyed Susan flower.

This was my first flower bouquet with salmon lobelia and one Black Eyed Susan flower.

This is my second bouquet with the miniature red rose, the first one was leftovers from pruning: salmon Lobelia, pink phlox, self heal and a couple of butterfly bush flowers initially filled the silver flower basket.

Other fresh flowers I added included liriope, forget me nots and the sweet little white flowers that are just opening. Don't get too close to those, though, garlic chives are pretty but they are definitely not sweet-smelling!

Charlotte

Red Roses Gift Flowers

A little bouquet of red roses on its way to a friend's business.

A little bouquet of red roses on its way to a friend's business.

Red Roses Gift Flowers

We often think of gift flower bouquets as elaborate collections of flowers, of big globs of one flower, but they don't have to be. A gift bouquet can be as simple as one flower, or in this case, three little flowers in a simple vase.

But this isn't just any red rose.

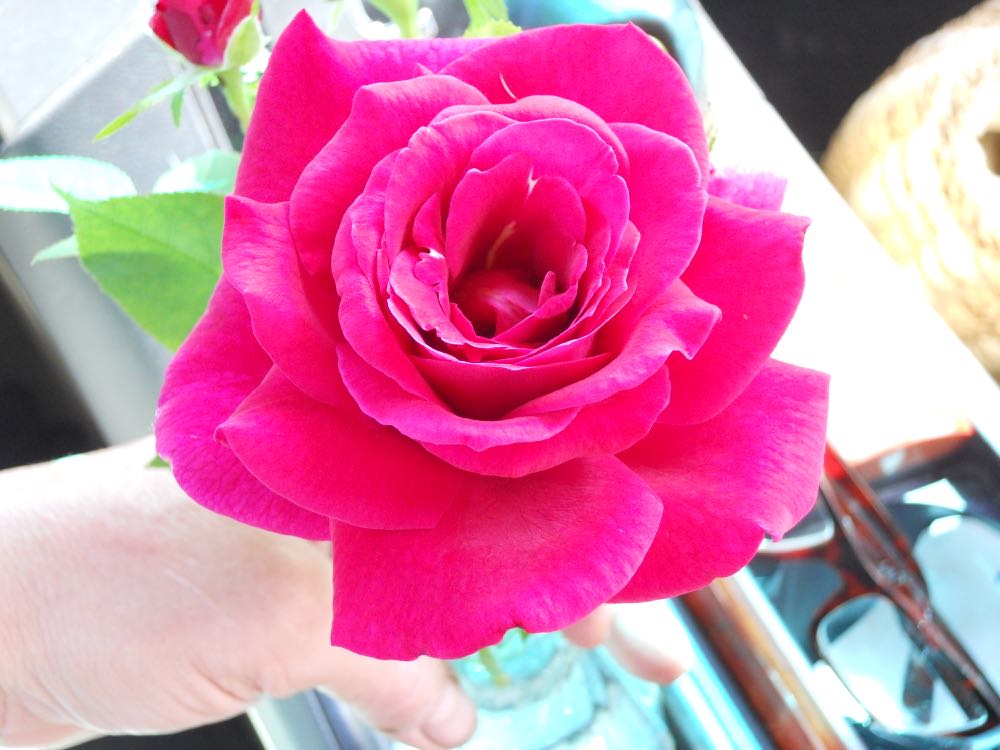
I picked the hybrid tea rose with a wonderful scent early morning, when the rose was still in bud form so that it would open through the rest of the day and last longer. I added two miniature roses in the same color for a touch of whimsy. The Mr. Lincoln hybrid tea rose would have been lovely all by itself but I liked adding the little miniature roses for fun.

Pairing miniature roses with a hybrid tea rose is a simple way to make a pretty bouquet.

Pairing miniature roses with a hybrid tea rose is a simple way to make a pretty bouquet.

Miniature roses are shrub roses that often bloom more frequently than hybrid tea roses, at least in my garden, so I like having a variety of miniature rose colors growing throughout the season. I give them compost, banana peels and coffee grounds to keep them well fed, and regularly mulch them, so they get similar care to my regular roses.

Although miniature roses are easier to grow, I also grow hybrid tea roses, especially Mr. Lincoln roses. Besides their lovely red color, I love their scent, which can envelop a room with just one flower.

Mr. Lincoln hybrid tea rose has a wonderful scent and invites a sniff just because.

Mr. Lincoln hybrid tea rose has a wonderful scent and invites a sniff just because.

I also keep little glass flower vases around in a garage cabinet just for these occasions, picking them up as I see them at garage sales.

The red roses gift flowers bouquet was appreciated, even more when my friend got a whiff of the rose. She said she only plants the repeat-blooming KnockOut roses, but she may be giving the old time hybrid tea roses a second look now. My friend said she thought I had sprayed the red rose with a perfume. I assured her this was the natural scent.

When I left, she was still smelling that red rose!

Charlotte


How to Add Daffodils

Found this bunny basket at a local Salvation Army and removed all of the plastic decorations.

Found this bunny basket at a local Salvation Army and removed all of the plastic decorations.

How to Add Daffodils to Baskets

Over the years, friends have asked me how I make these flower arrangements in baskets and vases and they are quite simple.

This rabbit was not planned. I was looking for flower vases at our local Salvation Army store when I ran across this little rabbit basket. Originally it had a plastic burgundy hat, old ribbon around it's neck and some grey plastic bib, all quickly removed to reveal the charming black-eyed bunny.

Whether it's this rabbit basket or just a plain one, it's easy to add spring daffodils or any flowers of your choice. Find a glass container that will fit inside the basket to hold water. I picked one up at the Salvation Army store since I wasn't sure what I had at home.

Wash it out with hot water and let it dry. If you use soap, make sure it is washed out well or the soap can make the flowers droop faster.

Don't worry what kind of container you use, although clear or light colored is better than something dark.  Once the flowers are added, it won't matter what you have them in because the flowers will cover the bowl.

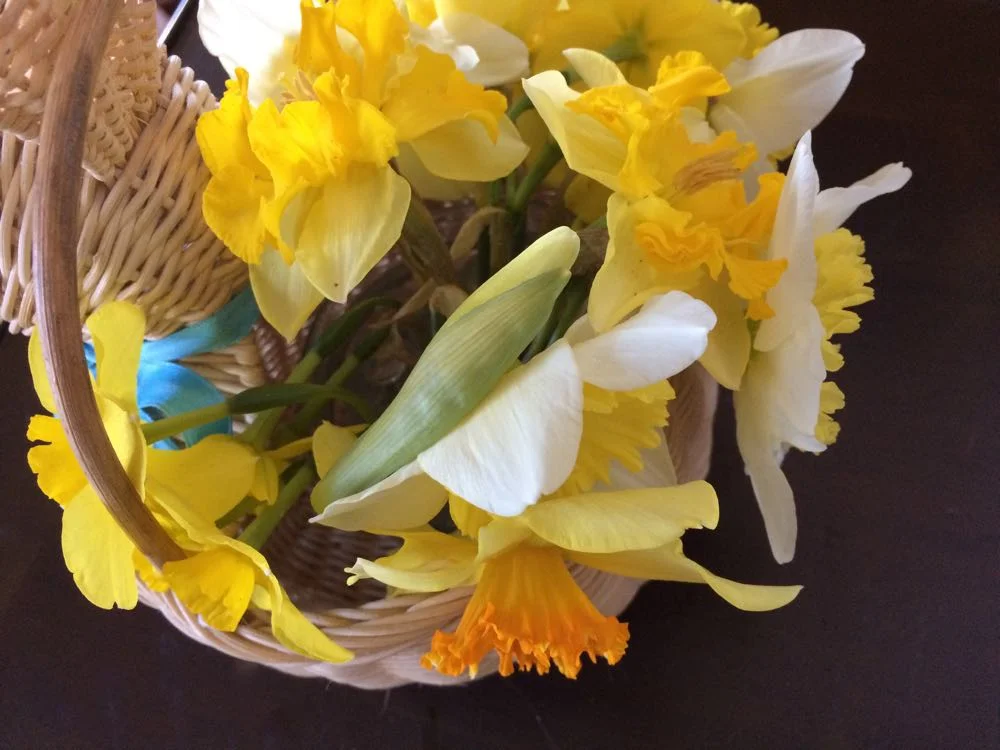
I enjoy a mixture of daffodils from my garden, or you can make a bouquet of the same flowers.

I enjoy a mixture of daffodils from my garden, or you can make a bouquet of the same flowers.

The trick is to cut the flowers so that they have room to bloom but won't fall over. I will test cut one to make sure I have the right stem length, and then cut the rest.

I also use clear florist marbles placed around the flowers to keep them standing upright in the glass vase in the basket.

No problem if you don't have the florist marbles, rocks or even washed driveway gravel will work.

Once you add the marbles or rock gently around the daffodil stems, don't forget to slowly add room temperature water until the container is full.

Place the flowers in marbles, or rocks to keep them stable, then add water in a container.

Place the flowers in marbles, or rocks to keep them stable, then add water in a container.

For 20 years or more, I used to take these cut flowers into my office's coffee room. I'm still getting adjusted to being retired from that job so I placed the bunny where I could enjoy it, on my den coffee table.

Bunny basket holding fresh-cut daffodils on my den coffee table.

Bunny basket holding fresh-cut daffodils on my den coffee table.

The forecast is for cold temperatures and possibly snow over the next few days. I will enjoy these signs of spring with my tea as winter makes it's last stand outside, or so I hope!

Charlotte

Pantone 2017 Color

Some "greenery" items already around my house, so odd to be on the cutting edge!

Some "greenery" items already around my house, so odd to be on the cutting edge!

Pantone 2017 Color "Greenery"

For those of you who like to be on the cutting edge of cool, the provider of professional color standards for the design industries has declared the 2017 "it" color as "greenery." My newspaper editor background tends to fume just a tad with the proliferation of non-words in our current vocabulary but I like this new word. I would have been fine with just "green" but "greenery" has extra panache.

Pantone defines "greenery" as "fresh and zesty yellow-green shade that evokes the first days of spring when nature's greens revive, restore and renew." If you know me, you are undoubtedly not surprised that this is a favorite color of mine. A visiting friend recently noted how nice my furniture looks in my sea of wintering over inside plants. I do, and will continue to contend, that adding something living and green will spice up any room and home decor, any time of any year.

Leatrice Eiseman, Pantone Color Institute executive director, put their color choice in context. While the colors last year - baby blue and baby pink - "expressed the need for harmony in a chaotic world, Greenery bursts forth in 2017 to provide us with the hope we collectively year for amid a complex social and political landscape.

"Satisfying our growing desire to rejuvenate, revitalize and unite, Greenery symbolizes the reconnection we seek with nature, one another and a larger purpose. The tangy yellow-green speaks to our desire to express, explore, experiment and reinvent, importing a sense of buoyancy. Through its reassuring yet assertive vibrancy, Greenery offers us self-assurance and boldness to live life on our own terms, during a time when we are redefining what makes us successful and happy."

Pantone calls this color "nature's neutral," noting it compliments a wide range of color palettes. Adding Greenery to interior furnishings can "created the illusion of bringing the outdoors inside and provide a sense of respite."

I love green, from the living kind to greens in quilts, this green sleeping cats throw is a personal favorite.

The last time a shade of green was designated as an official Pantone color was 2013, when the darker emerald green was featured.

For those of you wanting the exact color match, Greenery is Pantone 15-0343. 

"Greenery" has always been "in" at my house, whether inside or outside.

"Greenery" has always been "in" at my house, whether inside or outside.

Live plants that can easily add that color to your home decor include geraniums, herbs, philodendrons...oh, anything live and growing looks wonderful.

How about that, I am finally in style!

Charlotte

Closet Sewing Room

Bluebird Gardens sewing room is in a closet where I can close the doors and leave projects out.

Bluebird Gardens sewing room is in a closet where I can close the doors and leave projects out.

Closet Sewing Room

As we brainstorm gift ideas, this is one that my mother used to talk about all of the time. She wanted a room - not even a room, just a place - where she could set up her sewing machine and leave it up without having to take it down every time we needed to set the table for dinner.

So when I set up my Bluebird Gardens office, I remembered those conversations and chose to make a closet into my sewing area.

It's about twice the size of a regular closet. I added shelves so I could keep my smaller fabric stashes organized by color. I also added a little light under the lowest shelf to give me more sewing light.

The sewing table is a butcher block top with ceramic legs from my mother's old sewing room. I have plastic bins on the right holding the things I use the most when sewing: different-sized elastics, fabric glue, filled bobbins.

My sewing machine stays out all of the time now with the sewing spool holder my brother made when he was 9 years old hanging on the wall behind it. A small bench that tucks under the sewing table when not in use gives me seating room in front of the machine. When I am finished with using the area, I close the folding doors without having to put the sewing machine away.

I forgot how much of a luxury this is until a friend was renovating an old bedroom and wanted some suggestions on how to make it into her craft room. Wish you could have seen her eyes when she saw my closet!

To turn a closet into a sewing room, you need a sewing table and chair that will fit into the space when not in use; lighting over the sewing machine and doors that can be closed. Shelving is additional and can be added over time.

Charlotte


How to Gift Wrap Daffodils

Darker vases in blue and black nicely contrast against traditional yellow and white daffodils.

Darker vases in blue and black nicely contrast against traditional yellow and white daffodils.

Daffodils are March's gift flowers, captured sunshine to chase away winter gloom and bring on spring garden dreams

How to Gift Wrap Daffodils for Gift Giving

To easily gift wrap your gift of flowers, have fun shopping for an interesting vase. Most home decor stores have a selection, as do antique and thrift shops. When in a rush, don't overlook your local grocery store floral department. If you don't see any vases, ask; they will usually share what they have in stock.

When looking for a gift vase, look for something on the small size from 4-6 inches tall and 2 inches wide.

Also think about the person who is going to get the flowers. Select a vase that represents their spirit and joy. Anything in a blue range works well with yellow, as does white and black.

Flower Vases Should Be Repeatedly Used

In my world, flower vases are repeatedly used. A friend of mine who regularly gets flowers from my garden periodically cleans out her flower vase collection and gives them back to me for re-use.

I also collect vases later in the year at yard sales and keep a stash for easy use when I have flowers to share.

Don't Wait For A Flower Vase

If you don't have a fancy vase, don't hesitate to wrap them in paper towels or a clean, recycled glass jar. Most people have a vase they can use once they get the flowers so make someone's day with a nice bouquet.

A bouquet of daffodils from my garden on its way to a friend's house with other goodies.

A bouquet of daffodils from my garden on its way to a friend's house with other goodies.

Wouldn't you enjoy getting a bouquet of fresh flowers just because?

Charlotte


Fabric Holiday Wreath

Fabric Holiday Wreath.jpg

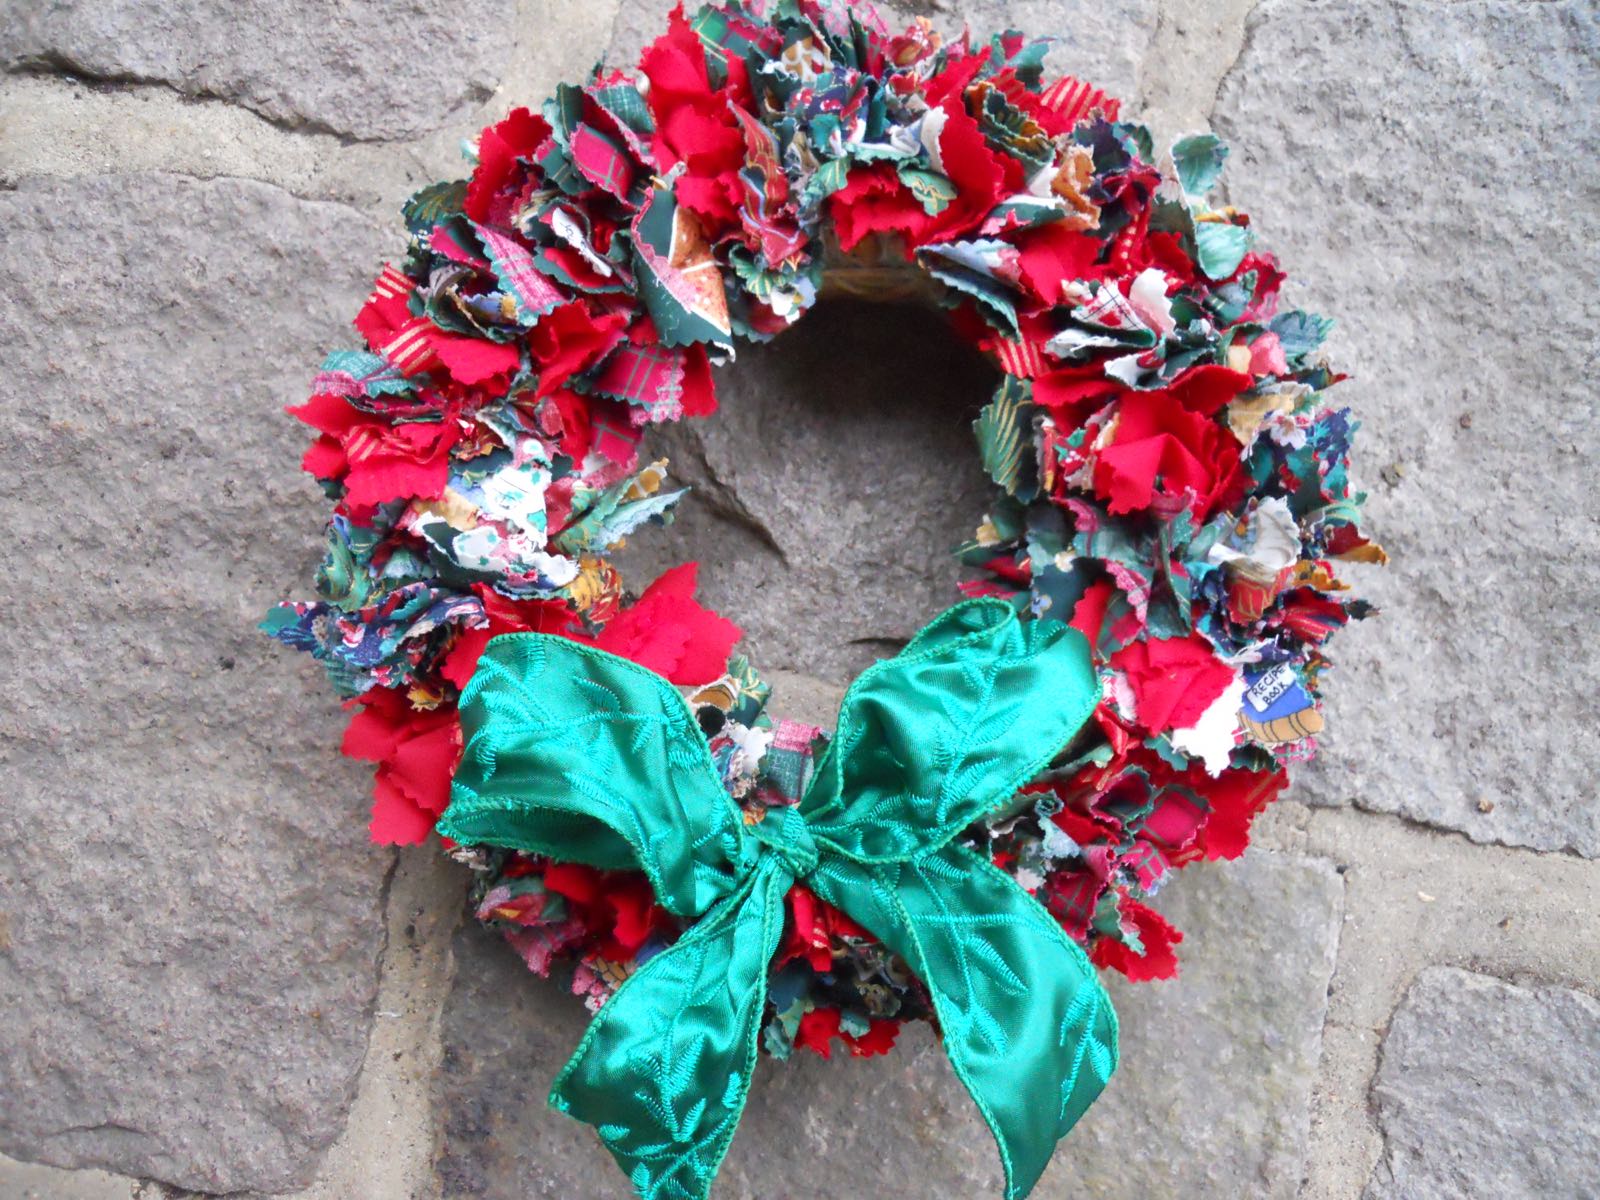
One of the holiday traditions is adding wreaths to our home decor. You can get the family involved, too. You could make this fabric holiday wreath for almost any occasion, or no occasion at all if you just want to use up fabric scraps or break into your secret, holiday-themed fabric stash. No worries, we all have them!

Start with one of those craft store wreaths that look like a bunch of straw bundled together. You want something you can easily poke holes in. Don't remove the clear wrap unless you don't mind those little pieces falling all over your floors.

These wreaths are available at most craft stores and big box stores with craft sections.

These wreaths are available at most craft stores and big box stores with craft sections.

Cut fabric pieces into 2-inch squares with pinking shears. You could use all red fabrics or all holly green fabrics. I couldn't decide which one to use so I used both.

Pinking shear fabric edges give fabric squares an easy finish and add texture to the wreath.

Pinking shear fabric edges give fabric squares an easy finish and add texture to the wreath.

Once you have pieces cut, have little hands punch holes literally into the wreath with a safe bamboo chopstick. If adults are helping, use closed scissors to poke a hole, then center a fabric square on the scissor point and insert into the hole.

Bamboo sticks make a safe tool for little hands to help making the wreath.

Bamboo sticks make a safe tool for little hands to help making the wreath.

Once the wreath is full, add a wire and twist at the back so that you can easily hang it. You can add a wire before you start poking fabric in but it may be hard to find later.

Adding a loop of wire makes hanging the wreath easier.

Adding a loop of wire makes hanging the wreath easier.

I have my fabric holiday wreath hanging inside my front door so I can enjoy it. I'm also thinking it would make a nice addition to a fireplace mantel.

Almost forgot. Don't forget to add a bow!

Wired ribbons hold their shape better than plain ribbons but either one will work.

Wired ribbons hold their shape better than plain ribbons but either one will work.

This fabric wreath is easy to make and will be a nice addition to your holiday decor for many years to come!

Charlotte