Holiday Poinsettia Care

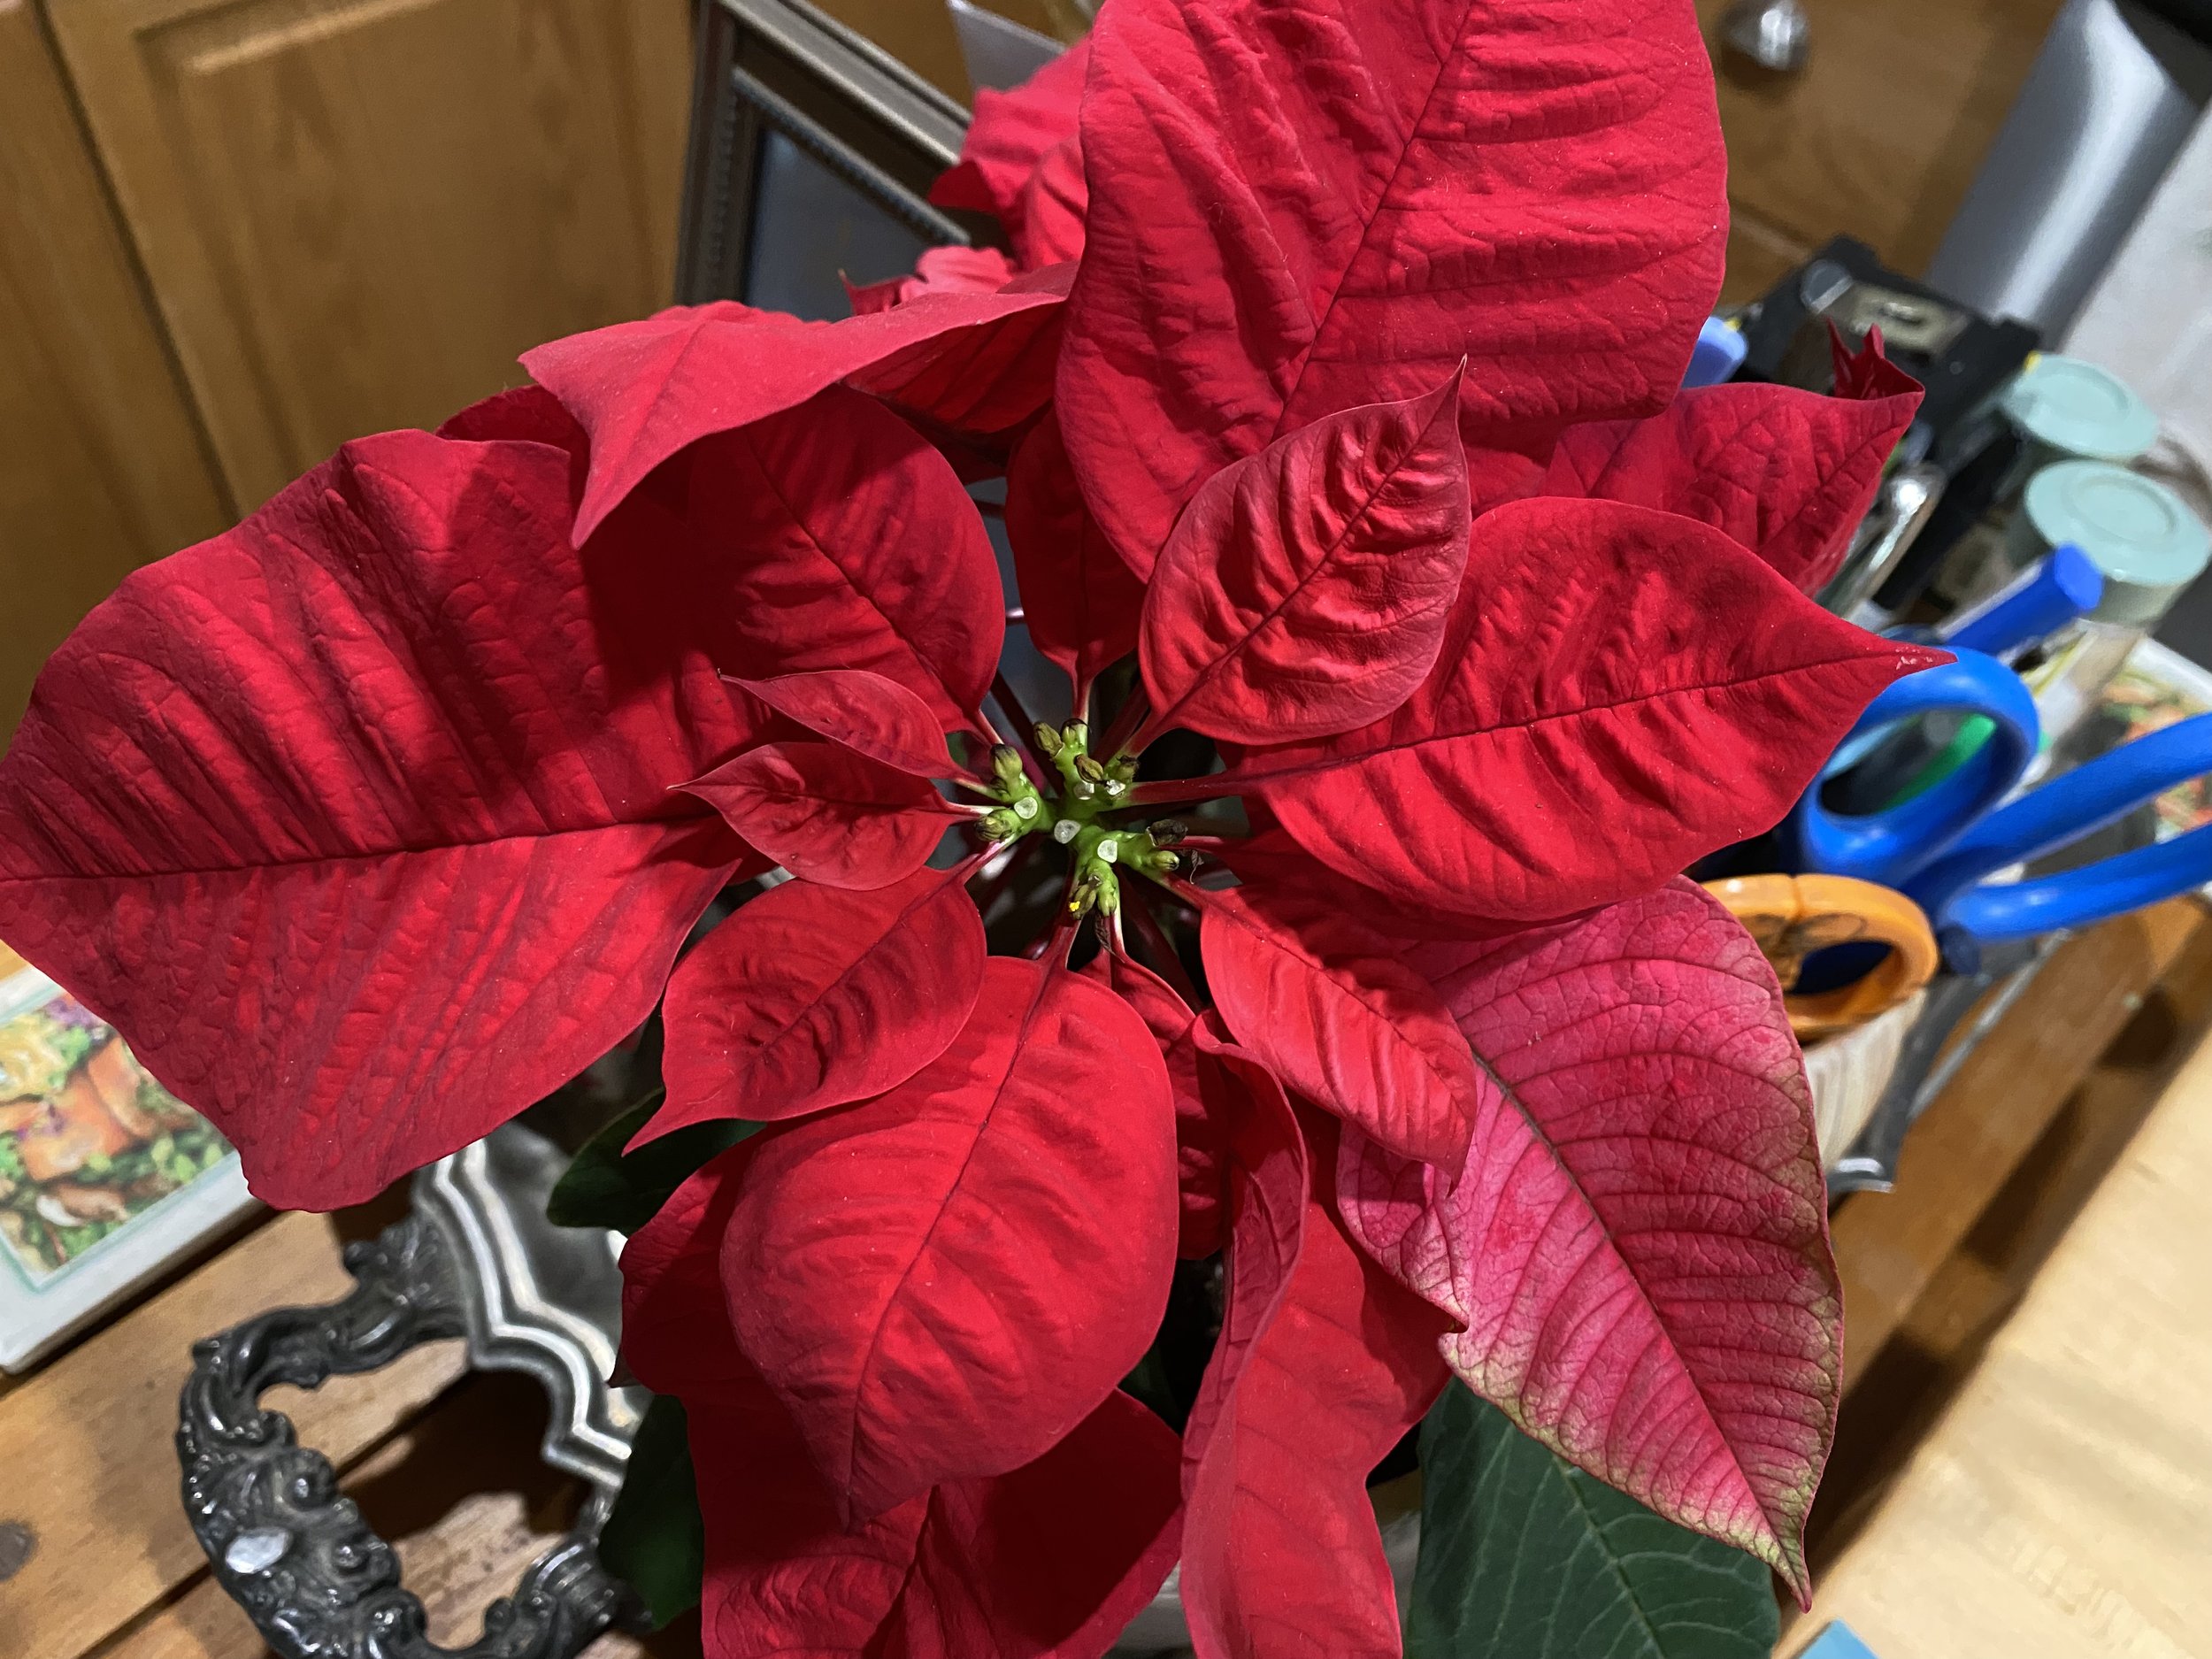
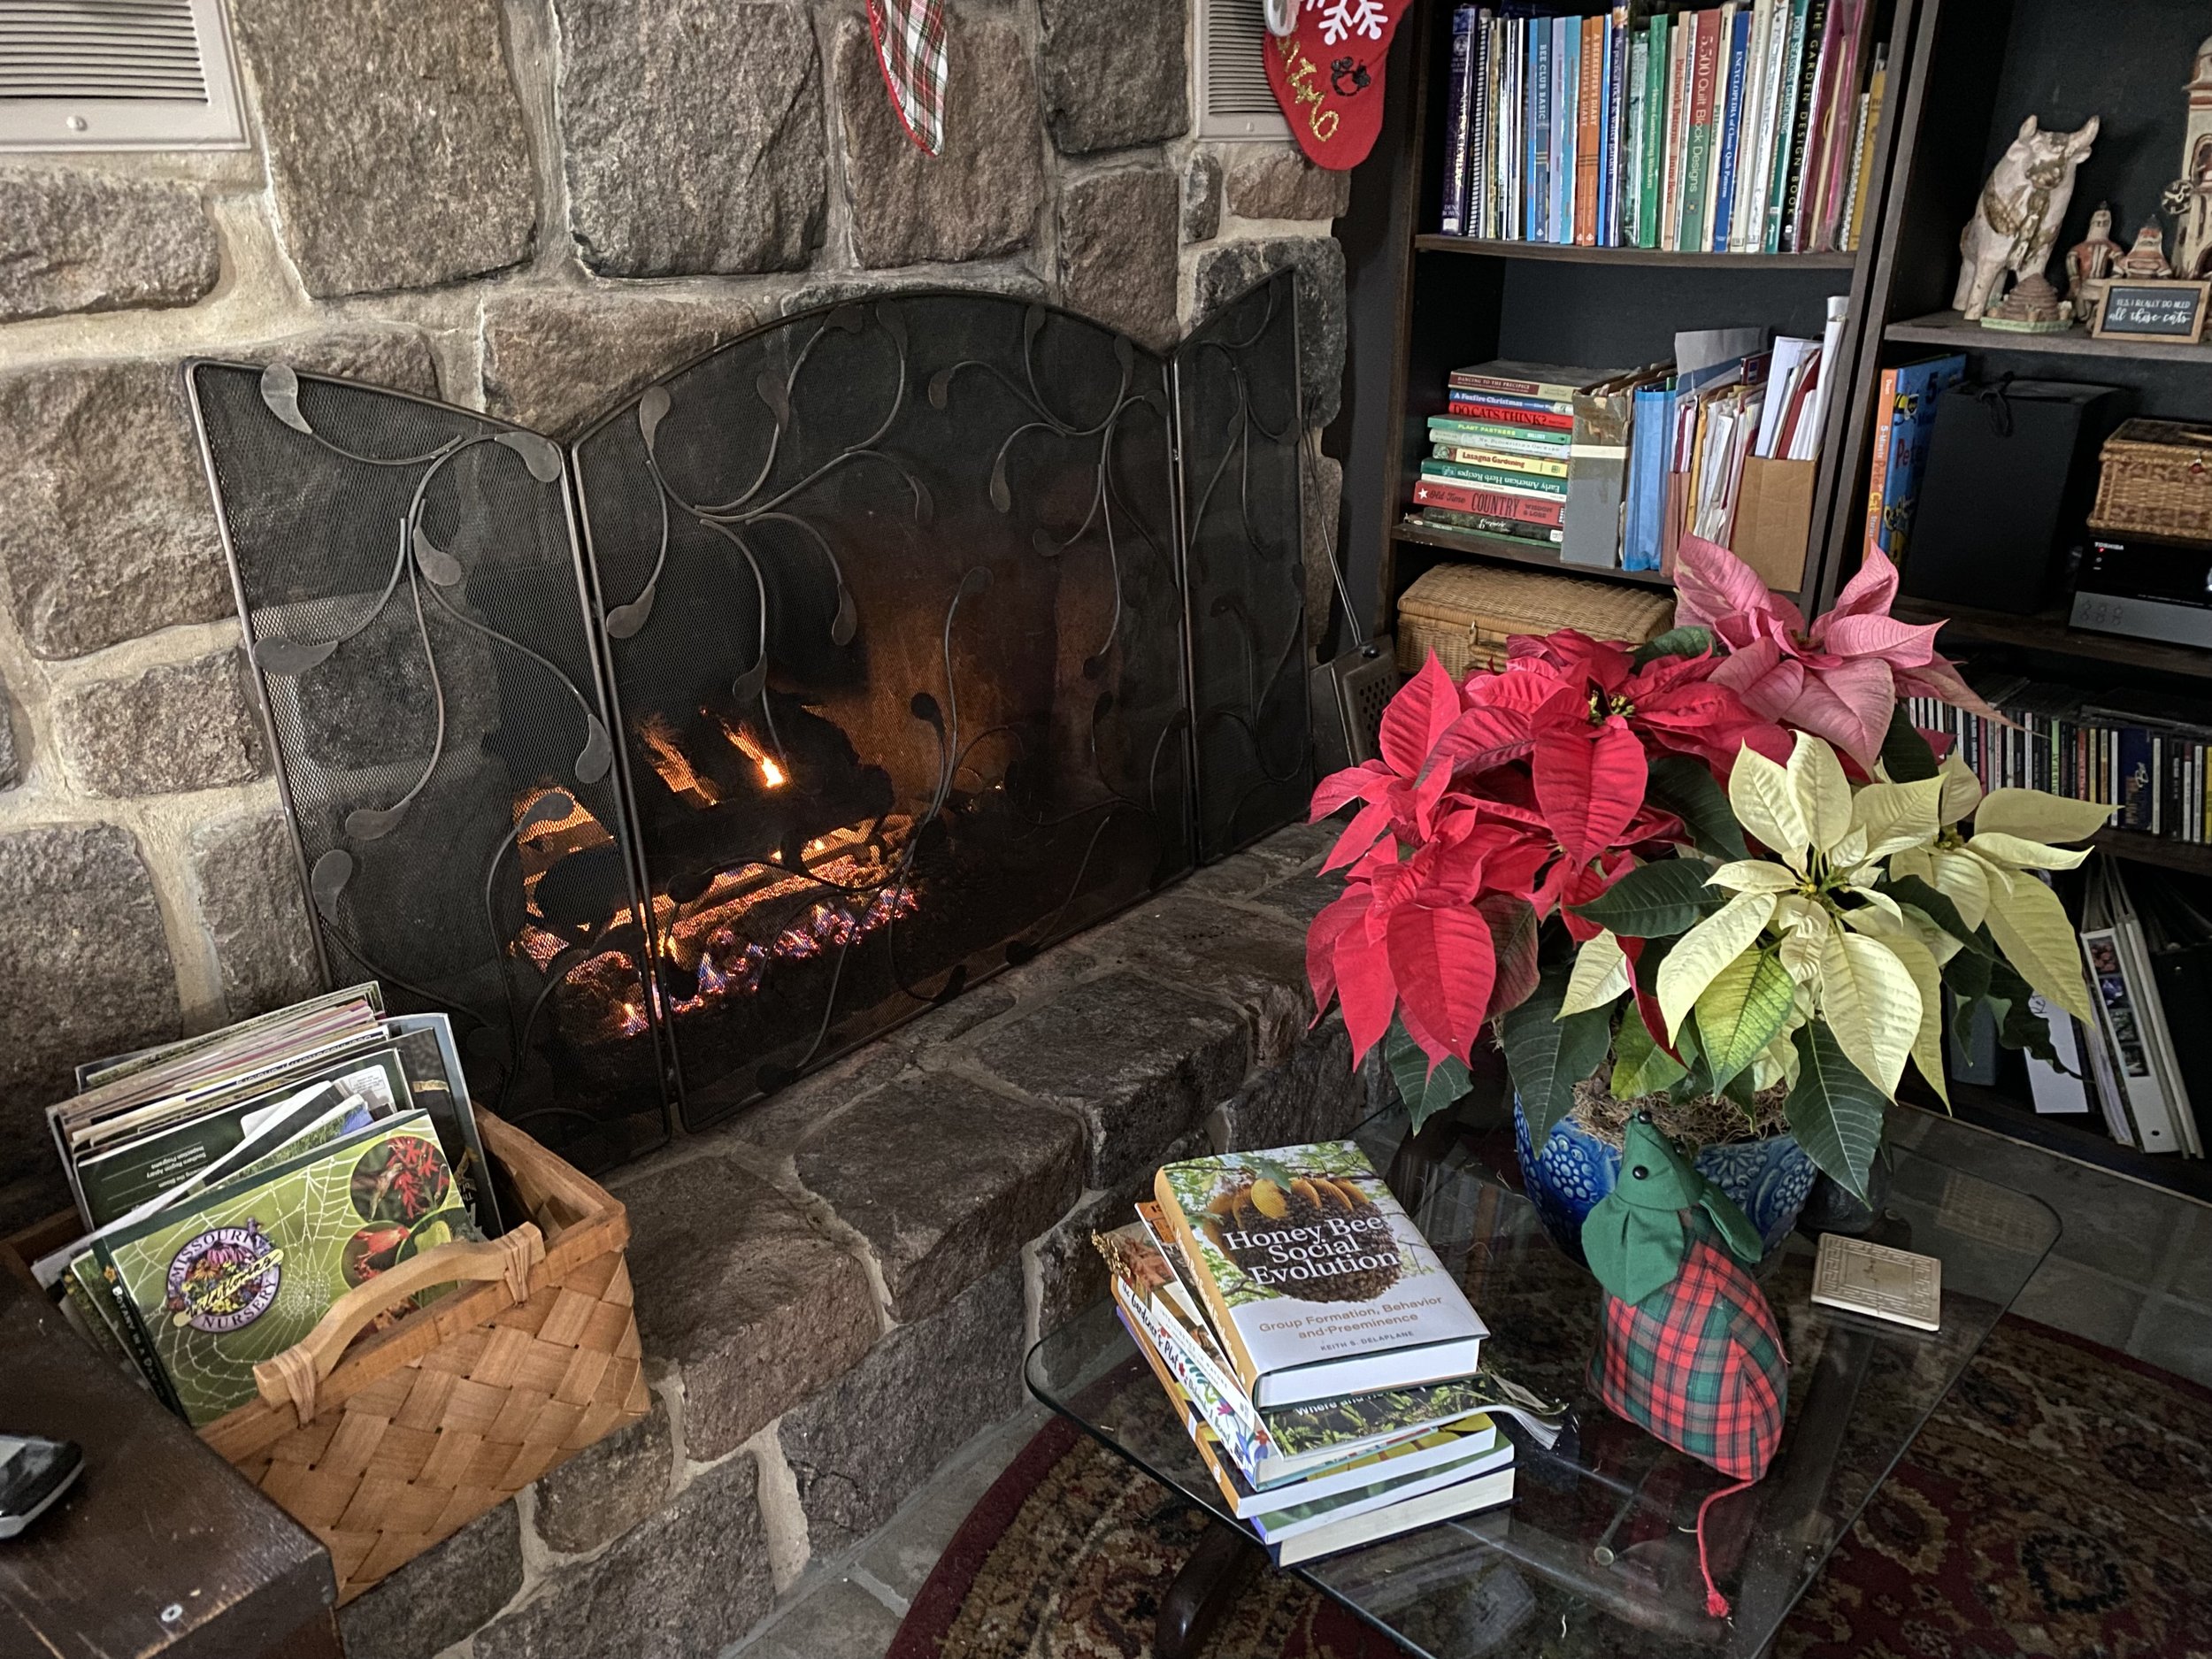
Charming gift poinsettia from a neighbor keeping me company in the kitchen. (Photo by Charlotte Ekker Wiggins)

Holiday Poinsettia Care

Millions of poinsettias will be making their way from retailers to homes this week, a popular holiday decorating as well as gift item. One of the biggest mistakes I see people making, especially in temperatures below 70F, is taking the poinsettias out from a warm environment into cold. If you are purchasing poinsettias for whatever reason, ask them to be wrapped and, better yet, have a lightweight blanket you can place around the plant(s) as you move them to a warm car you drive close to the retailer entrance.

These are tropical plants, native of Mexico, and they don’t do well in colder temperatures. If you want to extend their life span, make sure to keep them warm as you move them home and present them as gifts. I keep brown bags stashed in the garage just for this kind of contingency. Brown bags will help protect the delicate poinsettia bracts from the cold.

Secondly, when shopping for a poinsettia, look in the center for tighly-closed yellow buds, those are the actual flowers. Poinsettias without yellow centers are older and won’t last as long.

Finally, place your poinsettias away from a heat source in indirect light.

If they have tin foil over the pot, remove the tin foil and add a saucer underneath. Don’t overwater, keep the soil moist without being water logged.

With a little care, you can keep your poinsettias through the year to re-bloom next year.

Last year’s gift poinsettias re-blooming for this year. (Photo by Charlotte Ekker Wiggins)

This was a gift poinsettia from two years ago now that has survived construction, poor watering schedule and getting knocked over a couple of times while it was summering outside.

The bracts, or leaves when they are green are a pretty shape and color and can easily be included in with other shade plants. I like them bunched up with my straight-leaf Bromeliads under trees in summer.

If you would rather not have to water anything, you can add the poinsettia vibe in your home decor with our crochet poinsettia throw.

Poinsettias emit a white sap when cut or broken. For some time it was assumed the sap was poisonous but it isn’t. I don’t let me cats chew the bracts but that’s more for the aesthetics of it.

One last note: poinsettias are red and may continue to bloom into Valentine’s Day, February 14 so enjoy these lovely plants through several seasons.

Charlotte

Sweet Santa Gifts

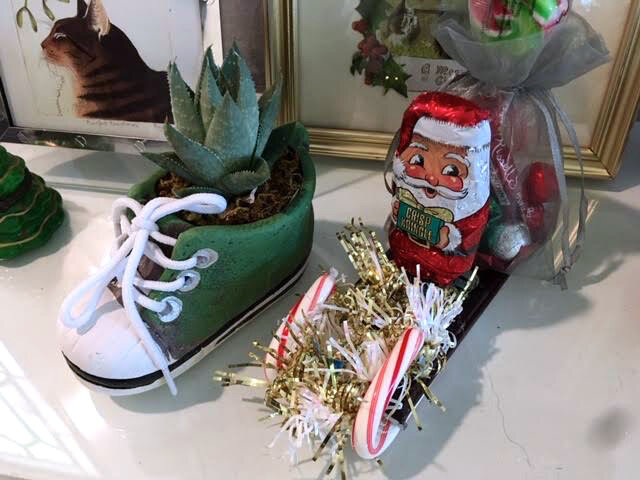
Chocolate Santa arrives on a chocolate sleigh carrying - well, yes, chocolates! (Photo by Charlotte Ekker Wiggins)

Chocolate Santa arrives on a chocolate sleigh carrying - well, yes, chocolates! (Photo by Charlotte Ekker Wiggins)

Sweet Santa Gifts

One of my neighbors and her grandson sang “We wish you a Merry Christmas“ as they dropped off this charming chocolate Santa on a chocolate sleigh. It reminded me of one of my favorite holiday lap quilts with Santa in a woodland setting. Maybe it’s because we both enjoy our hillside wildlife, we often exchange stories about what creatures have been spending time in our hillside gardens.

Tag these to make later this year, so cute and easy.

Looks like you will need:

Hershey chocolate bars

Chocolate Santas

Chocolate goodies for the

Drawstring bag

Candy canes the length of Hershey bar

Some tinsel

Glue

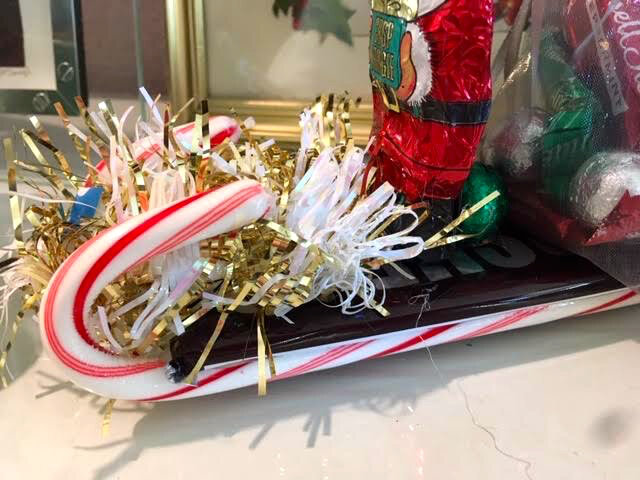
A wrapped chocolate bar glued behind Santa helps him stand up. (Photo by Charlotte Ekker Wiggins)

A wrapped chocolate bar glued behind Santa helps him stand up. (Photo by Charlotte Ekker Wiggins)

In the drawstring bag, a little collection of more sweet goodies. The bag was also glued to the Hershey bar top and it was quite easy - too easy - to remove.

A drawstring bag holds more chocolate gifts. (Photo by Charlotte Ekker Wiggins)

A drawstring bag holds more chocolate gifts. (Photo by Charlotte Ekker Wiggins)

And what luck, Santa and his sleigh very nicely fit into my little winter scene with snowman cat, Christmas trees and the framed Christmas card collection next to my front door.

Chocolate Santa sleigh joins my other Christmas scene members. (Photo by Charlotte Ekker Wiggins)

Chocolate Santa sleigh joins my other Christmas scene members. (Photo by Charlotte Ekker Wiggins)

Charming way to be greeted every morning as I come down my stairs!

Charlotte

Last Minute Shopping

Last minute gift ideas don’t always come in gift-wrapped boxes. (Photo by Charlotte Ekker Wiggins)

Last minute gift ideas don’t always come in gift-wrapped boxes. (Photo by Charlotte Ekker Wiggins)

Last Minute Shopping

The call came in late last night, a male customer clearly exasperated with Christmas gift expectations.

Four daughters. One doting aunt. I waited to hear about a wife but there was no mention so I took him to be a single Dad.

At this point in the season, with five days until Christmas, I understood some of his frustration so I made the current suggestion of 4 gifts per person:

Something they want,

Something they need,

Something to wear,

Something to read.

There was silence at the other end. Oh, he said, that’s good “that gives me a place to start.”

Then we headed into each category for suggestions. He had the first one covered for the daughters but not the aunt. How about a framed photo of the four girls, does she have one? He liked that idea; he said the girls would have fun setting up the photo shoot. Framed photos are always a good choice!

In terms of what they “needed,” he made it clear he was a good provider. I suggested writing each of them a letter explaining what each meant to him and the good wishes he had for them as they grow up. It was something he could slip in their stockings and I guaranteed it would be something they would cherish. He loved that idea. It was something he “could make” for them.

We both groaned at the “what to wear” one although I said a good pair of winter gloves and a scarf for each qualified. “Sold” he said.

The reading list was frankly the toughest one but we sorted out favorite likes and hobbies that he now can use to shop online for books to match.

The relief in his voice was palpable. “So you make money doing this” he asked.

I laughed. No, I said, but hopefully the next time he needed a personalized birthday gift he would think of us.

He thanked me again, said he was going to “double check” his list and hung up, off to shop online for books, he said.

He will make it. Merry Christmas!

Charlotte

Poinsettia Care Update

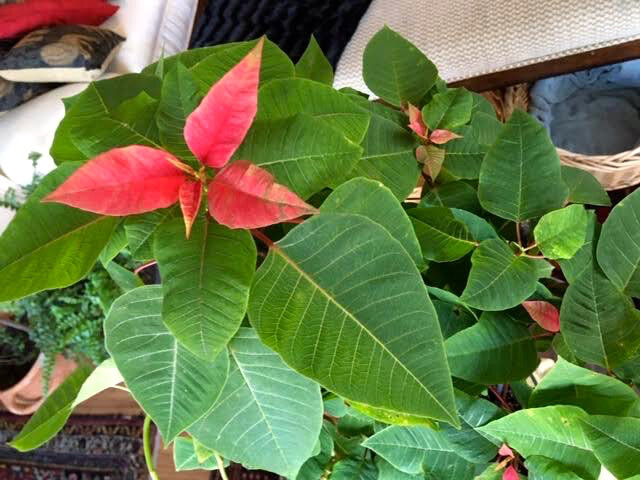
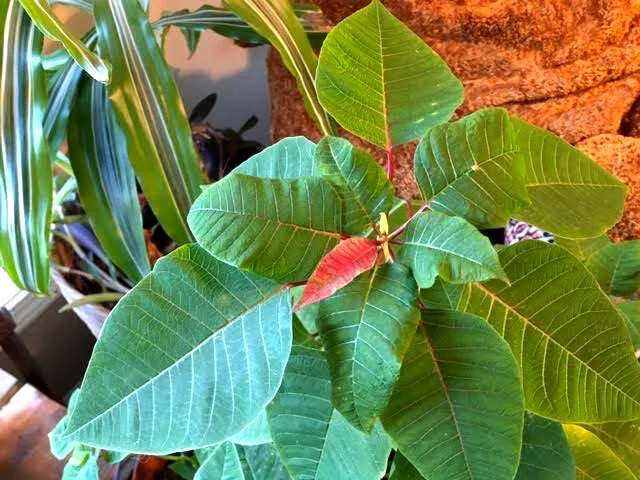
Last year’s gift poinsettias re-blooming for this year. (Photo by Charlotte Ekker Wiggins)

Last year’s gift poinsettias re-blooming for this year. (Photo by Charlotte Ekker Wiggins)

Poinsettia Care Update

It’s been about 10 days since my last update on the poinsettias from last year. They have been sitting in indirect light during the day with no evening light since September. I forgot to give them fertilizer during their dormant period but did keep them on the dry side.

They are now getting more leaf color, which is what turns either red, white, pink and pink and white. And I saw a really furly red leaf at one of our local home and garden centers, not to mention the crocheted poinsettia lap quilt throw we have in storage.

No I didn’t buy any of the plants, I’m enjoying watching mine from last year turn.

This is how the one in the top photo started about a month ago. This is when I knew to pull it out of the back room and give it more indirect sunlight.

Same poinsettia a good 5 weeks ago, first showing leaf color. (Photo by Charlotte Ekker Wiggins)

Same poinsettia a good 5 weeks ago, first showing leaf color. (Photo by Charlotte Ekker Wiggins)

As with most plants, we don’t always have the space to give them the growing conditions they need so most of these tropical plants from Mexico get tossed after Christmas.

In their native habitat, they grow the size of small trees, similar to our native Missouri dogwoods.

My plan is now to keep them growing through winter, then repot and set them outside in shade over summer so they have more time to grow. It will be interesting to see how big they will get by next year.

The other poinsettias? Well, if I happen to find one on sale I just might bring another one home.

Charlotte

Christmas Tree Ornament

This handmade Christmas tree ornament uses up extra buttons. (Photo by Charlotte Ekker Wiggins)

This handmade Christmas tree ornament uses up extra buttons. (Photo by Charlotte Ekker Wiggins)

Christmas Tree Ornament

Most of us have them, jars of buttons we have cut off from blouses and shirts we could no longer wear. I know I do, and did several years ago when a friend stopped in with her two small children. She was moving across country and had most of her belongings in the back of her car. She was down in her luck and trying to put a brave face on for her daughters.

I was only too happy to give her a safe haven, even for just a few days. We spent most of the time giving her daughters a fun Christmas; which is where this ornament comes in.

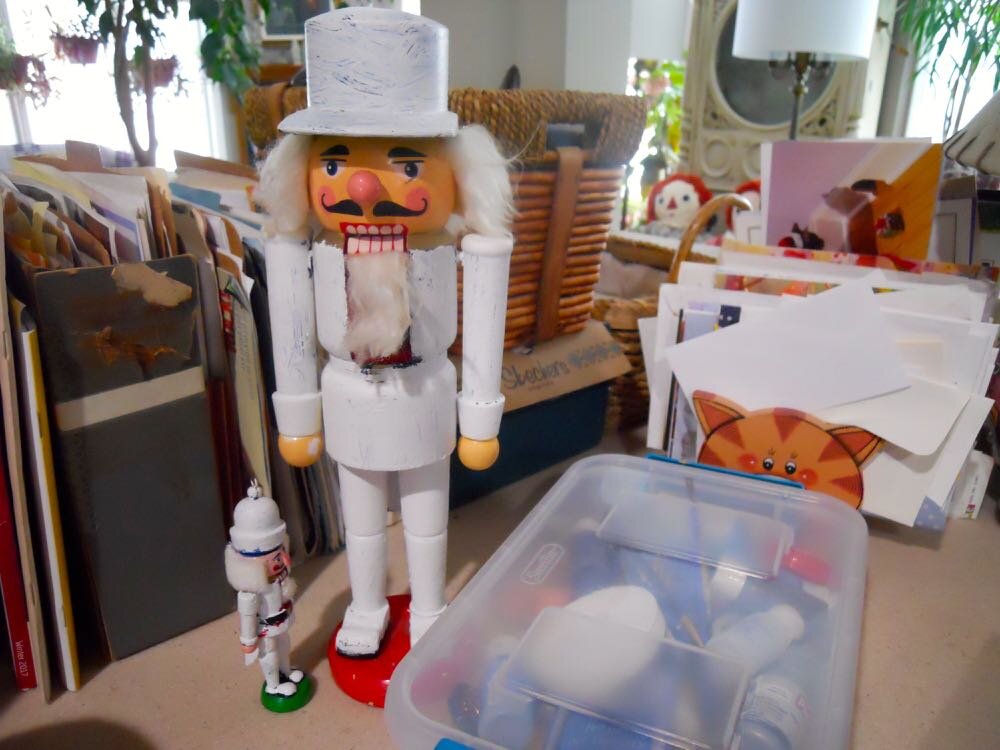
I didn’t have much in craft materials in the house but we decided we wanted to make Christmas ornaments anyway. These are actual popsicle sticks I had saved to use as plant markers. One of the girls found the jars of buttons and I knew where i stored green and brown paint. I keep a small plastic container full of small paint jars and brushes so that I can easily decorate when I need to.

My plastic container of small paints and paint brushes. (Photo by Charlotte Ekker Wiggins)

My plastic container of small paints and paint brushes. (Photo by Charlotte Ekker Wiggins)

Sitting around my butcher block kitchen island covered in newspapers, we glued, then painted, then glued buttons on. We talked. Some of us were silly, and not necessarily the two little ones. The girls loved the hot chocolate with marshmallows. I could see Mom starting to relax.

She didn’t have money for gifts so the girls made these ornaments for their family members. We cut cat faces out of cardboard and added them to the top of the tree ornament instead of a star. They had left their pet cat behind; this was a wish that they would get another one. If you haven’t lived with a cat through holiday Christmas tree climbing, you are missing quite the adventure.

Another tree had a boot on it for a grandfather, and yet another one had a flower one of the girls cut out of one of my gardening magazines. We decided the tree topper on the Christmas tree tree ornaments were things they wished Santa would bring their relatives.

They signed their names and put a date on the back. Mom and I hand wrote little cards for each person explaining the wish expressed at the top of the ornament. I ended up with one of the ornaments with a star on top.

My friend went on to bigger and better things, and husbands. Her daughters are now married with their own children and cats I think of them when I find this simple ornament. It may not look much but to me it represents life. The tree of life. And hope that things would get better.

It still does today.

Charlotte


Quilted Throws as Wall Hangings

Four Seasons Lap Quilt Throw Quilted Wall Hanging adds color to a sofa. (Photo by Charlotte Ekker Wiggins)

Four Seasons Lap Quilt Throw Quilted Wall Hanging adds color to a sofa. (Photo by Charlotte Ekker Wiggins)

Quilted Throws as Wall Hangings

Not sure how to use quilted lap quilt throws as quilted wall hangings?

Lap quilts, also called throws, may be the most flexible of all of the handmade quilts. Lap quilts throws are usually 50x60 inches, a size that covers most people sitting in a chair. Ergo the name “lap quilt” and throw.

Over the years, I have found lap quilts throws also work well to quickly change a room decor when using them as a wall hanging. They are excellent in entryways, as focal points in a room or nursery, and as a welcome at the top, or bottom, of stairs.

Four Seasons Lap Quilt Throw Quilted Wall Hanging is a personal favorite, I have one hanging at the bottom of the steps to my basement. In addition to announcing the seasons, this quilted wall hanging can help to warm up a cold wall.

Four Seasons throw makes an interesting, and warm, quilted wall hanging. (Photo by Charlotte Ekker Wiggins)

Four Seasons throw makes an interesting, and warm, quilted wall hanging. (Photo by Charlotte Ekker Wiggins)

When I want to change the decor, I remove Four Seasons Lap Quilt Throw Quilted Wall Hanging and thread a new one through the metal rod. For this season I am using the all cotton, Holiday Traditions Lap Quilt Throw Quilted Wall Hanging.

With a flick of a wrist, the entrance to my basement takes on a holiday theme.

Four Seasons throw can easily be replaced with another seasonal throw. (Photo by Charlotte Ekker Wiggins)

Four Seasons throw can easily be replaced with another seasonal throw. (Photo by Charlotte Ekker Wiggins)

And no need for extra storage for Four Seasons Lap Quilt Throw Quilted Wall Hanging. Two folds and the winter scene adds color to chair or sofa.

Two folds and Four Seasons Lap Quilt Throw Quilted Wall Hanging offers a little winter cheer. (Photo by Charlotte Ekker Wiggins)

Two folds and Four Seasons Lap Quilt Throw Quilted Wall Hanging offers a little winter cheer. (Photo by Charlotte Ekker Wiggins)

These are excellent, all cotton imported throws that are soft to curl up with on a sofa or chair.

When not hanging, the little tabs on the back lie flat against the backing fabric, almost imperceptible to the eye. I have to gently move the rod down the top to even find them.

If you have a lap quilt throw without tabs, you can easily add those. There are also quilt hangars available that will easily hold the lap quilt throws as a wall hanging.

Quilted lap quilts throws make wonderful practical gifts. So many customers write to tell us how much gift recipients enjoy our lap quilts, and that’s without them knowing how versatile they can be!

Charlotte

Front Door Wreath

Inspiration to make a simple and inexpensive decorative door wreath. (Photo by Charlotte Ekker Wiggins)

Inspiration to make a simple and inexpensive decorative door wreath. (Photo by Charlotte Ekker Wiggins)

Front Door Wreath

Years ago, I kept a small dried wreath on my front door with dried flowers I picked during my walks. One day I opened the door to find a small deer munching on the greenery. Ever since, I have kept that in mind as I decorate my front door. I tended to use natural items in case deer decided to nibble on the decor for a snack.

For a couple of years, I have decorated my front door with a small grapevine wreath cut from my Missouri hillside garden. For some reason this year I became restless about that wreath and decided to replace it.

After shopping at several local home decor stores as well as craft stores, I decided I could remain restless until I found something that struck my fancy at a local thrift store. Some wreaths start at several hundred dollars and I was not interested in frustrating my grazing deer with silk greenery. I suspect they would just tear it apart trying to eat it.

Several weeks ago, I saw this square fake greenery covered wreath. I passed it the first time I saw it, then went back hoping it was still there. Even though I had a priced something similar at a crafts store, it was the shape that stayed with me. Having a different shape was a good option next to the larger, 5-foot grape vine wreath hanging nearby. Something similar to the square one was close to $50 at a crafts store.

As I was taking the green square wreath to the cash register ,I saw another smaller wreath that usually runs around $20.

The two at the thrift store, in excellent condition, cost $9.

I decided to replace the grapevine wreath on the left. (Photo by Charlotte Ekker Wiggins)

I decided to replace the grapevine wreath on the left. (Photo by Charlotte Ekker Wiggins)

I tucked the smaller round wreath inside the larger, square one. I thought about attaching it but if my deer decide to nibble on it, this way they can remove it without taking the whole door. Or at least the rest of the square wreath.

My biggest challenge was where to place the '"home sweet bees” sign, and the little skep, in relation to the rest of the two wreaths.

The sign is attached with two small wires on either end so I turned the wreaths over to attach the sign. There are several spots along the back of the square wreath to easily attach the wires.

Wires on the back of the square wreath are good for attaching signs. (Photo by Charlotte Ekker Wiggins)

Wires on the back of the square wreath are good for attaching signs. (Photo by Charlotte Ekker Wiggins)

I found the little skep, or tiny basket that beekeepers once used to use to keep bees, for a quarter. I have it on a thin mental strand so that I can easily add it to wreaths or what strikes my fancy. Some years it has paid a Christmas tree a short visit.

This was the front door wreath version with the skep on the top and the sign attached to the front instead of the back of the wreath.

I moved the wire through the greenery to secure it to the back of the wreath.

The Home Sweet Bees sign is attached to the back of the square wreath. (Photo by Charlotte Ekker Wiggins)

The Home Sweet Bees sign is attached to the back of the square wreath. (Photo by Charlotte Ekker Wiggins)

Then I tried the sign at the top of the wreath as I dabbed burgundy paint on some of the tiny foam balls that make up the fake berries.

The foam makes these substantial-looking wreaths lightweight, making them usable on door hooks.

See the metal ring in the upper right? This wreath can also be hung in a diamond shape thanks to that hook. Love having that option, makes this front door wreath even more versatile.

A few minutes of dabbing paint and the worn spots are covered. (Photo by Charlotte Ekker Wiggins)

A few minutes of dabbing paint and the worn spots are covered. (Photo by Charlotte Ekker Wiggins)

After looking at both options and removing the extra paint on my fingers, I decided this is the version I like best.

This is the current placement of the sign on the wreath. (Photo by Charlotte Ekker Wiggins)

This is the current placement of the sign on the wreath. (Photo by Charlotte Ekker Wiggins)

One of these days I will get a better sign made but, in the meantime, I am very happy with the combination of square green wreath with the inside garland and skep.

The wreath colors pick up the chartreuse colors in deck pillows and compliment the rest.

My “new” square green door wreath fits in nicely on my front deck. (Photo by Charlotte Ekker Wiggins)

My “new” square green door wreath fits in nicely on my front deck. (Photo by Charlotte Ekker Wiggins)

Now tomorrow, who knows. I may move the sign again.

Or maybe the deer will. What am I saying, we now have black bear sightings in the area, it could also be a bear!

Charlotte

Adding Bookcase Legs

One long 2 inch by 2 inch painted piece gives this bookcase some height. (Photo by Charlotte Ekker Wiggins)

One long 2 inch by 2 inch painted piece gives this bookcase some height. (Photo by Charlotte Ekker Wiggins)

Adding Bookcase Legs

You see them all over home decor, home remodeling sites and home renovation shows, special mud rooms with room to hang coats, store boots and maybe even do crafts. They usually include cubby holes and bins to store backpacks and other items, either in a dark grey or white finish.

This is one of those white pre-fabricated cabinets that can easily provide shelving and storage. These pre-fabricated cabinets are delicate so they can’t hold much weight, such as books, but they do make nice little storage bins.

This small bookcase was left over from re-organizing a closet. Although not impressive as a stand alone piece of furniture, I easily updated the piece by simply adding legs. The legs were made from 2-inch by 2’inch pieces I cut the length of the book case and glued along the ridge on the inside edge of the bookcase..

Titebond III wood glue is excellent for bee hives as well as home wood projects!

I can’t use nails or screws because the particle board sides and shelves will splinter under the pressure of using nails and screws. Glueing on the legs, however, was easy.

I used the piece of wood along the full edge of the book case to cut down on the number of cat toys that get kicked under the piece.

You can also paint the are that looses the covering strip. It will take a couple of coats of paint; this is the first one. (Photo by Charlotte Ekker Wiggins)

You can also paint the are that looses the covering strip. It will take a couple of coats of paint; this is the first one. (Photo by Charlotte Ekker Wiggins)

See the little missing piece bottom right? This is easy to fix with a few coats of a good paint. Here I have only applied the first layer to test whether the particle board will absorb it.

So here is the book case with legs sitting next to my front door giving me a tiny mudroom-like storage space.

The book case is now a little mudroom by my front door. (Photo by Charlotte Ekker Wiggins)

The book case is now a little mudroom by my front door. (Photo by Charlotte Ekker Wiggins)

There is a closet to the left of the front door so this little storage unit helps to expand the front area into a pseudo mud room. The little bookcase now looks more like a free standing furniture piece and I have the necessities I need close to my front door: fish food; a botanical reference book; muslin kitchen towels, my crocs and the blanket for the front porch sofa when temperatures turn cool.

I have added a couple more layers of paint to seal that one spot on the right and, you will be happy to know, the cats stood by carefully watching me. As soon as the bookcase was back in place, they volunteered to test the new legs with their soccer games. So far, only one toy made it through the goal.

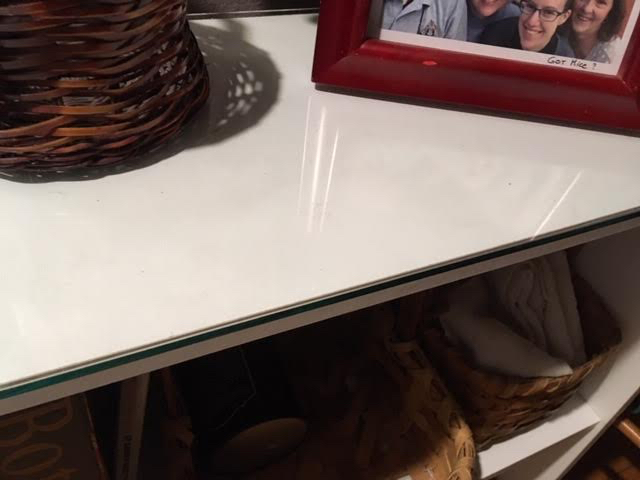
One more addition; a glass top to protect it from heavy use. (Photo by Charlotte Ekker Wiggins)

One more addition; a glass top to protect it from heavy use. (Photo by Charlotte Ekker Wiggins)

I also added a quarter inch piece of glass to the top to protect it from heavy use. I tend to drop baskets full of items on it, sometimes towels and plants I want to bring inside. For about $15, the top is now protected and becomes yet another place I can use.

I would say this little hack turned out quite well, wouldn’t you?

Charlotte


Covering Paint Stains

Simple daisy flower embroidery can cover paint stains on fleece. (Photo by Charlotte Ekker Wiggins)

Simple daisy flower embroidery can cover paint stains on fleece. (Photo by Charlotte Ekker Wiggins)

Covering Paint Stains

When I learned to embroider at age 8, it did not cross my mind that I would be using that skill decades later to save a favorite fleece jacket from a close encounter with paint. Whether it is paint, a food stain or any other mark you didn’t mean to have on fabric, the simple daisy embroidery design can easily cover the mark so you can continue to use the item.

Actually it doesn’t have to be just the daisy design. You can use butterflies, bees or other garden-inspired embroidery represented in this Buzzing Garden Baby Crib Quilt as your inspiration. The daisy design has become my go to design because it’s easy to do and can nicely cover a variety of stains.

In this example, I ended up with yellow paint on a sleeve of this favorite beige fleece gardening jacket. Since I like to wear it also shopping and not only in my garden, I set it aside for a little rehab work.

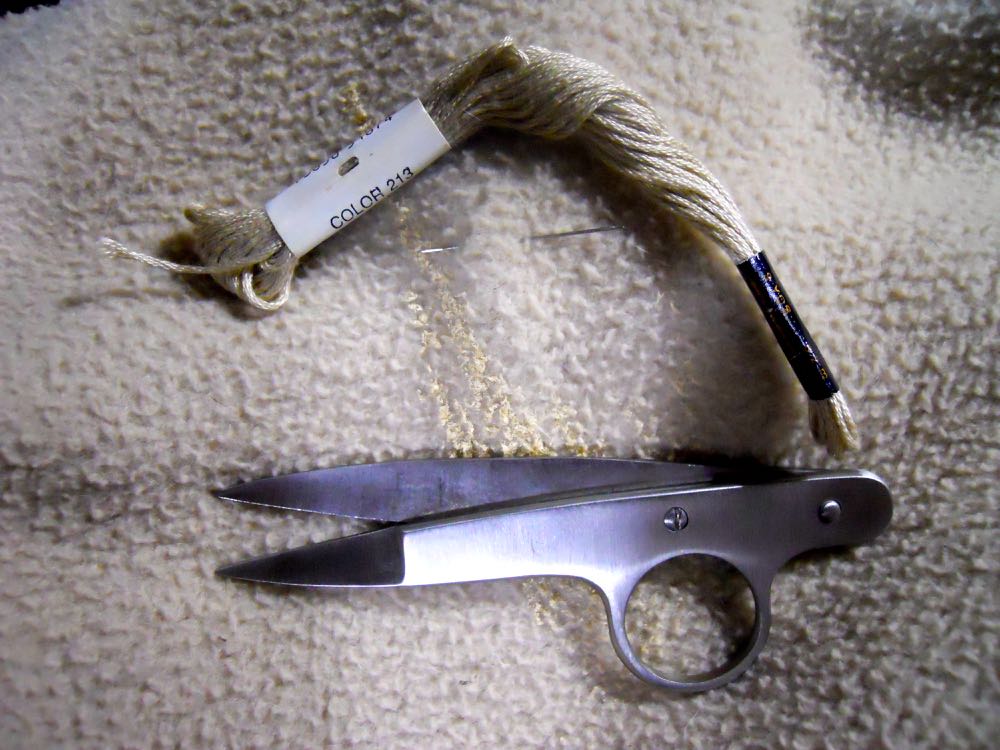
Start by choosing embroidery floss that most closely matches the color of the basic item. Matching colors will help the spot blend in.

I could have also selected an embroidery floss that matches the yellow paint. That color selection would have made the spot more prominent.

Match the embroidery floss color to the fabric. (Photo by Charlotte Ekker Wiggins)

Match the embroidery floss color to the fabric. (Photo by Charlotte Ekker Wiggins)

Once I had the matching embroidery floss, I just started the embroidery process, covering the yellow paint with the daisy flowers sewn very close together.

As you embroider, see how the matching floss color covers the paint. (Photo by Charlotte Ekker Wiggins)

As you embroider, see how the matching floss color covers the paint. (Photo by Charlotte Ekker Wiggins)

As I covered the paint, a design shaped itself over the paint.

To make the embroidery look more deliberate, I also embroidered several other patches on the jacket so that it appears to be part of the jacket look.

In addition, I used thread snips to carefully and gently cut off some of the remaining paint since paint solvent would not remove it.

The grouping of daisy embroidery now covers most of the pain. (Photo by Charlotte Ekker Wiggins)

The grouping of daisy embroidery now covers most of the pain. (Photo by Charlotte Ekker Wiggins)

I took the embellished jacket out for a spin earlier this week. It was nice to have it back and to be able to continue to use it!

Charlotte

Homemade Laundry Detergent

Basic ingredients, and utensils, to make homemade laundry detergent.

Basic ingredients, and utensils, to make homemade laundry detergent.

Homemade Laundry Detergent Recipe

Maybe you don’t like all of those scents added to commercial laundry detergents or someone in your family has an allergic reaction. Or maybe you have a well-loved quilt you want to wash and don’t want to use more harsh chemicals on the older fabric. Whatever the reason, it’s very easy to make your own homemade laundry detergent without all of those additives. You will save money along the way, too!

The basic laundry detergent recipe is as follows:

1 bar mild soap such as Ivory or Fels-Naptha

1 cup Arm and Hammer laundry booster

1 cup 20 Mule Team Borax

1 cup OxiClean (Optional)

I have used this recipe both with and without OxiClean. Since I was trying to determine what was causing an allergic reaction, I removed the OxiClean. It worked quite well without it.

The most time-consuming part is grating the bar of soap. I ended up using a cheese grater, then crumbling the smaller soap pieces with a roller.
Use a cheese grater to make soap pieces to add to the laundry soap mix.

Use a cheese grater to make soap pieces to add to the laundry soap mix.

You can use any soap of preference. Since I was trying to eliminate possible sources of skin rashes, I use the mildest available soaps: Fels-Naptha and plain Ivory.

No time to roll the soap? Not a problem, this is how it looks when you are mixing it all together. This has both the larger soap pieces as well as the smaller crumbled ones. I include both because I was playing with the different sides of the grater.

This is how the finished mix should look with little yellow dots of soap mixed in.

This is how the finished mix should look with little yellow dots of soap mixed in.

Once done, store in a container. I repurpose old peanut containers because they have handles on the back side, making them easy to lift.

To use, it takes 1-2 scoops per full load. I use 1 scoop on my household and day clothes, 2 scoops on the gardening items where the washer water turns brown.

Store finished mix and make sure to mark it. I recycle these peanut containers for my detergent.

Store finished mix and make sure to mark it. I recycle these peanut containers for my detergent.

Earlier this year, I made a batch for a friend looking for a laundry detergent without all of the added perfumes. I picked up containers similar to these at a local big box store and added a label with her name on it. She asked for the recipe so the next time I make it for someone, I will include the recipe. She was so thrilled to get this I can say this would also make a nice housewarming gift!

Charlotte

Repairing Quilt Tears

Even with stabilizing backing, stretch fabrics can develop wear spots and tears.

Even with stabilizing backing, stretch fabrics can develop wear spots and tears.

Repairing Quilt Tears

Every once in awhile, we get to see one of our custom quilts returned for repairs because they've been well-loved and used. That was the story behind this round custom quilt made out of t-shirts and other favorite clothing.

One of the shirts, a polkadot pink with white dots, tore along the longer side. Another couple of wear spots were developing on the short side of the block. The customer asked if there was some way we could replace the torn block with a new piece of clothing.

Taking a close look at the finished quilt, it was not possible to tear out the pink polkadot fabric so we did the next best thing. Selecting a piece of sturdy, all cotton gross grain cotton ribbon, I sewed the ribbon on two sides over the long tear to keep it from moving. Securing both sides will reduce either block from tearing and will hold the torn side together.

The same ribbon was sewn across the shorter side to cover the newly-developing wear spots.

Grossgrain ribbon is an excellent way to reinforce worn spots and repair tears.

Grossgrain ribbon is an excellent way to reinforce worn spots and repair tears.

Since several other quilt blocks had ribbons either in or along the side of the blocks, the purple gross grain ribbon fit right into the rest of the blocks.

If you don't want to use ribbon, you can make your own ribbon out of fabric reinforced with a stabilizer to ensure the fabric ribbon can handle the pressure.

The complimentary purple gross grain ribbon color blends right in with the rest of the blocks.

The complimentary purple gross grain ribbon color blends right in with the rest of the blocks.

It was fun to see a custom quilt back and so well-loved. As I tell customers, quilts should be used, not stored away somewhere. And if there is a tear, there's usually a way to fix it!

Charlotte

Making A Love Seat Cover

My front porch love seat with it's brand new blue, ever so soft love seat cover for $3.50.

My front porch love seat with it's brand new blue, ever so soft love seat cover for $3.50.

Making A Love Seat Cover

I am so tickled with the results I had to share. Do you have an outside love seat that's seen better days?

Mine wasn't bad yet but it was - well, orange. More of a terra cotta, ceramic plant kind of orange but orange, and a plastic nevertheless.

This plastic orange love seat works well in hot summers but not so much in cold winters.

This plastic orange love seat works well in hot summers but not so much in cold winters.

The front porch love seat was fine for hot summer days but it looked out of place after last year when I repainted all of my garden benches a wonderfully uplifting blue. They now stand out nicely among the greenery, or winter drab, and give Bluebird Gardens a bit of a nod.

My formerly-red garden bench had a new back added and a couple coats of blue paint.

My formerly-red garden bench had a new back added and a couple coats of blue paint.

Although I knew I would eventually have to tackle the front porch, for winter I just draped a soft tan throw over it so I could sit out on the bench and watch it snow, or rain, or just sit.

Although it was warm, the throw moved around a lot and still didn't look quite right.

A temporary tan throw over the orange love seat was hard to sit on without losing the throw.

A temporary tan throw over the orange love seat was hard to sit on without losing the throw.

How hard could it be to find a blue love seat slip cover, I thought to myself. Well, it was not an easy search. There are a number of beige, brown and black ones but few in the matching blue. I finally located one for $229 not counting $14.95 shipping.

Not wanting to spend that much money on a seat cover that may be visited by squirrels, birds and my grungy pants, I started looking through local thrift stores hoping I might find something there that was better than orange. Yes, my expectations were pretty low but anything would have been better than the plastic orange.

These two pre-owned 50x60 inch throws were the perfect blue color for $4 for both.

These two pre-owned 50x60 inch throws were the perfect blue color for $4 for both.

At the local Goodwill store, I found two 50x60 fleece throws originally from Walmart in the perfect blue color. I thought I would have to sew the two together to have enough fabric but I wasn't sure so I picked both of them up.

A few pins in the right place and I cut off all four throw edges to give it a fit at the corners.

Cutting off the 50x60 inch throw corners and sewing them gave the love seat a finished look.

Cutting off the 50x60 inch throw corners and sewing them gave the love seat a finished look.

I added elastic all around the edge. leaving each of the corners with a gap in case I needed to adjust the elastic tension:

Leaving the back of the seat cover open at the corners allows me to easily adjust the elastic.

Leaving the back of the seat cover open at the corners allows me to easily adjust the elastic.

Not only does it nicely fit in with my other garden benches, but I made two, one for when the other one is in the wash.

Total price? $7. The fleece blankets were $2 each, then I used about $3 in elastic. If I deduct that from the $245 I was initially going to spend, that leaves a nice little account to buy plants. It's a family joke, I grew up learning several different ways to do math and one of my brothers calls that my "gardening math."

I'm going outside to sit on my new front porch blue bench and dream about what new plants I will now buy. On sale, of course!

Charlotte


Handmade Cards Art

This bluebird was painted by the signer of the card and was turned into a lovely thank you card I was lucky enough to get.

This bluebird was painted by the signer of the card and was turned into a lovely thank you card I was lucky enough to get.

Handmade Cards Art

Although it is becoming a - well, dying art - handmade thank you cards are still a favorite in my house. They are art, unique and stories in and of themselves. 

As we enter the extended holiday season, when some people still teach their children to write thank you cards, here is some inspiration to save your favorites.  To continue to appreciate these lovely pieces, there are several things you can do with these works of original art to repurpose them and keep them in your life:

1. Use as book marks. Instead of turning down the pages to mark where you last left off in a hardcover book, use a card to mark the spot. That way you can still enjoy the card and keep the book pages from getting creased.

2. Mark recipes you want to try. I love reading recipe books but don't always remember a recipe I want to locate again later. When I find one I want to find again, I pop in one of these cards so I can easily find it later.

3. Frame the cards for wall art. This is one of my favorite uses of handmade cards art, especially if you have several in the same theme, such as I did.

It doesn't have to be only a theme, find something that unifies them - maybe they are all the same color, or by the same author.

If all else fails, add a unifying element by placing them all in the same frames.

Love the elegance of this thank you card, a handpainted bird on an old book page in french.

Love the elegance of this thank you card, a handpainted bird on an old book page in french.

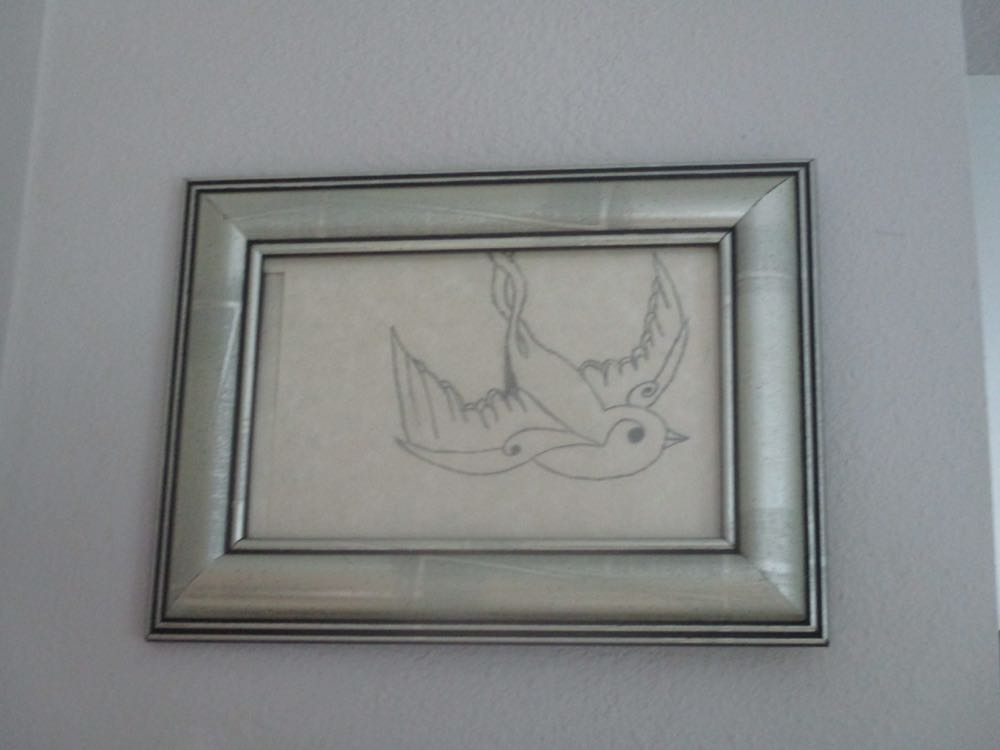
The thank you card that inspired me to shop for frames at our local thrift stores was this small bird card by a teenage boy.

I kept all of the cards intact so I can still read the inside messages.

This was a thank you from a young man who drew this bird free hand.

This was a thank you from a young man who drew this bird free hand.

Here they are, all three framed bird thank you notes hanging together off my kitchen:

The picture frames are also each different but are all in silver tones and compliment the cards.

The picture frames are also each different but are all in silver tones and compliment the cards.

Who said you had to pay a lot for original art? You probably have some right in your own mail box!

Charlotte

Basket Flowers

This tiny silver toned floral basket makes a great way to collect small flowers for a table.

This tiny silver toned floral basket makes a great way to collect small flowers for a table.

Basket Flowers

A friend recently told me she admires the fresh flowers I have around my house, especially the small bouquets tucked on tables. Come to think about it, I rarely seem to see small flowers in home improvement shows so this is going to be about how to easily incorporate those tiny gems into your home.

Right Size Container

The first step is to find the right size container that fits the space where you want to place flowers. I like having flowers on my den coffee table where I do some of my work. I also like fresh flowers on my kitchen island but I have to mitigate that location with cats that like to stop by and munch on anything that is long, skinny and green so long, skinny and you know what is out for the kitchen.

Actually I don't add long and skinny greens to my den coffee table, either, it just makes things simpler and - well, quieter. I don't have to police the flowers as much, although any greens do seem to invite trouble.

One of my favorite thrift store finds for the den is this little silvertone floral basket that is 6x4x4 inches, not counting the long handle. It has a clear plastic liner inside that holds water, or I could have popped a glass jar the size of the inside of the basket to keep the flowers hydrated if the liner had been missing. The flowers sit nicely low to the ground in this flower arrangement. I could also have cut the flowers with longer stems so they filled the space between the basket and basket handle so this gives me some versatility.

Now that the growing season is starting to slow down, I cut some geraniums from my deck plants as anchors and then started to add whatever else I could find in my garden that was small.

Geraniums from my deck add color to other tiny flowers cut from my garden.

Geraniums from my deck add color to other tiny flowers cut from my garden.

Miniature roses take center stage when they are added to these little bouquets, especially red ones. I have only one in this combination but it sits nicely in the center of the flowers, anchored on either side by the peach geraniums and purple verbena.

This was my first flower bouquet with salmon lobelia and one Black Eyed Susan flower.

This was my first flower bouquet with salmon lobelia and one Black Eyed Susan flower.

This is my second bouquet with the miniature red rose, the first one was leftovers from pruning: salmon Lobelia, pink phlox, self heal and a couple of butterfly bush flowers initially filled the silver flower basket.

Other fresh flowers I added included liriope, forget me nots and the sweet little white flowers that are just opening. Don't get too close to those, though, garlic chives are pretty but they are definitely not sweet-smelling!

Charlotte

Personalized Christmas cards

Last year, one of our artists tossed out a card with a gift check inside so I decided I needed to make my cards stand out this year.

I thought about making my own cards but time escaped me. I was going to make something inspired by our ribbon garden quilt, reminiscent of cards I remember making when I was a kid.

Seeing a ribbon on a handmade card a friend sent me, ribbons were still on my mind. I took some of our organza blue ribbon and added it to ready made Christmas cards.

Inside, I tucked the check into the ribbon so that it wouldn't be lost once the card was opened.

This card will be a little harder to loose, don't you think?

Charlotte

Paint Stick Snowmen Ornaments and Gift Tags


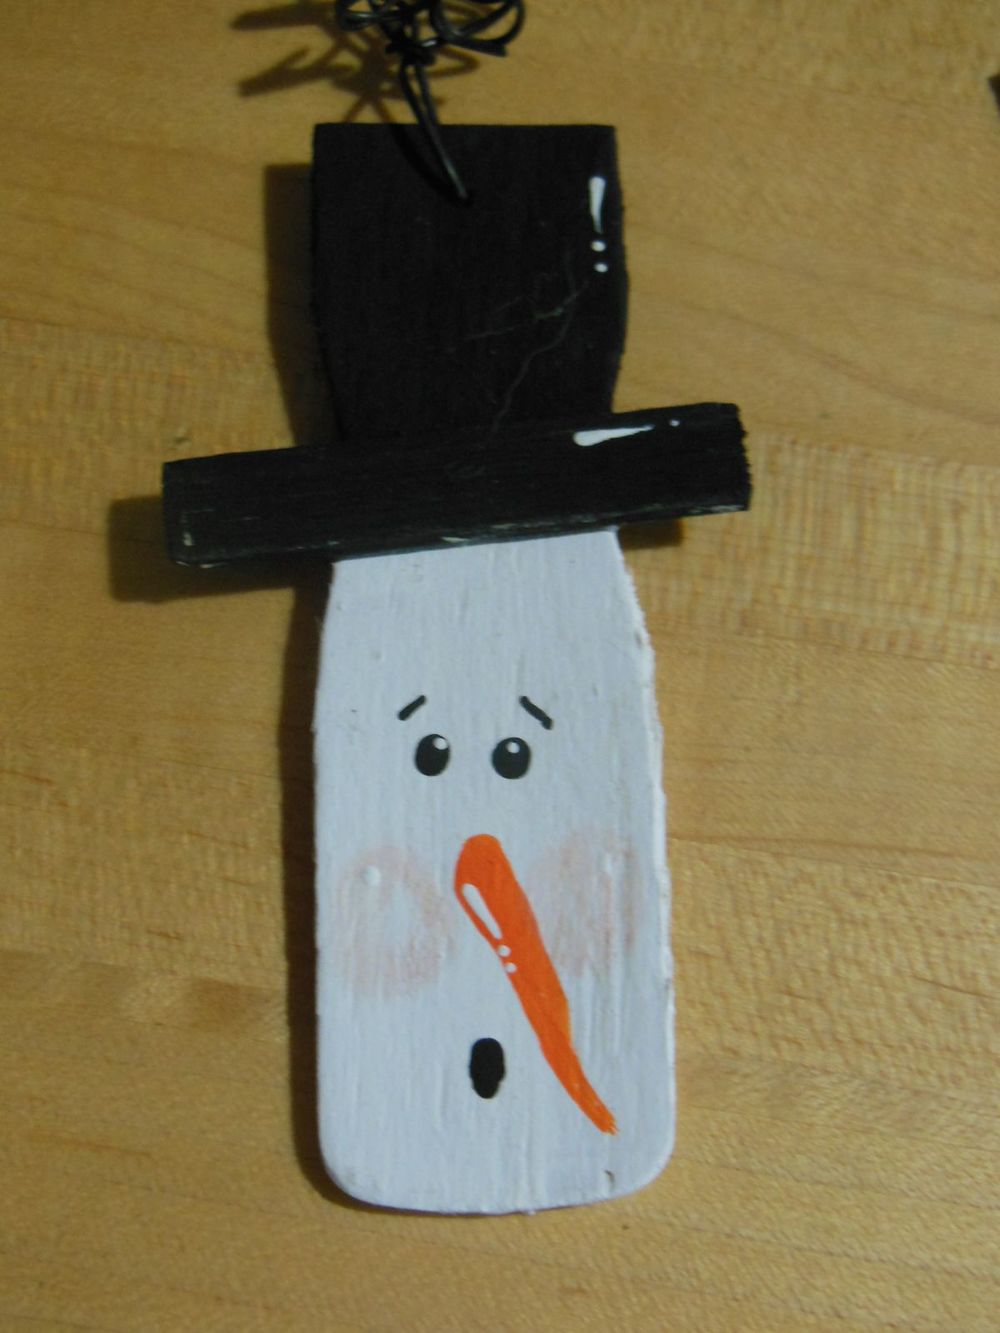
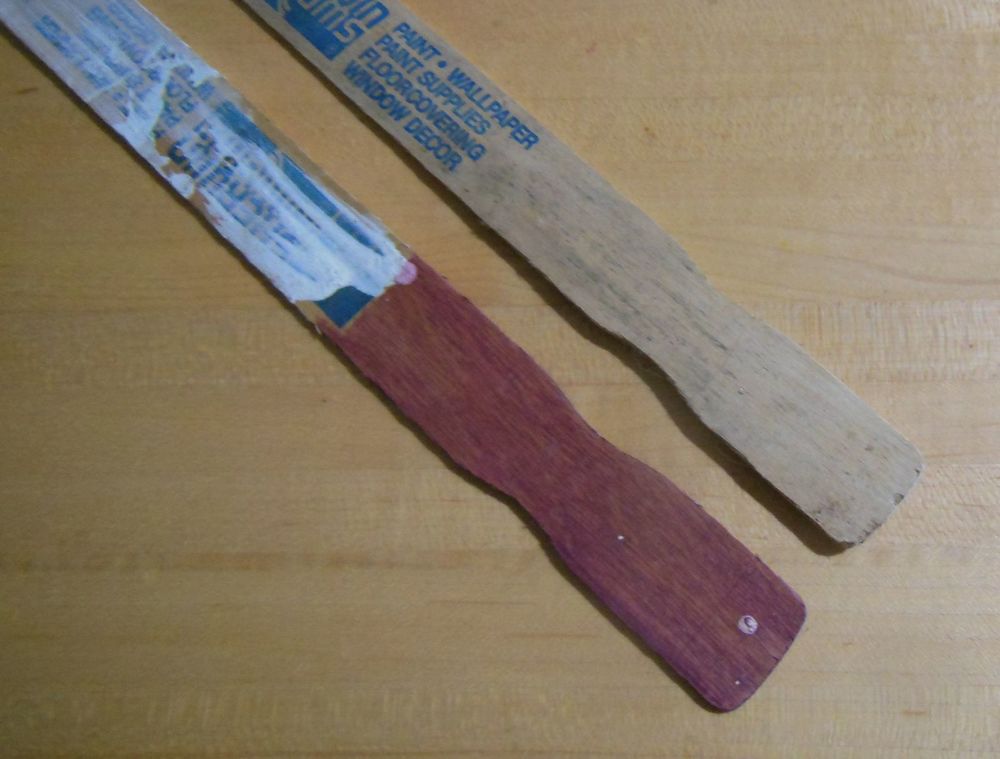
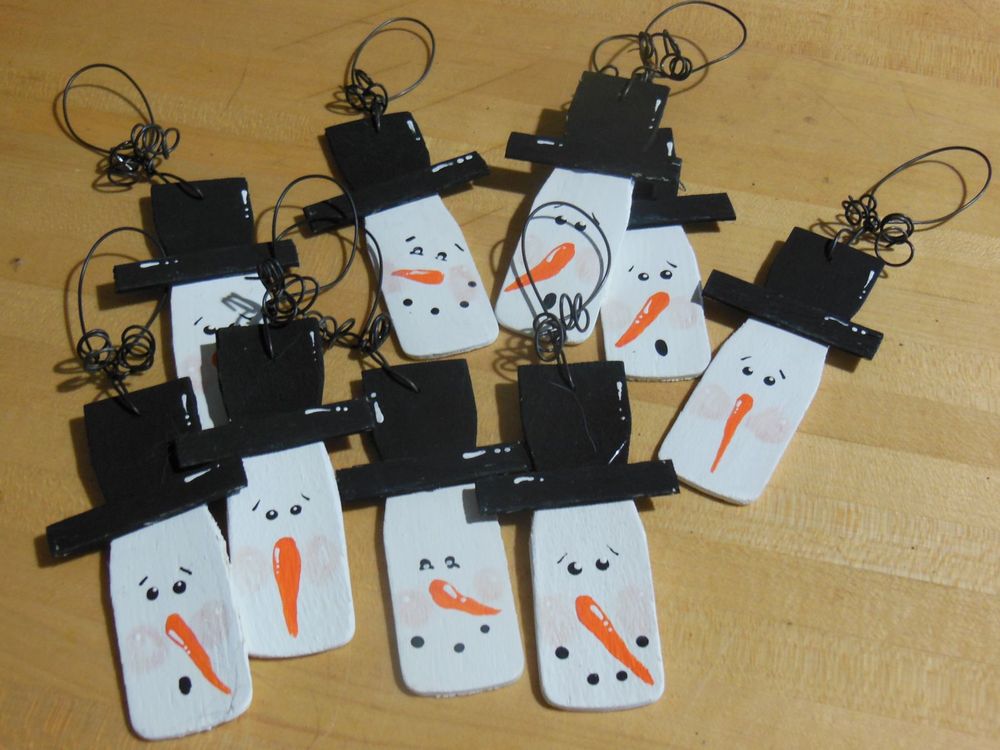
I saw this charming handmade snowman ornament at a local crafts fair. Who doesn’t love snowmen in their holiday home décor and have a pile of paint sticks gathering dust somewhere!

One of my friend’s husbands bought a Let It Snow Throw for her for Christmas so one of these little guys will be on her package as a gift tag. She can then add it to her Christmas tree later as an ornament and memento of this year's Christmas.

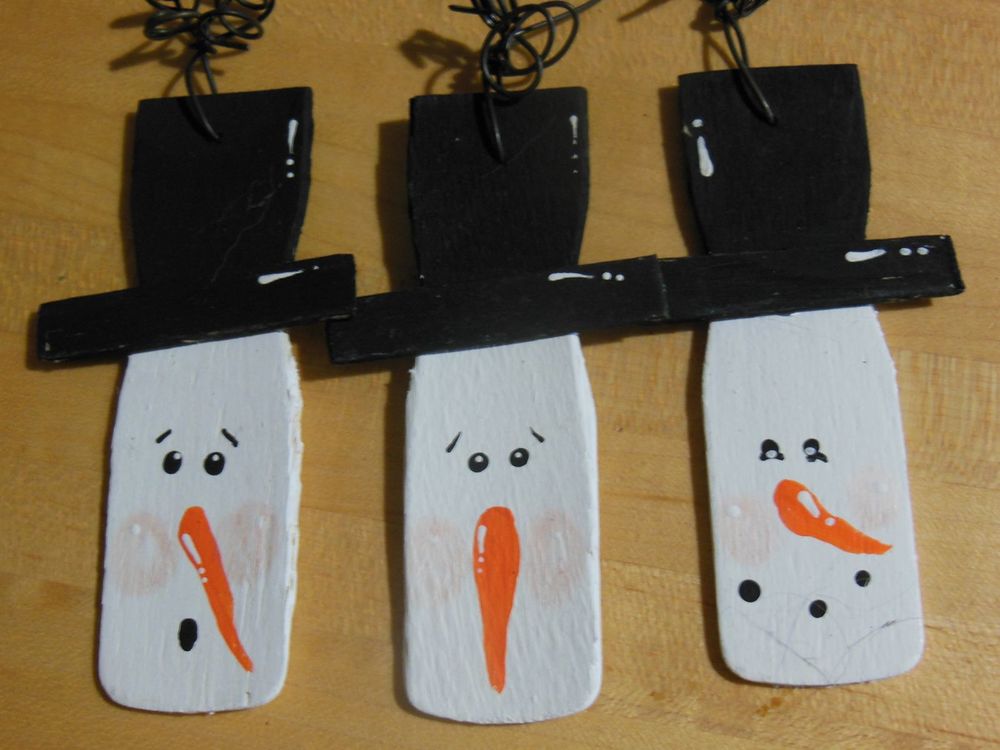
These snowmen were made out of the shaped tip of a paint stick with the hat brim cut out of the rest.

Painting is simple. The charm comes in the details including placement of the dots for the mouth and the little white highlights on the hat.

 These examples have a fancy metal wire hangar but something simple would work just as well.

Fun easy project to do with kids of all ages!