Dry Russian Sage

Dry Russian sage, bottom right, adds a nice pop of color to my front porch wreath full of dry greenery. (Photo by Charlotte Ekker Wiggins)

Dry Russian sage, bottom right, adds a nice pop of color to my front porch wreath full of dry greenery. (Photo by Charlotte Ekker Wiggins)

Dry Russian Sage

If you enjoy dry flower wreaths and using dry flowers in home decor, there is a perennial that can add a nice pop of bluish purple that often gets overlooked.

We all tend to look for lavenders but have you considered Russian Sage?

Russian sage is an easy to grow perennial often used as a landscape plant. (Photo by Charlotte Ekker Wiggins)

Russian sage is an easy to grow perennial often used as a landscape plant. (Photo by Charlotte Ekker Wiggins)

I see Russian Sage growing all around where I live in mid-Missouri. It is a popular landscaping plant, which means businesses tend to use them to add color. One business I know pulled them out because they were a magnet for bees, which of course I loved to see. That inspired me to add them to my garden.

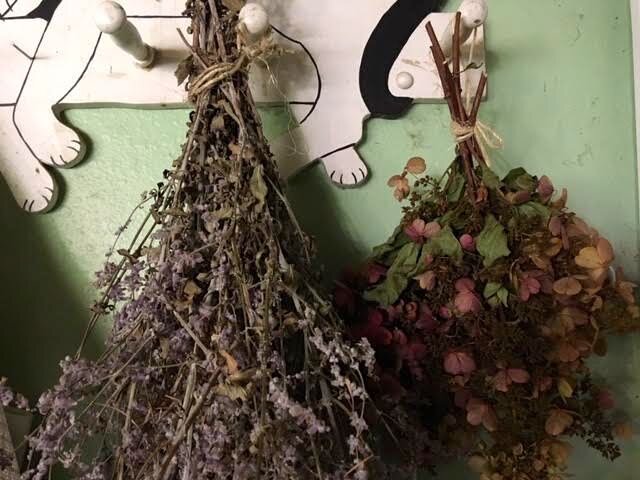
I hand bundled Russian sage in garage on coat hangars to dry. Panacle hydrangeas, right, as well. (Photo by Charlotte Ekker Wiggins)

I hand bundled Russian sage in garage on coat hangars to dry. Panacle hydrangeas, right, as well. (Photo by Charlotte Ekker Wiggins)

How to Dry Russian Sage (or any other plants)

It is easy to dry this hardy perennial. Once you cut off the blue spikes, tie with a string and hang for a few days so the greenery and stems dry.

I use coat hangars in my garage. If the weather gets cool, place them in a basket over your refrigerator, the heat of the motor provides a nice drying spot.

Once dry, you can easily incorporate Russian sage into wreaths and other dry flower arrangements.

I also have a bouquet dry Russian Sage sitting in a windowless bathroom. The bluish purple color adds a nice punch of color through winter when I won’t have fresh flowers to add.

This sprig of dry Russian Sage now decorates a corner of a bathroom. (Photo by Charlotte Ekker Wiggins)

This sprig of dry Russian Sage now decorates a corner of a bathroom. (Photo by Charlotte Ekker Wiggins)

Once dry, Russian sage also looses its scent. I don’t use oils but it occurred to me you could easily add a drop of lavender.

I added small bunches of Russian Sage to my outside grapevine wreaths, adding a nice pop of color. The grapevine wreath on my front porch has a little gourd bluebird that is fun to decorate with dried plants and branches. I’m sure the deer will let me know what they think of it.

Any day now.

Charlotte

Shipping Rose of Sharon

Rose of Sharon trimmed into a tree form at the entrance to my garden. (Photo by Charlotte Ekker Wiggins)

Rose of Sharon trimmed into a tree form at the entrance to my garden. (Photo by Charlotte Ekker Wiggins)

Shipping Rose of Sharon

My brother in Virginia and I share a love of gardening. He has three flat acres compared to my one slopping hillside. Our garden concepts and designs are different but we both love having blooming plants mid to late summer.

He discovered crape myrtles; I found Missouri’s native rose mallows and their hardy cousins Rose of Sharon, a relative of the popular tropical hibiscus. The ones I have are white, pink, purple, and I discovered a double purple earlier this year.

When my brother mentioned he was looking for something else that blooms late summer, I decided to send him some of my Rose of Sharon starts for his birthday. I settled on the purplish ones to compliment his backyard full of pink, red and soft lavender crepe myrtles.

Rose of Sharon, also called Shrub Althea (Hibiscus syriacus) are old-fashioned garden staples where I live in mid-Missouri. Even some businesses use them as landscaping plants because they are hardy and will grow in less than ideal conditions. I consider them vintage flowers, like these featured in a set of vintage flowers handmade kitchen towels.

After checking if I could ship them to Virginia, I dug up small starts, wrapping the roots in wet soil and newspaper. I shook them to remove any bugs, then hosed them down and allowed them to dry. Don’t want any bugs hitchhiking their way out east.

I didn’t have a box that they would fit in so I made a shipping container out of cardboard. It was an odd shape but it worked. Believe it or not, this homemade box helped the plants get safely to Virginia.

A self-made shipping box for sending Rose of Sharon through the mail. (Photo by Charlotte Ekker Wiggins)

A self-made shipping box for sending Rose of Sharon through the mail. (Photo by Charlotte Ekker Wiggins)

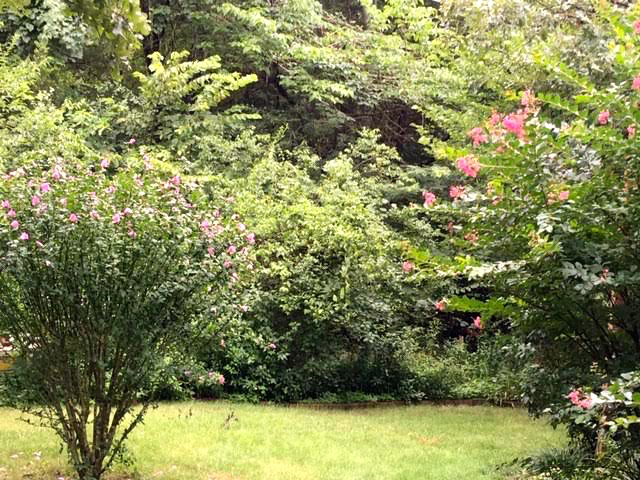
A local friend has some of the crepe myrtles my brother in Virginia has so I sent my brother a photo of the Rose of Sharon, on the left, close to red crepe myrtles, right. It helps to see the two of them together, especially when my brother didn’t know what a Rose of Sharon shrub looked like.

Rose of sharon, left, growing with crape myrtles at a friend’s house here in Rolla. (Photo by Charlotte Ekker Wiggins)

Rose of sharon, left, growing with crape myrtles at a friend’s house here in Rolla. (Photo by Charlotte Ekker Wiggins)

Once the Rose of Sharon starts arrived in Virginia, my brother said he didn’t think they were going to make it. He said only three looked good; the rest had yellow leaves or were dropping their leaves.

I usually remove the leaves once they turn yellow.

Shipped rRose of Sharon starts potted once they arrived in Virginia. (Photo by Charlotte Ekker Wiggins)

Shipped rRose of Sharon starts potted once they arrived in Virginia. (Photo by Charlotte Ekker Wiggins)

Nonsense, I said, they are hardy. Now that they are in a pot, water daily, place in shade and wait for the new greenery to start growing.

My brother wasn’t so sure.

I knew better. I had moved three Rose of Sharon “trees” to a new spot in my garden earlier this summer. Two made it quickly but a third one on the left in photo dropped all of its leaves.

Rose of Sharon, left, dropped all of its leaves before settling into a new garden spot. (Photo by Charlotte Ekke r Wiggins)

Rose of Sharon, left, dropped all of its leaves before settling into a new garden spot. (Photo by Charlotte Ekke r Wiggins)

I wasn’t discouraged, I had moved these before. The trick is to keep the roots mulched and watered as the Rose of Sharon settles in. In these record hot summer temperatures, I carried water to this garden spot to make sure the Rose of Sharon roots stayed hydrated.

About three weeks later, new growth started to appear on my moved Rose of Sharon.

New leaf growth is a sign the Rose of Sharon has settled into its new garden spot. (Photo by Charlotte Ekker Wiggins)

New leaf growth is a sign the Rose of Sharon has settled into its new garden spot. (Photo by Charlotte Ekker Wiggins)

A good month later, my brother said the Rose of Sharon starts I shipped him not only all pulled through but they are doing quite well.

Now my brother said he has to find spots for ALL of them in his garden.

Shipped Rose of Sharon starts recovering in their new Virginia home. (Photo by Charlotte Ekker Wiggins)

Shipped Rose of Sharon starts recovering in their new Virginia home. (Photo by Charlotte Ekker Wiggins)

Not only are they pretty and a good bee plant but Rose of Sharon are hardy and easy to grow. I have most of mine trimmed into tree shapes. They can also grow as shrubs to fence off areas. They do drop their leaves over winter.

Happy belated birthday, David!

Charlotte


Giving Stargazer Lilies

Stargazer Asiatic lilies carry pollen at the end of their protruding stamens. (Photo by Charlotte Ekker Wiggins)

Stargazer Asiatic lilies carry pollen at the end of their protruding stamens. (Photo by Charlotte Ekker Wiggins)

Giving Stargazer Lilies

One of the advantages of having a Missouri hillside pollinator garden is that I can share some of the flowering residents with friends. It’s fun to get floral jewelry like this gold orchid pin, too, but there is no substitute for the real fresh flowers.

In early July, my little collection of Stargazer lilies bloom, one of the most aromatic of my summer blooming perennials.

I picked up the bulbs on sale last year, not expecting many of them to survive but I have been pleasantly surprised.

The biggest issue with these lovely blooms is that they may need to be staked. The flower stalks are thick but not strong enough to hold up the lovely flowers.

History of Stargazer Lilies

Stargazer lilies are, in a word, dramatic. The almost 6-inch wide individual flowers can easily command a room in a flower vase so they are fun to share.

The Stargazer was developed in 1978 by Leslie Woodruff. He cross-pollinated an Oriental lily and Asiatic lily bringing together the fragrance and shapely flowers of an Asiatic lily and bright colors as well as ‘hardy’ habits of an Oriental lily. Since the flowers open towards the sky, they were named Stargazers.

The most common stargazer lily species has petals of bright pink color and speckles in yellow and white hues. Pink, white and yellow are also available. The fragrance of the hybrid lilies is bold yet pleasant and heady. The flowers stay fresh for longer time and thanks to their sturdy stem, they are a fantastic choice as cut flowers and long-stemmed flower arrangements.

Remove Pollen

Before taking them inside, however, cut off the pollen at the end of the long stamens. The pollen will permanently stain anything and everything it touches, including the flower petals.

To remove the pollen, cut off the pollen from the end of the stamens.

At first I thought cutting off the pollen would completely change the look of the flower but I was wrong. They still look nice and, even better, still smell as lovely as ever.

Cut off the protruding stamens to minimize pollen stains. (Photo by Charlotte Ekker Wiggins)

Cut off the protruding stamens to minimize pollen stains. (Photo by Charlotte Ekker Wiggins)

I do the trimming outside so the pollen can fall into the garden instead of covering my inside table surfaces as well as my hands.

Although I love the pollen for my pollinators, I do cut them off from gift flowers.

Here are the Stargazer lilies now in flower vases ready for the trip to their new homes.

These Stargazer Asiatic lilies are ready to be shared. (Photo by Charlotte Ekker Wiggins)

These Stargazer Asiatic lilies are ready to be shared. (Photo by Charlotte Ekker Wiggins)

To cut the Stargazer Asiatic lilies, make a 45-degree cut at the approximate length they will fit in a flower vase. Remove the bottom leaves so they don’t sit in the water.

If you are not sure the gift recipient will be around when you deliver them, add a gift card. I save the ones I get from florists so I can recycle them with one of my business cards.

Finally, to make sure the gift flowers arrive safely, I store them in one of my blue paint buckets with towels tucked inside around the flower vases to keep them from falling over and spilling water all over my car seats.

Ask me how I know that can happen.

Gift Stargazer Asiatic lilies travel in a blue bucket to make sure they arrive safely. (Photo by Charlotte Ekker Wiggins)

Gift Stargazer Asiatic lilies travel in a blue bucket to make sure they arrive safely. (Photo by Charlotte Ekker Wiggins)

So much fun to share these lovely wonders. I left one on a friend’s desk this summer. She thought I had purchased them from a florist instead of growing them myself.

Don’t forget to save one for yourself; I put them in my bathrooms so that I can enjoy the scent when I am relaxing in the tub.

Charlotte
Painted Apple Gourd Birdhouses

Painted apple gourd birdhouses getting their last drying before hanging in trees. (Photo by Charlotte Ekker Wiggins)

Painted apple gourd birdhouses getting their last drying before hanging in trees. (Photo by Charlotte Ekker Wiggins)

Painted Apple Gourd Birdhouses

You are going to start seeing these gourds at local farmers markets late summer so I wanted to inspire you to think ahead. These gourds can make charming homemade gifts as hand painted birdhouses so this is how to make them into something simple: apples.

A friend gave these to me with the wren-size holes already drilled. I love wrens as well as the other birds that like the 1 1/4 inch hole entrance: tufted titmice and downy woodpeckers. If you want these birdhouses for other birds, check on what size entrance the specific bird likes. You can find a number of these guides online, here is one as an example:

Bird house hole sizes.jpg

The gourd will also need holes on the bottom to let any moisture drain. A simple drill bit 1/4 inch wide will do the trick.

Drilling holes in the bottom help the gourds stay dry. (Photo by Charlotte Ekker Wiggins)
Drilling holes in the bottom help the gourds stay dry. (Photo by Charlotte Ekker Wiggins)

Simple eye hooks securely screwed into the top will work to hang these gourds. I used copper wire from plant packaging to give the gourds a safe hanging wire.

Simple eye hooks into the top next to the stem make the gourds easy to hang. (Photo by Charlotte Ekker Wiggins)

Simple eye hooks into the top next to the stem make the gourds easy to hang. (Photo by Charlotte Ekker Wiggins)

Now paint the gourd with a good primer.

Once dry, add a coat of red. I used Valspar satin paint sample jar, cost around $2.50.

Once dry, I added two more coats, drying in between.

Green leaves on the top add dimension. (Photo by Charlotte Ekker Wiggins)

Green leaves on the top add dimension. (Photo by Charlotte Ekker Wiggins)

The green leaves where added free hand first in a solid satin dark green, those took two coats.

A lighter green gave the leaves some dimension.

The stems were painted brown; those took only one coat.

Once dry for a good 2 days, I finished by spraying with a clear plastic coat.

Painted gourds on a stick drying outside. (Photo by Charlotte Ekker Wiggins)
Painted gourds on a stick drying outside. (Photo by Charlotte Ekker Wiggins)
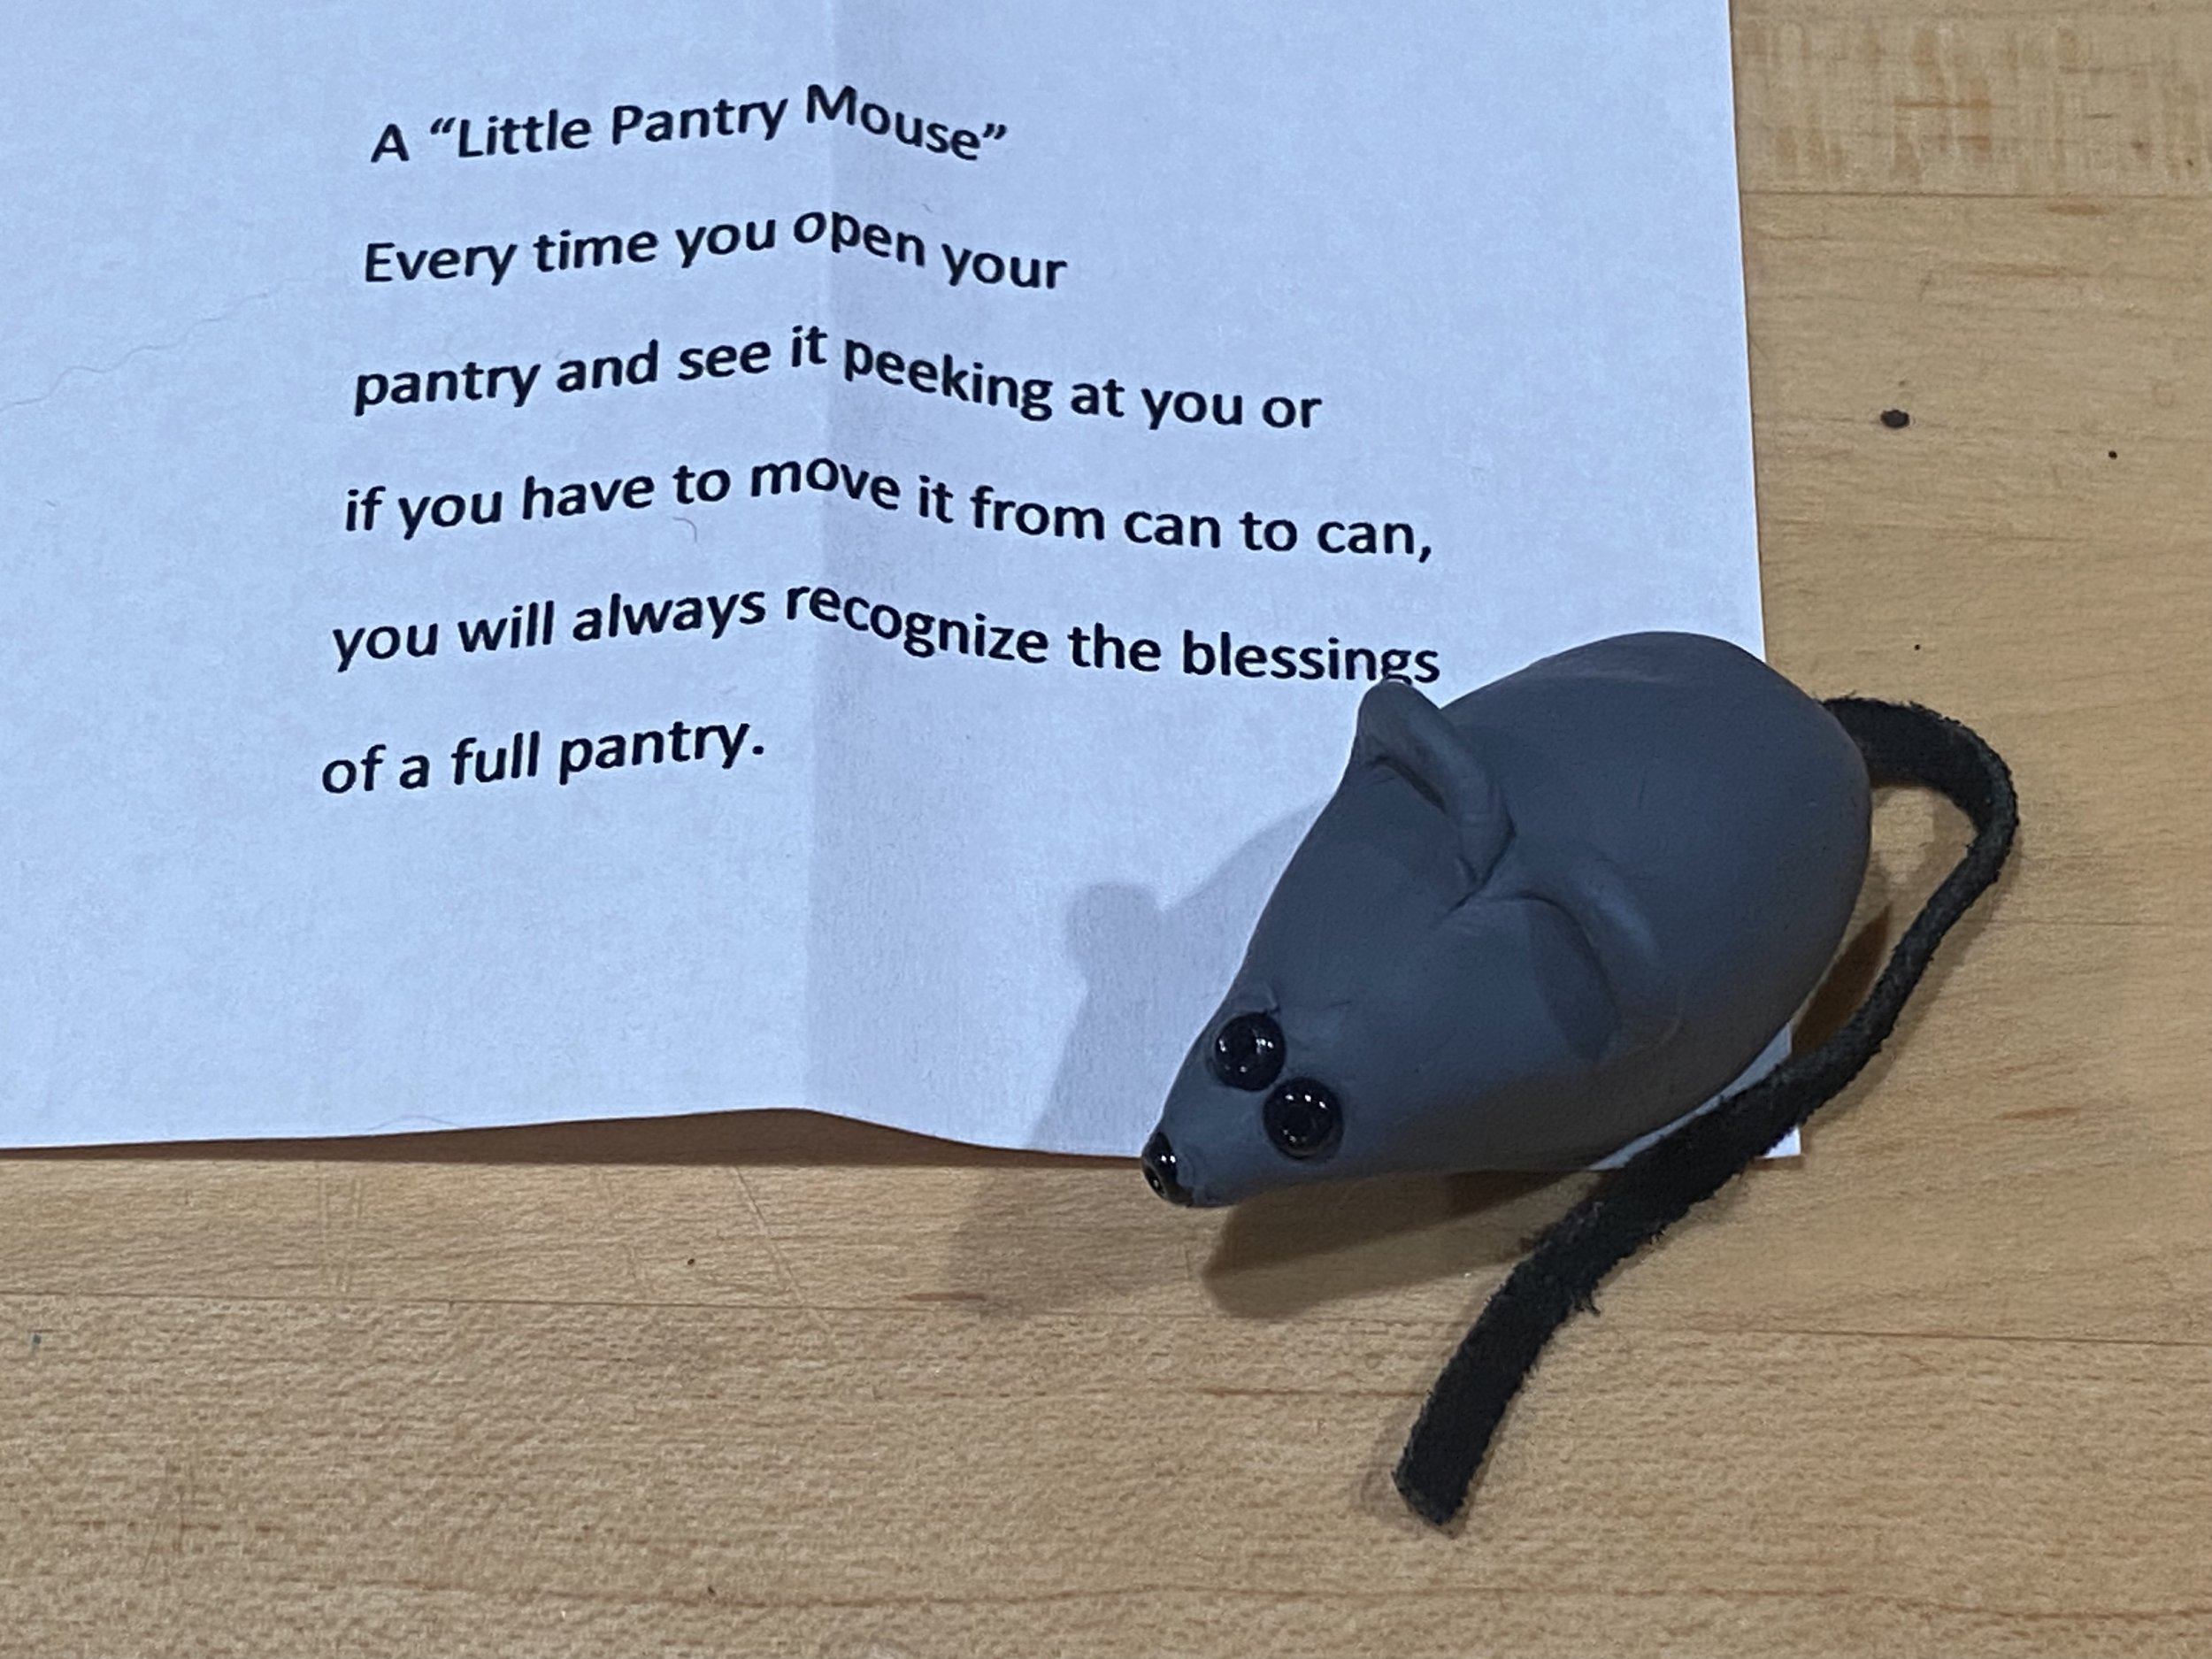
This gourd has a wider opening courtesy of a wintering mouse. (Photo by Charlotte Ekker Wiggins)

This gourd has a wider opening courtesy of a wintering mouse. (Photo by Charlotte Ekker Wiggins)

So two gourds will welcome wrens. The third one, with the wider opening courtesy of a wintering mouse, might be attractive to nutchatches or maybe a yellow bellied sapsucker. 

Better yet, make a painted apple gourd to add to one of our songbird throws and you will have songbirds in hand.

Now wouldn't you like to get one of these as a gift for your garden?

Charlotte


Basket Flowers

This tiny silver toned floral basket makes a great way to collect small flowers for a table.

This tiny silver toned floral basket makes a great way to collect small flowers for a table.

Basket Flowers

A friend recently told me she admires the fresh flowers I have around my house, especially the small bouquets tucked on tables. Come to think about it, I rarely seem to see small flowers in home improvement shows so this is going to be about how to easily incorporate those tiny gems into your home.

Right Size Container

The first step is to find the right size container that fits the space where you want to place flowers. I like having flowers on my den coffee table where I do some of my work. I also like fresh flowers on my kitchen island but I have to mitigate that location with cats that like to stop by and munch on anything that is long, skinny and green so long, skinny and you know what is out for the kitchen.

Actually I don't add long and skinny greens to my den coffee table, either, it just makes things simpler and - well, quieter. I don't have to police the flowers as much, although any greens do seem to invite trouble.

One of my favorite thrift store finds for the den is this little silvertone floral basket that is 6x4x4 inches, not counting the long handle. It has a clear plastic liner inside that holds water, or I could have popped a glass jar the size of the inside of the basket to keep the flowers hydrated if the liner had been missing. The flowers sit nicely low to the ground in this flower arrangement. I could also have cut the flowers with longer stems so they filled the space between the basket and basket handle so this gives me some versatility.

Now that the growing season is starting to slow down, I cut some geraniums from my deck plants as anchors and then started to add whatever else I could find in my garden that was small.

Geraniums from my deck add color to other tiny flowers cut from my garden.

Geraniums from my deck add color to other tiny flowers cut from my garden.

Miniature roses take center stage when they are added to these little bouquets, especially red ones. I have only one in this combination but it sits nicely in the center of the flowers, anchored on either side by the peach geraniums and purple verbena.

This was my first flower bouquet with salmon lobelia and one Black Eyed Susan flower.

This was my first flower bouquet with salmon lobelia and one Black Eyed Susan flower.

This is my second bouquet with the miniature red rose, the first one was leftovers from pruning: salmon Lobelia, pink phlox, self heal and a couple of butterfly bush flowers initially filled the silver flower basket.

Other fresh flowers I added included liriope, forget me nots and the sweet little white flowers that are just opening. Don't get too close to those, though, garlic chives are pretty but they are definitely not sweet-smelling!

Charlotte

Red Roses Gift Flowers

A little bouquet of red roses on its way to a friend's business.

A little bouquet of red roses on its way to a friend's business.

Red Roses Gift Flowers

We often think of gift flower bouquets as elaborate collections of flowers, of big globs of one flower, but they don't have to be. A gift bouquet can be as simple as one flower, or in this case, three little flowers in a simple vase.

But this isn't just any red rose.

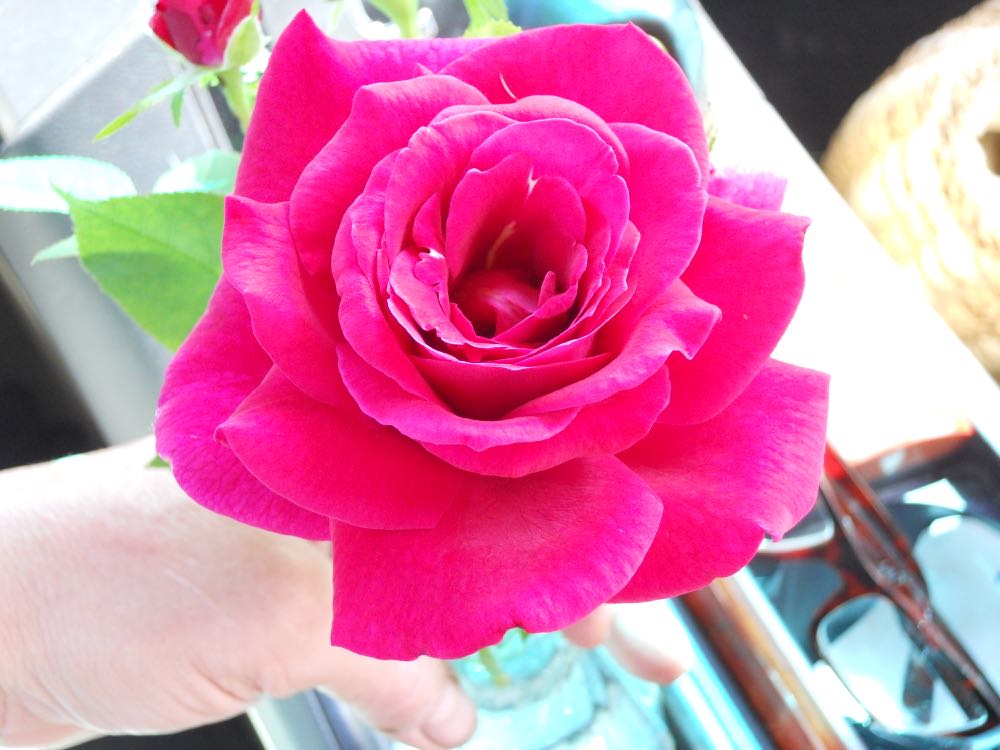
I picked the hybrid tea rose with a wonderful scent early morning, when the rose was still in bud form so that it would open through the rest of the day and last longer. I added two miniature roses in the same color for a touch of whimsy. The Mr. Lincoln hybrid tea rose would have been lovely all by itself but I liked adding the little miniature roses for fun.

Pairing miniature roses with a hybrid tea rose is a simple way to make a pretty bouquet.

Pairing miniature roses with a hybrid tea rose is a simple way to make a pretty bouquet.

Miniature roses are shrub roses that often bloom more frequently than hybrid tea roses, at least in my garden, so I like having a variety of miniature rose colors growing throughout the season. I give them compost, banana peels and coffee grounds to keep them well fed, and regularly mulch them, so they get similar care to my regular roses.

Although miniature roses are easier to grow, I also grow hybrid tea roses, especially Mr. Lincoln roses. Besides their lovely red color, I love their scent, which can envelop a room with just one flower.

Mr. Lincoln hybrid tea rose has a wonderful scent and invites a sniff just because.

Mr. Lincoln hybrid tea rose has a wonderful scent and invites a sniff just because.

I also keep little glass flower vases around in a garage cabinet just for these occasions, picking them up as I see them at garage sales.

The red roses gift flowers bouquet was appreciated, even more when my friend got a whiff of the rose. She said she only plants the repeat-blooming KnockOut roses, but she may be giving the old time hybrid tea roses a second look now. My friend said she thought I had sprayed the red rose with a perfume. I assured her this was the natural scent.

When I left, she was still smelling that red rose!

Charlotte


How to Dry Rose Buds

While you are shopping for your white ceramic pieces, pick up a basket with perforations around the sides and a solid bottom. It will come in handy when it's time to dry the gift rose buds.

I start by saving all those decadent bags in shoes in a jar so I can add those when I need to dry something. Once I have the basket, I add a paper towel, then the items I want to dry: rose buds, either from a florist or from my garden. I place the basket on top of my refrigerator, where the hot air from the back of the motor helps dry out the buds faster. It also keeps the flowers safe from admiring cat paws. I check once a week, until the buds are dried and ready to arrange in the white ceramic bowl.

If you just want to have the flowers still around, you can also dry them on stems with leaves. Just shape them the way you want them in the end so you don't break the brittle stems once they are dry.

Have you dried rose buds before?

Charlotte