Last Flowers of Season

Zinnias and lantana in the last cut flower bouquet of the season. (Photo by Charlotte Ekker Wiggins)

Zinnias and lantana in the last cut flower bouquet of the season. (Photo by Charlotte Ekker Wiggins)

Last Flowers of Season

The first frost came early this year; about two weeks earlier than the usual Halloween frost that marks the first hard frost of the season. I live in USDA Hardiness zone 5 where we have four distinct seasons. With our rapidly changing climate, springs and falls are getting longer while summers and winters seem shorter.

I started bringing in my tropical plants a few weeks back which includes pots of annuals including geraniums, lantanas and salvia. The pots of zinnias have not survived well inside in the past so those are cut to preserve the last flowers of the season.

If you want to enjoy a few more cut flowers from your garden, cut them as you would any time of the year. Early morning is best, and use pruners or flower scissors to make a clean cut on the stem.

Lantana flowers are annuals that have a sharp scent as cut flowers. (Photo by Charlotte Ekker Wiggins)

Lantana flowers are annuals that have a sharp scent as cut flowers. (Photo by Charlotte Ekker Wiggins)

This time of year you can also cut the buds. In the case of zinnias, the buds very nicely open up inside to form full flowers in a vase.

You can cut zinnias in bud; they will unfurl into full flowers in a vase. (Photo by Charlotte Ekker Wiggins)

You can cut zinnias in bud; they will unfurl into full flowers in a vase. (Photo by Charlotte Ekker Wiggins)

Remove leaves from the stem bottoms.

Change water every day or so to keep the flowers blooming.

If the stem is collapsing, recut so the flower can still absorb water.

If you get the stems too short, consider putting them i a shorter flower vase instead of throwing them out.

You can also add wildflowers currently in bloom. The combination of annuals and wildflowers can make lovely combinations. Since I was cutting these flowers in the middle of the night I chose not to go looking for wildflowers. Wildflowers will make it through a frost much better than these tropical annuals.

Enjoy, and start planning next year’s garden!

Charlotte

Picking Throw Pillows

Pick a favorite theme and work off the colors. (Photo by Charlotte Ekker Wiggins)

Pick a favorite theme and work off the colors. (Photo by Charlotte Ekker Wiggins)

Picking Throw Pillows

I forget what well-known designer said it but someone recently was quoted as saying solid color throw pillows are a sign of laziness.

Well, unless you’re buying the same patterned pillow, trying to collect interesting complimentary throw pillows can be a challenge. Or an adventure, depending on your point of view.

The advantage of collecting different complimentary pillows is that it quickly adds interest to a chair and sofa. The disadvantage is that it can take a little time and treasure hunting.

To start, I pick a throw pillow I really like. I found the outdoor bird pillow in the photo for my deck at a local sale. The colors are complimentary to the outside rug and the theme is a personal favorite.

My outdoor deck with a few extra pillows tucked under the table. (Photo by Charlotte Ekker Wiggins)

My outdoor deck with a few extra pillows tucked under the table. (Photo by Charlotte Ekker Wiggins)

I took a picture of the pillow and had it handy whenever I ran across other pillows.

A few weeks later, I found the outdoor throw pillow with the single bluebird. It’s not a perfect match but it is complimentary in colors, which means they look good next to each other in the deck chairs. And the bluebird theme is a personal favorite.

I’m good with these two bird-themed pillows for the deck. I have a few solid color outdoor pillows for when I need to add seating. I keep a couple of the solid outdoor pillows tucked under the deck table. I want it to be inviting and comfortable, not a place to collect pillows.

The end of the season is also a good time to shop for outdoor throw pillows on sale. Take a photo of one you like and have fun finding throw pillows that make you smile!

Charlotte

How to Get Blue Phlox

Blue flower colors can be hard to find to add to cut flower bouquets. (Photo by Charlotte Ekker Wiggins)

Blue flower colors can be hard to find to add to cut flower bouquets. (Photo by Charlotte Ekker Wiggins)

How to Get Blue Phlox

It can be challenging to find blue flowers for home decor bouquets. When I think of blue flowers, bluebells from Texas come to mind but they don’t grow well in Missouri. Virginia bluebells do bloom here in spring but they disappear by June.

By happenstance I discovered that with a little patience I can have blue phlox for flower arrangements.

These lovely blue-toned flowers are actually native Missouri pink phlox, the original flower species that is the basis of all hybrid phlox varieties.

The blue cut flowers come from native Missouri pink phlox. (Photo by Charlotte Ekker Wiggins)

The blue cut flowers come from native Missouri pink phlox. (Photo by Charlotte Ekker Wiggins)

If you leave the pink phlox inside in a flower vase with fresh water every day or so, the pink will fade to a blue, giving you the option to add a blue-toned flower to your cut flower arrangement.

This is such an easy way to get a hard to find blue flower for home decor!

Charlotte

Repurpose Birdhouses

This old wren house now sits on my deck table as a flower vase. (Photo by Charlotte Ekker Wiggins)

This old wren house now sits on my deck table as a flower vase. (Photo by Charlotte Ekker Wiggins)

Repurpose Birdhouses

Do you have a favorite birdhouse birds are not using? Or maybe one that is starting to fall apart but you want to keep it around a little longer. That’s what happened with this small grey wren house that now serves as a flower vase on my deck.

The birdhouse had served as a home for birds for many years. One spring, though, I noticed the roof was disintegrating and I didn’t want to risk having baby birds being unprotected from the elements.

After removing the resident nest, I washed the birdhouse in hot water with a dab of bleach to remove any remaining undesirables.

Wear gloves to protect your hands from the bleach.

An old toothbrush works well to scrub out both the inside and outside.

Once dry, I sprayed it with a light coat of a clear poly satin to slow down the wood deteriorating.

It is stored over winter and brought out in the spring time to hold flowers.

The missing roof piece is wide enough to squeeze a small plastic cup. (Photo by Charlotte Ekker Wiggins)

The missing roof piece is wide enough to squeeze a small plastic cup. (Photo by Charlotte Ekker Wiggins)

To use the birdhouse as a flower base, I added a small plastic cup that would fit through the missing roof line.

Spanish moss fills in where the flowers run out.

This year the birdhouse has extra decor. Did you see him?

This tree frog is also making the birdhouse a home. (Photo by Charlotte Ekker Wiggins)

This tree frog is also making the birdhouse a home. (Photo by Charlotte Ekker Wiggins)

A Missouri tree frog seems to have moved in and decided to make the birdhouse home. He’s been greeting me every morning now for almost a week, watching me from the old birdhouse entrance.

I suppose frogs don’t mind when it rains although he has a good half of the birdhouse that stays dry.

Guess it’s time to give him a name!

Charlotte
Dry Catnip

It’s time to dry catnip for winter tea and handmade cat gifts. (Photo by Charlotte Ekker Wiggins)

It’s time to dry catnip for winter tea and handmade cat gifts. (Photo by Charlotte Ekker Wiggins)

Dry Catnip

It seems early to think about Christmas but if you make gifts for cats, this is the time to get that homegrown catnip dried.

Catnip is a perennial herb that, when dried, most cats love. Catnip also makes a nice winter tea.

To pick the catnip at the best time, you want it before it starts generating flowers, that’s when the catnip will be strongest. That’s about this time of year where I live in USDA Hardiness zone 5.

I also leave a separate patch of catnip to flower since bees love it. See the tiny flower heads on the top?

Cut catnip before it blooms to retain its strongest flavor. (Photo by Charlotte Ekker Wiggins)

Cut catnip before it blooms to retain its strongest flavor. (Photo by Charlotte Ekker Wiggins)

How to Dry Catnip

Cut the catnip stalks about 4 inches from the bottom. Catnip stalks, like most mints, will have square hollow stalks.

Carefully remove leaves. Only use leaves from plants that haven’t been treated with pesticides or other chemicals.

Place catnip leaves in an open weave basket lined with a paper towel or a cotton napkin. You want a container where air can travel through it. Glass and porcelain containers retain moisture.

If you have saved those little silica gel packets that come with shoes and other items, this is the time to use them. Tuck them under the paper towel to help speed up the catnip drying process.

Silica gel packets will help speed up the catnip-drying time. (Photo by Charlotte Ekker Wiggins)

Silica gel packets will help speed up the catnip-drying time. (Photo by Charlotte Ekker Wiggins)

You want the catnip leaves sitting on top of the paper towels. The paper towels will help absorb moisture as the leaves dry out.

Place the basket in a warm spot. I place my drying baskets on top of my refrigerator.

Turn them every day or so until they are dry.

You can wait to remove plant stalks until after they are dry. (Photo by Charlotte Ekker Wiggins)

You can wait to remove plant stalks until after they are dry. (Photo by Charlotte Ekker Wiggins)

If you use cotton napkins, those also make good reusable drying surfaces for catnip.

You can also dry catnip on cloth napkins placed over silica gel packs. (Photo by Charlotte Ekker Wiggins)

You can also dry catnip on cloth napkins placed over silica gel packs. (Photo by Charlotte Ekker Wiggins)

Once dry, you can easily remove the dried stalks. Store in an airtight container for later use. I also sprinkle cat toy storage containers with the freshly dried catnip to refresh catnip toys.

And those catnip-infused baskets?

I let my cats enjoy playing in them, that helps me to ensure the quality of the dried catnip.

Boo Boo Bartholomew, left, trying to curl up in a small catnip-infused basket. (Photo by Charlotte Ekker Wiggins)

Boo Boo Bartholomew, left, trying to curl up in a small catnip-infused basket. (Photo by Charlotte Ekker Wiggins)

You can also buy dried catnip for homemade toys. Over the years, though, friends and family have told me their cats didn’t like catnip until they tried my toys. I am convinced it is because my toys are made with homegrown fresh catnip.

Christmas is only six months away!

Charlotte

Gourd Bird Houses

The bee birdhouse was purchased ready made and on sale. (Photo by Charlotte Ekker Wiggins)

The bee birdhouse was purchased ready made and on sale. (Photo by Charlotte Ekker Wiggins)

Gourd Bird Houses

Whether you buy ready made or make one yourself, gourd bird houses are a fun way to provide your natural pest patrol with homes.

Contrary to some assumptions, gourd bird houses can last for several years. The trick is to clean them out in fall and store them in a safe place over winter.

You can grow your own gourds or buy gourds at your local farmer’s market, usually at the end of the growing season. Kids can have fun decorating the gourds. Once dry, apply a coat of clear acrylic to help preserve the art work.

Do not spray the inside of the gourd.

The biggest question I get about my bird house gourds is what size is the entrance. Different birds like different sizes. I like having Carolina wrens around my garden so my gourd entrances are 1 1/4 inch, which is their preferred entrance size.

That tends to be the size in pre-made gourd birdhouses because it also attracts titmice and chickadees.

The gourd bird house entrance is a 1 1/4 inch circle. (Photo by Charlotte Ekker Wiggins)

The gourd bird house entrance is a 1 1/4 inch circle. (Photo by Charlotte Ekker Wiggins)

If you want a simpler painting scheme, start by painting your gourds fruit colors. Apples are fun and provide a quick pop of color. I painted these home grown gourds red and added painted leaves on the top and back. They now hang from my dwarf apple trees, housing a resident, and very vocal, wren.

This homemade apple gourd has the same sized entrance. (Photo by Charlotte Ekker Wiggins)

This homemade apple gourd has the same sized entrance. (Photo by Charlotte Ekker Wiggins)

Also remember to add a hook at the top so that you can easily and safely hang the gourd.

I screwed in an eye hook and then glued around it to ensure it safely holds the gourd’s precious cargo.

Remember to plan for hooks to easily hang your birdhouse gourds. (Photo by Charlotte Ekker Wiggins)

Remember to plan for hooks to easily hang your birdhouse gourds. (Photo by Charlotte Ekker Wiggins)

Homemade gourd bird houses also make for nice garden gifts. When painting yours, make sure to make a few more to share with family and friends. Your birds will appreciate it and they will help keep garden bug populations under control.

Charlotte

Homemade Face Masks

Reversible homemade face masks with filters. (Photo by Charlotte Ekker Wiggins)

Reversible homemade face masks with filters. (Photo by Charlotte Ekker Wiggins)

Homemade Face Masks

The Centers for Disease Control and Prevention now recommends wearing basically a face mask when coming in contact with others when, for example, grocery shopping.. With predictions that COVID 19 will peak in Missouri mid May, I decided to make a few face masks.

There are a lot of patterns making the rounds, from red bandanas with hair ties to ones with replaceable filters. I decided to tackle a reversible, reusable one with replaceable filters and here it is.

To make, I washed purple quilter’s cotton in hot water to shrink the cotton fibers. Quilter’s cotton is one of the best cottons to use because the fibers are tighter. Once washed, I dried in a hot dryer, again to tighten the cotton threads, and then ironed it.

For the adjustable nose pieces, I used the small gauge wire I had in my goodies drawer for house projects.

The 1/4 inch elastic was in my sewing supplies.

I did buy the Dupont 9600 furnace filter and Tool Box Shop towels, both recommended in a Business Insider article about household items tested for filtering particles. For a 20x20x1 furnace filter, I cut out 36 face mask filter replacements. Be careful as you remove the filter; I would cut it out of the cardboard frame instead of trying to tear it out. I ripped a corner before I took scissors to it.

Also use a piece of cotton when trying to iron out the furnace filter or you won’t be able to flatten the filter without burning it.

Iron out furnace filters by placing cotton on the filter. (Photo by Charlotte Ekker Wigigns)

Iron out furnace filters by placing cotton on the filter. (Photo by Charlotte Ekker Wigigns)

The Tool Box shop towels come in rolls and can easily be cut from the rolls.

Homemade Face Mask Pattern

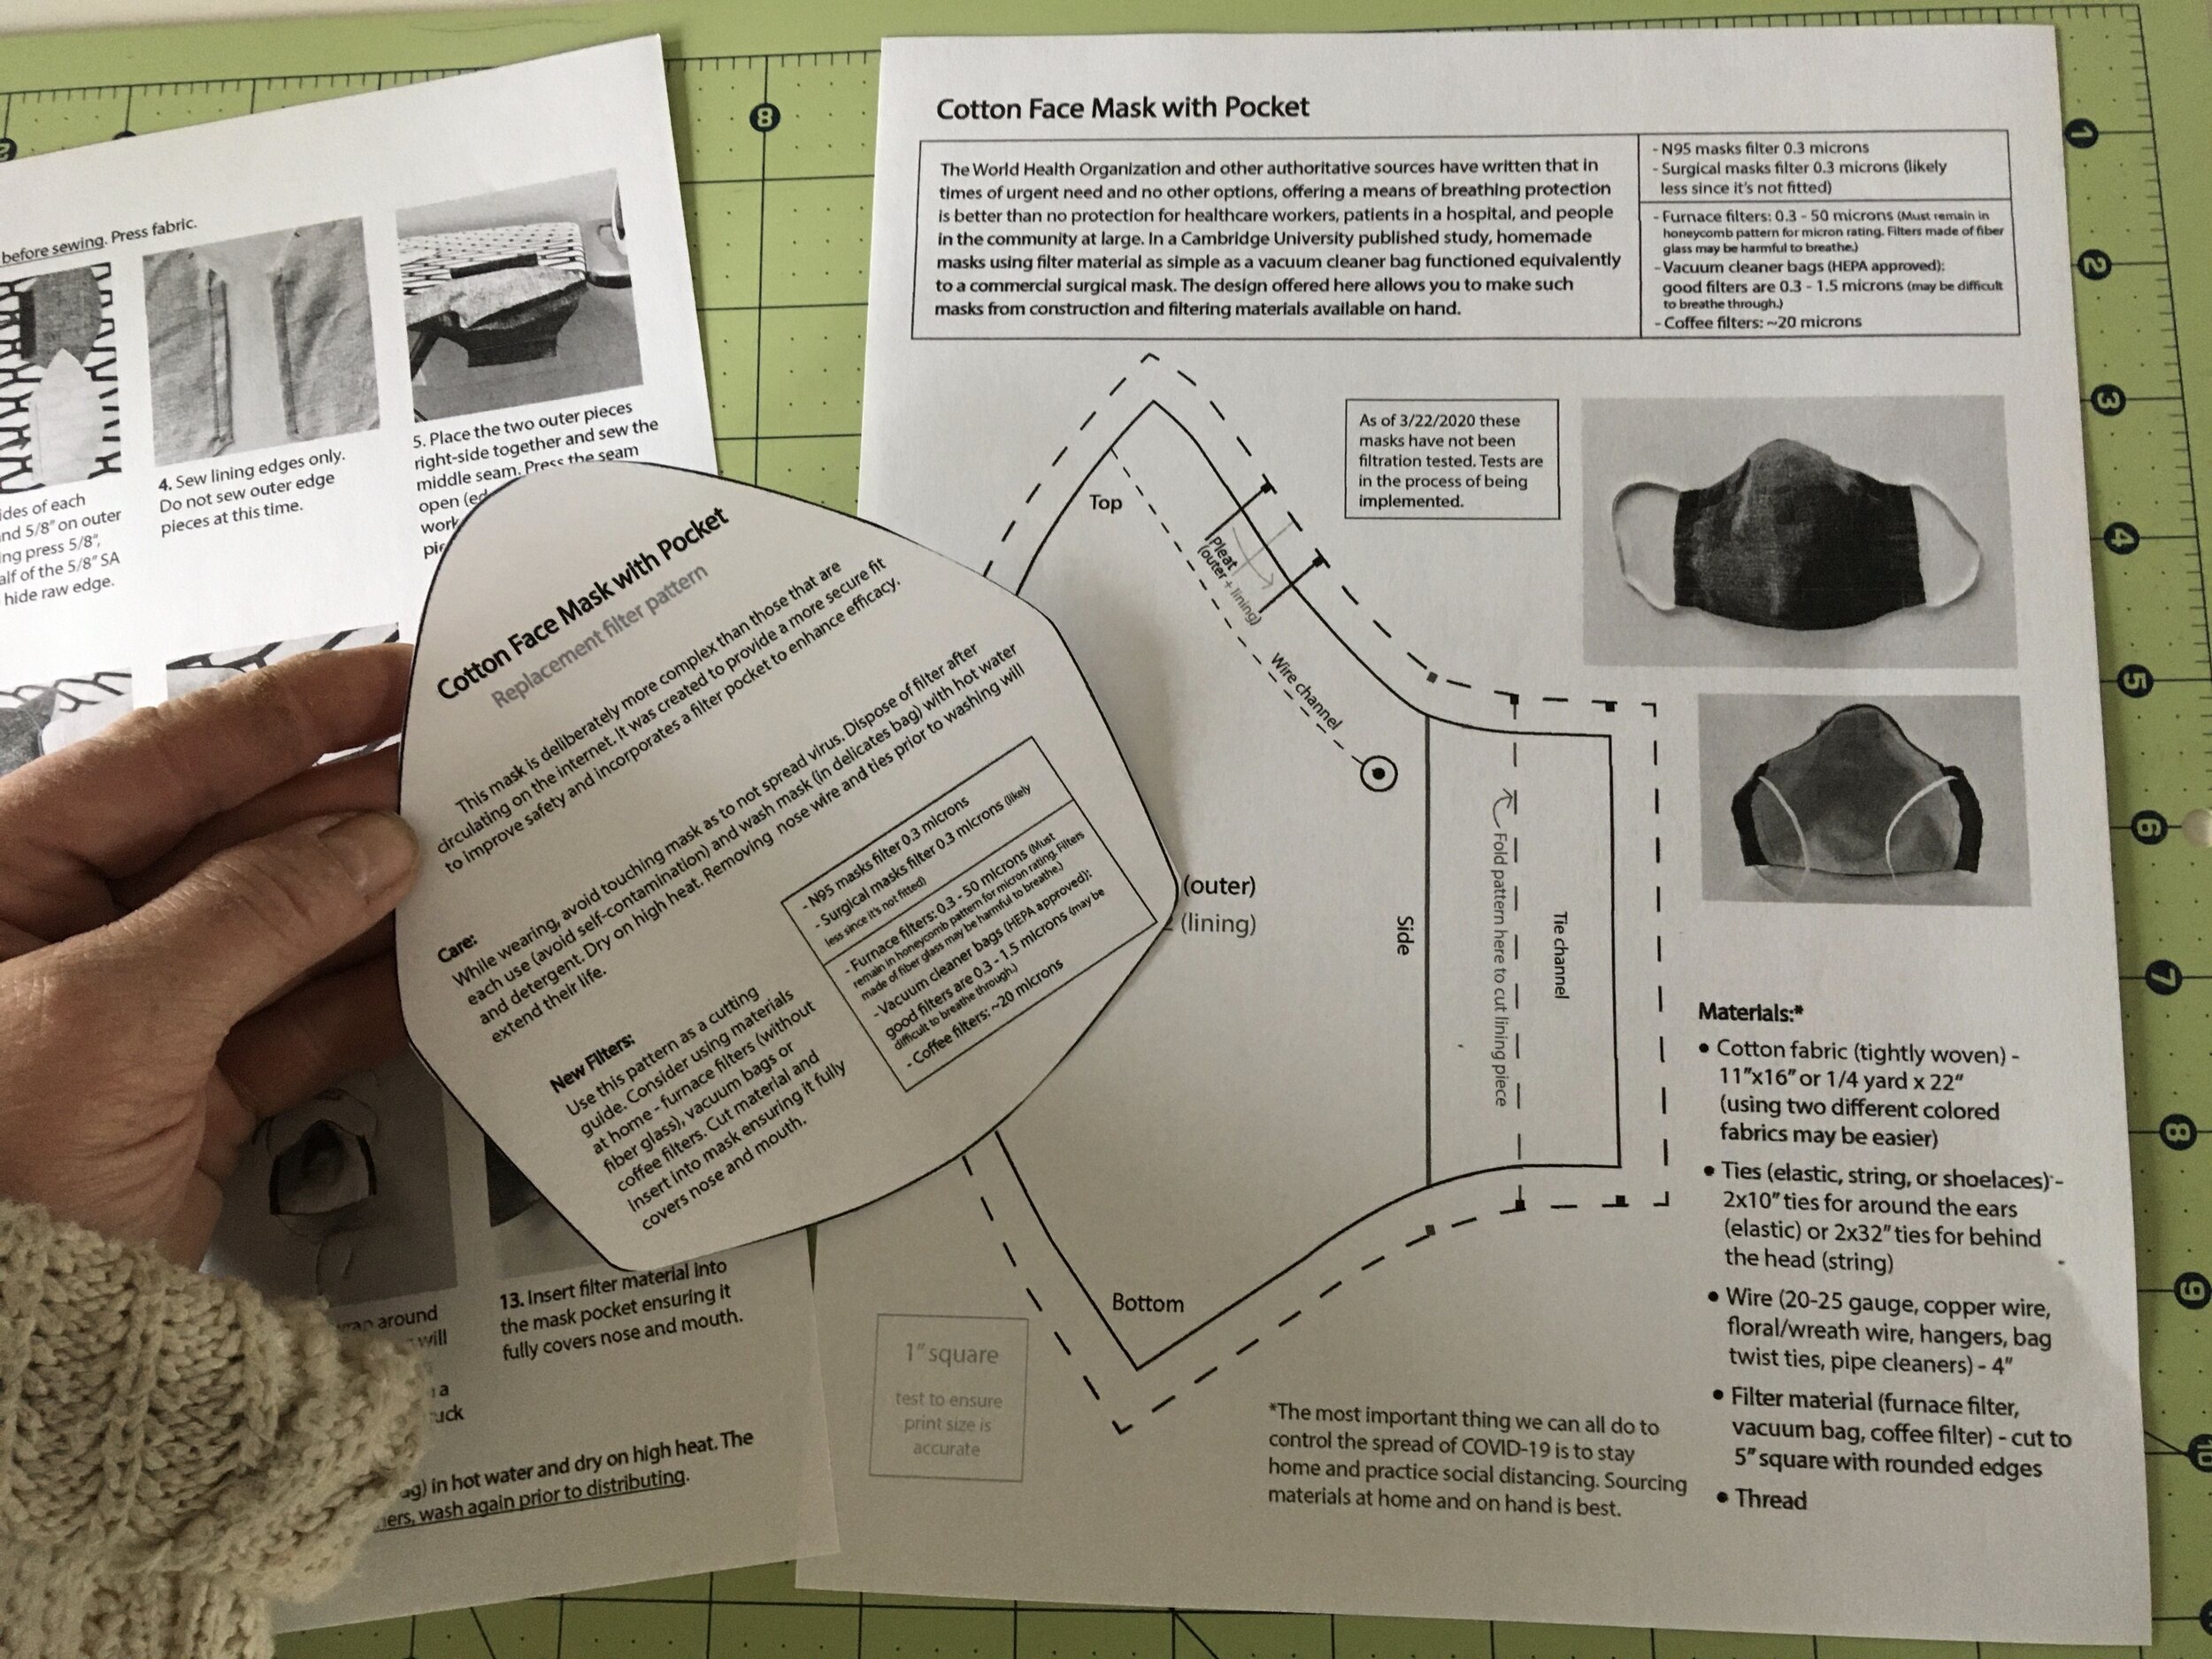
After doing some research, I decided to use this pattern from University of Minnesota alum Shannon Williamson. She has degrees in apparel design and medical device innovation. She works as a user experience designer with the cardiovascular group at Medtronic.

While DIY masks are not as effective as surgical or N95 masks* in preventing the spread of COVID-19, some doctors and other health care professionals are wearing them over the top of the higher-tech masks to increase durability. And use of these DIY masks, by lower risk populations, free up N95 masks for health care professionals and others who are at high risk.

Only two patterns, this is for cutting out the filters. (Photo by Charlotte Ekker Wiggins)

Only two patterns, this is for cutting out the filters. (Photo by Charlotte Ekker Wiggins)

“This mask is deliberately more complex than those that are circulating on the Internet,” says Williamson. Her design provides a more secure fit and includes a filter pocket.

She created the design after consulting with everyone from quilters and seamstresses to physicians and engineers. But, she says, it’s important for people not to go out and get supplies in order to create these.

She recommends people use what they have on hand, from unused fabrics to cut-up furnace filters, or even vacuum cleaner bags, for the filter pockets. You will find the pattern and instructions here:

https://twin-cities.umn.edu/news-events/diy-face-masks-during-covid-19

Here’s the reversible mask I made for myself, it’s purple for Easter. (Photo by Charlotte Ekker Wiggins)

Here’s the reversible mask I made for myself, it’s purple for Easter. (Photo by Charlotte Ekker Wiggins)

 Additional Notes

After washing and drying fabric in hot water and hot heat, iron it. All of that heat will make the fabric fibers tighter.

Once you sew the curve edges together, make little cuts along the curve so the fabric will fold better. It’s hard to iron the seams open so this step will help you skip trying to iron the seams open.

I did try a bread tie in the first one and liked the small gauge wire better. Use the bread tie if that’s the only thing you have. Pipe cleaners and floral wire will also work.

To keep the wire in place, I added a little sewn in wing at the end of where the wire ends to make sure it stays in place.

If you are not sure of head size, make fabric ties instead of using elastic. The ties will provide the wearer more flexibility and be more comfortable for long wear.

The furnace filters are easier to insert than the Tool Box Shop towels. Both are easy to breathe through and have been confirmed as filtering a high percentage of virus particles.

Mask liners made from furnace filters and shop vac towels. (Photo by Charlotte Ekker Wiggins)

Mask liners made from furnace filters and shop vac towels. (Photo by Charlotte Ekker Wiggins)

The homemade face masks do look a bit like a bra cup. These masks don’t sit flat on your face, they stand out to allow you room to breathe without getting fabric in your mouth on the intake. At one point I was tempted to make one out of yellow like a duck bill, then came back to my senses.

Don’t forget to make a few extras to share with family. (Photo by Charlotte Ekker Wiggins)

Don’t forget to make a few extras to share with family. (Photo by Charlotte Ekker Wiggins)

You are wondering, though, why purple?

I actually made two different colors. No, make that three. One set was made out of yellow bee fabric, another one was made out of pink fabric for a friend, and then there are these purple ones. Reversible with a solid purple on the other side.

It’s Easter. Purple seems to be a good compromise, not too pastel but still a nod to the season.

Happy Easter and stay well!

Charlotte


How to Set Up Home Office

This was my first home office set up in a vintage desk in a guest bedroom. (Photo by Charlotte Ekker Wiggins)

This was my first home office set up in a vintage desk in a guest bedroom. (Photo by Charlotte Ekker Wiggins)

How to Set Up Home Office

As many people scramble to set up home offices, here are some tips from my experience setting up, and having, a home office for some time now.

When you first set up, you are going to make do. Do not, I repeat, do not place your coffee, tea and water next to your temporary computer space.

As you find what doesn’t work, you will adjust so don’t expect to get it right the first time, keep adjusting.

If you don’t have a computer and are buying one, get a laptop, it’s more portable and easier to place. You can always add a larger monitor or two if you need them.

  1. Set up your work space separate from other home activities. Good places for home offices are guest bedrooms and a corner of your unused living room.

  2. Wherever you set up, make sure you have electrical outlets close by. If not, thread the extension cord under rugs to make sure the work area is safe.

  3. If possible, set up close to a window. Having a connection to the outdoors is spirit-lifting, even if you spend all day on a computer.

  4. Move dictionaries and other reference material to your work space. Be creative about how you make them easily accessible. Boxes make excellent temporary files assuming the cat doesn’t find it first!

  5. You will need a printer so plan space for one, and a good lamp to minimize eye strain.

  6. Include a safe area for your cup of coffee, tea and water. Keep as many of your office routines as you can and bringing a cup of coffee back to your work space is a common one.

My writing work space in a living room corner. Took me a couple of weeks to find a way to fit my reference materials in the small wire book case underneath. (Photo by Charlotte Ekker Wiggins)

My writing work space in a living room corner. Took me a couple of weeks to find a way to fit my reference materials in the small wire book case underneath. (Photo by Charlotte Ekker Wiggins)

Quick and Dirty Home Offices

Those home offices are well worn and established but what if you don’t have a desk, or space.

It took me awhile to settle into those home work spaces so here are some of the other ones I have successfully used in the interim:

Sofa tables make handy temporary work spaces if you don’t immediately need a printer. (Photo by Charlotte Ekker Wiggins)

Sofa tables make handy temporary work spaces if you don’t immediately need a printer. (Photo by Charlotte Ekker Wiggins)

With portable laptops, a sofa table will work quite nicely as a temporary office to hold your laptop, phone and glasses. The sofa table makes it easier to establish a working spot in the middle of the usual family chaos. Make sure kids know not to touch what is on the table.

Sofa tables do not have enough room for everything listed plus a printer so this is a working space only. Helps to have a coffee table nearby for your other necessities including pens and a cup of tea.

I sometimes use this sofa table for online conference sessions. (Photo by Charlotte Ekker Wiggins)

I sometimes use this sofa table for online conference sessions. (Photo by Charlotte Ekker Wiggins)

If you don’t have a sofa table, try a bed tray with legs. You can set these up at a chair or sofa corner to give yourself an even platform.

These are only good options if you are not setting up monitors and printers, these work well for portable laptops.

This bed tray has been an excellent portable home office. (Photo by Charlotte Ekker Wiggins)

This bed tray has been an excellent portable home office. (Photo by Charlotte Ekker Wiggins)

While you are shopping for a sofa table and bed tray, your dining room table will work quite well especially if you have a larger monitor.

Just make sure you have your basic office necessities close by. I use an old tray and ceramic vases to hold pens, pencils, paper clips and a small stapler.

Dining room tables can easily be set up for temporary work spaces. (Photo by Charlotte Ekker Wiggins)

Dining room tables can easily be set up for temporary work spaces. (Photo by Charlotte Ekker Wiggins)

Other Home Office Considerations

Some other things to consider as you set up your home office.

  1. Get up and dressed for work; then go to your work area and appreciate that you don’t have a commute.

  2. Discuss with family that when you are in your work area, you are only to be disturbed in an emergency. A friend has set up a little office area for her daughter so that both of them can “go to work” together.

  3. If you are set up in an area with a door, walk out when you are done for the day and close the door or you may be tempted to go back in and work more.*

    *This is an advantage, and the challenge, of working at home. It took me several weeks working at home to identify stopping points on projects so that I could in good conscience put off the project work until the next day. In other words, having the work at home can make it easier to just keep going but try for balance.

  4. Set up your work hours and stick to them with colleagues. Realize you have some flexibility with your individual work hours but start first with the hours you are accustomed keeping. Then move to a flexible schedule as needed and appropriate.

    Who Are You Going to Call

Discuss with co-workers how you will communicate:

  1. Agree on how you will keep up to date on projects; end of day email summaries work well.

2. Collaborative platforms like Slack, Zoom, Free Conference Call and Google will work only as well as how comfortable the people are using them. Agree to try them out and then decide what works best for the whole group.

3. Keep your weekly meetings as much as possible; it will make the changes seem more normal.

Impact You Will Have on Pets

You know this will impact your family but it will also have an impact on your pets.

My two cats had an established routine when I worked away from home. Once I started working all day at home, it took them awhile to settle into a revised schedule, most of it of their own making.

Shirley Honey keeps me company at one of my desks. (Photo by Charlotte Ekker Wiggins)

Shirley Honey keeps me company at one of my desks. (Photo by Charlotte Ekker Wiggins)

One cat files herself away in a desk drawer whenever she gets the chance. The other cat periodically cruises by for some attention and lap time before heading for a nap in a chair. Frankly having pets close by is one of the biggest perks of working at home!

Charlotte


Re-Blooming Amaryllis

Apple Blossom Amaryllis bulbs starting to re-bloom late winter. (Photo by Charlotte Ekker Wiggins)

Apple Blossom Amaryllis bulbs starting to re-bloom late winter. (Photo by Charlotte Ekker Wiggins)

Re-Blooming Amaryllis

When you think of late winter flowers, maybe a tree is on our minds but how about these lovely flowers?

You see the bulbs that grow these flowers offered for sale around Thanksgiving and Christmas. Amaryllis are a popular flowering gift and one that people tend to toss after it flowers. I know because I happily adopt bulbs people don’t want any more over the years.

Amaryllis can re-bloom with a little care and patience, and they are well worth the effort.

Amaryllis are South American cousins to the North American Surprise lilies. Surprise lilies grow the green leaves first; the leaves die back and then the flower stalk shows up mid-July, blooming on naked stems. In Missouri, these lovely pink flowers are also called naked ladies.

The flowering “energy” is stored in the bulbs. To get Amaryllis to re-bloom, the idea is easy: they have to recharge their bulbs.

Surprise lilies, the North American cousins to Amaryllis. (Photo by Charlotte Ekker Wiggins)

Surprise lilies, the North American cousins to Amaryllis. (Photo by Charlotte Ekker Wiggins)

One of the big mistakes people make is planting the bulb too deep. Amaryllis bulbs need to have roots in soil but the bulb sitting on top. My bulbs have at most the bottom half in soil.

Amaryllis bulbs need to sit on soil with the roots buried. (Photo by Charlotte Ekker Wiggins)

Amaryllis bulbs need to sit on soil with the roots buried. (Photo by Charlotte Ekker Wiggins)

The roots also need to get moisture. To make sure the roots are kept hydrated, I have a plastic bottle full of holes sitting in the middle of the large pot. This helps ensure the water gets evenly distributed through the soil.

Buried plastic bottles with holes keep soil hydrated. (Photo by Charlotte Ekker Wiggins)

Buried plastic bottles with holes keep soil hydrated. (Photo by Charlotte Ekker Wiggins)

Once an Amaryllis finishes blooming, long leaves will grow out of the bulb. Keep those leaves well-watered and fertilize the bulbs until the leaves die back.

The leaves will turn sunlight into sugars which are stored in the large flower bulb.

Amaryllis bulb leaves will recharge bulbs. (Photo by Charlotte Ekker Wiggins)

Amaryllis bulb leaves will recharge bulbs. (Photo by Charlotte Ekker Wiggins)

Once the leaves die, let the bulbs “rest’ for a couple of months without watering. I mark my kitchen calendar when the leaves have died back and periodically check to make sure it’s not too dry.

At this point, the bulbs can be stored in a cool place but no colder than 50F. I just leave them in their pots until I am ready to get them blooming again. Then I either repot or just start watering. When I see the tips of the flower buds coming out of the bulbs, I know the plant is re-blooming. I then move them to where I can enjoy the flowers.

Amaryllis will do best in indirect sun while they bloom.

Several re-blooming Apple Blossom Amaryllis bulbs. (Photo by Charlotte Ekker Wiggins)

Several re-blooming Apple Blossom Amaryllis bulbs. (Photo by Charlotte Ekker Wiggins)

The Amaryllis in the photo is an Apple Blossom. I have 8 Amaryllis bulbs in the pot, each bulb producing 4 flowers.

Here’s another view showing at least 12 Amaryllis flowers in bloom and more to come. (Photo by Charlotte Ekker Wiggins)

Here’s another view showing at least 12 Amaryllis flowers in bloom and more to come. (Photo by Charlotte Ekker Wiggins)

Once the bulbs finish blooming, the pot will go outside to spend summer on my deck collecting energy into the bulbs through the leaves. I will also keep it fertilized with added compost.

When they come back inside late fall, leaves will still be growing. I will keep watering until the leaves turn yellow.

The leaves of this Apple Blossom Amaryllis bulb collection died back over Christmas. Once the leaves turned yellow, I cut back on watering for a couple of months to give the bulbs a rest.

Some years I dig out the top few inches of soil and give the bulbs new soil without disturbing their settled roots.

Amaryllis flowers make lovely cut flowers, too. (Photo by Charlotte Ekker Wiggins)

Amaryllis flowers make lovely cut flowers, too. (Photo by Charlotte Ekker Wiggins)

If you can’t place the Amaryllis in a pot where you can enjoy it, Amaryllis flowers can be cut and enjoyed in a flower vase.

Amaryllis will make new bulbs and keep growing year to year if you give them the right growing conditions.

This is the same Apple Blossom Amaryllis bloom from the top now mature. (Photo by Charlotte Ekker Wiggins)

This is the same Apple Blossom Amaryllis bloom from the top now mature. (Photo by Charlotte Ekker Wiggins)

These bulbs are so easy to grow. I love having mine but if you want to get rid of yours, you know where to find me!

Charlotte

Plant Pussy Willow Branches

Pussy Willow branch flowers look like tiny magnolia flowers. (Photo by Charlotte Ekker Wiggins)

Pussy Willow branch flowers look like tiny magnolia flowers. (Photo by Charlotte Ekker Wiggins)

Planting Pussy Willow Branches

If you ever come across, or are gifted, cut pussy willow branches for home decor, enjoy them for a couple of days and then find a place to plant them. By getting them to root, you will then have a source of pussy willow branches for years to come.

There are a number of different pussy willows. Any willow (Salix) with relatively large or striking furry flower clusters is likely to be considered a pussy willow. The “fur” is usually silvery to white hairs, likened to a kitten’s fur. The furry nubs are called a catkin, a word derived from old Dutch for kitten.

Unlike most flowers, catkins have no petals. Their covering of dense hair is designed to protect the delicate flowers inside. In this case, the flowers are white resembling magnolia tree blossoms.

A few more blooming pussy willow flowers on cut branches. (Photo by Charlotte Ekker Wiggins)

A few more blooming pussy willow flowers on cut branches. (Photo by Charlotte Ekker Wiggins)

I discovered these lovely flowers last fall when I found a stash of cut down pussy willow branches. Not knowing they would bloom once cut and brought inside, I would check them every day to see how and why they were blooming.

That means I was hooked. And I have a number of good reasons. Besides this being a plant often associated with cats and the vintage post cards my grandmother used to send me, willows are also excellent bee food.

After a few days of enjoying the white blossoms, and after a good soaking rain, I headed outside with my vase of pussy willow stems to get them in the ground.

Pushing pussy willow branches into soft ground to grow. (Photo by Charlotte Ekker Wiggins)

Pushing pussy willow branches into soft ground to grow. (Photo by Charlotte Ekker Wiggins)

I grouped three branches per spot, gently pushing them into the ground until the lowest growing node was covered. Pussy willows have both male and female plants. Since I don’t know which is which, I increased the chances of the two different plants being close by grouping them together.

A good dose of water and I was done. I love planting in spring, most plants started this time of year nicely make it with very little effort.

And before I headed back inside, I enjoyed looking at the lovely white pussy willow flowers one last time.

Another lovely white flower on these cut Willow branches. (Photo by Charlotte Ekker Wiggins)

Another lovely white flower on these cut Willow branches. (Photo by Charlotte Ekker Wiggins)

I am counting on being able to have the next flowers blooming on rooted pussy willows!

Other favorite home decor plants that are easy to start through cuttings include forsythia and berries.

Charlotte

Homemade Flower Catnip Toys

Finished homemade flower catnip toys ready for gift-giving. (Photo by Charlotte Ekker Wiggins)

Finished homemade flower catnip toys ready for gift-giving. (Photo by Charlotte Ekker Wiggins)

Homemade Flower Catnip Toys

Every Christmas for a number of decades now, I make homemade catnip toys for the cats in my life. Some live with my brothers, others are with friends. And then I live with two cats that couldn’t imagine opening their Christmas stockings without finding fresh catnip toys in them.

Seems a little early to be talking about homemade catnip toys, doesn’t it. Well, it isn’t because you need to plan ahead. First step, plant the catnip this spring. I grow not only my own but one of my cats enjoys eating the fresh leaves when I bring a sprig inside.

Catnip is a perennial herb so once you plant it, it should come back over the years. Don’t use chemicals oh them and you can easily pick, and dry, for homemade catnip toys.

Homemade Flower Catnip Toys Inspiration

This past year, I made these homemade flower catnip toys out of felt. Buy felt out of season and it will be less expensive than getting jt around Easter and Christmas.

After drying the catnip on top of my refrigerator, I store it in an old coffee container and glass jar so I have it ready to use.

The dried catnip goes t into the circular flowers after the yellow centers were sewn on. The stem and leaves are one felt piece.

Easy to make homemade flower catnip toys out of felt. (Photo by Charlotte Ekker Wiggins)

Easy to make homemade flower catnip toys out of felt. (Photo by Charlotte Ekker Wiggins)

If the long stems and leaves are too challenging, just cut out a tiny green leaf that can be added when the flower is stitched closed.

So where is the catnip? You can put it inside the yellow circle or you can sew the larger flower petals together and sneak it between the petals.

You can also make the catnip toy flower with a short leaf. (Photo by Charlotte Ekker Wiggins)

You can also make the catnip toy flower with a short leaf. (Photo by Charlotte Ekker Wiggins)

Store these homemade flower catnip toys in an airtight container with dried catnip. That’s also how you can refresh the toys periodically.

Do cats like them?

I have been making homemade catnip toys for decades and my cats have enjoyed a variety of designs. Even cats that haven’t responded to store purchased catnip have a different reaction to fresh dried catnip.

Shirley Honey even seems to think she can warm her paws on one made for her birthday!

One of my cats seemingly warming her paws on a catnip toy. (Photo by Charlotte Ekker Wiggins)

One of my cats seemingly warming her paws on a catnip toy. (Photo by Charlotte Ekker Wiggins)

You can make these as simply as a felt square that you fill with dried catnip and then tie with a ribbon. Or you can be creative with a different design.

Oh. One more thing. Keep an eye on the cat if you have one, mine have been tempted to “help.” I have lost a number of felt pieces that way!

Charlotte

Dry Catnip

Baskets to capture the refrigerator heat are an excellent option to dry herbs. (Photo by Charlotte Ekker Wiggins)

Baskets to capture the refrigerator heat are an excellent option to dry herbs. (Photo by Charlotte Ekker Wiggins)

Dry Catnip

I have been drying catnip for my cats, and for cat gifts, for as long as I can remember. Fresh dried catnip is much stronger, and more appreciated, than anything you can buy in the store. Although some cats do not respond to the enticement of catnip, all of my cats, and those of my family, have had a run of the sillies when enjoying homemade catnip toys.

The catnip I grow is a perennial so it comes up every year. I also don’t use chemicals in my garden so I know when I harvest it to dry, it will be safe for kitty consumption. My cats actually enjoy both fresh catnip during the growing season as well as the dried option.

To dry catnip, break up the stalks into sizes that will fit your drying baskets and make sure they are free of unwanted hitch hiking bugs. The baskets are nothing fancy, I found these baskets at a thrift store. I picked something I enjoy looking at because I dry the catnip on the top of my refrigerator, where the refrigerator heat helps to speed up the process.

It also keeps the catnip away from wondering paws.

I also save those silica gel packets that come in shoes and other shipments and use them in the baskets under either paper towels or cotton napkins. You can keep re-using the packs to help dry out a variety of herbs including catnip.

Save those silica gel packets to place under paper towels. (Photo by Charlotte Ekker Wiggins)

Save those silica gel packets to place under paper towels. (Photo by Charlotte Ekker Wiggins)

If you don’t have silica gel packs, not a problem. You can place the catnip on cotton napkins, which will help wick away moisture.

Fabric napkins can also help dry out herbs such as catnip. (Photo by Charlotte Ekker Wiggins)

Fabric napkins can also help dry out herbs such as catnip. (Photo by Charlotte Ekker Wiggins)

Once dry, you can store the herb in containers for use later. I label mine so I know when I placed the dried catnip in the containers; the fresher the herb-drying the better.

On a cold winter’s night, I bring out the drying baskets to let my resident experts sample the goods.

Catnip customers enjoying a supply during a cold winter night. (Photo by Charlotte Ekker Wiggins)

Catnip customers enjoying a supply during a cold winter night. (Photo by Charlotte Ekker Wiggins)

To refresh old cat toys, you can also store the toys in a container with freshly-dried catnip for a couple of days. That will easily re-invigorate the toys.

I also use dry catnip to make yearly toys for our families cats including a couple of resident ones.

i would say we have at least one happy customer, wouldn’t you?

Charlotte

Are Mums Growing?

One of the mums in a flower bed on my Missouri hillside. (Photo by Charlotte Ekker Wiggins)

One of the mums in a flower bed on my Missouri hillside. (Photo by Charlotte Ekker Wiggins)

Are Mums Growing?

Mums, short for chysanthemums, are a popular flower in gift bouquets because they are long-lasting. As a gardener, these are also excellent garden plants because they not only deter bugs but they are very easy to grow.

One of the more popular times to plant mums is in the fall, leaving the gardener to water the plants through winter until they get well-established. Once settled in, mums come back every year, providing continuing fall color for years.

So how do you tell if your mums are still alive?

At first glance, this dried up mum in my flower bed looks dead. As you get close, you will see green, signs of growth around the base of the plant. That’s how you know your mum is settling in.

Underneath the dry top, signs of new growth. (Photo by Charlotte Ekker Wiggins)

Underneath the dry top, signs of new growth. (Photo by Charlotte Ekker Wiggins)

It can take a little time for the new growth to show up. Another mum outside my front door looked dead for months. Now I find new growth appearing at the bottom of that plant as well.

New later growth on another mum. (Photo by Charlotte Ekker Wiggins)

New later growth on another mum. (Photo by Charlotte Ekker Wiggins)

If you have mums in water, also check the bottom of the stems. You may find that your cut mums are developing roots in water. Did I mention mums are easy to grow?

So don’t get discouraged if the top of your mums look dry and dead at the moment. Underneath, new growth should be getting established to grow later this year.

Here are some of my favorite mums, yellow ones, that have returned for several years in one of my garden path corners.

These mums have returned in this same spot for several years now that they are established. (Photo by Charlotte Ekker Wiggins)

These mums have returned in this same spot for several years now that they are established. (Photo by Charlotte Ekker Wiggins)

Mums are not only pretty and helpful in the garden but their daisy-shaped flowers make excellent cut flowers.

Charlotte

Sweet Santa Gifts

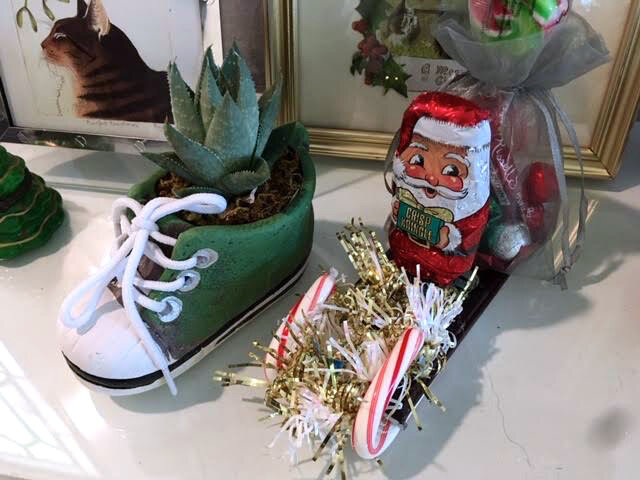
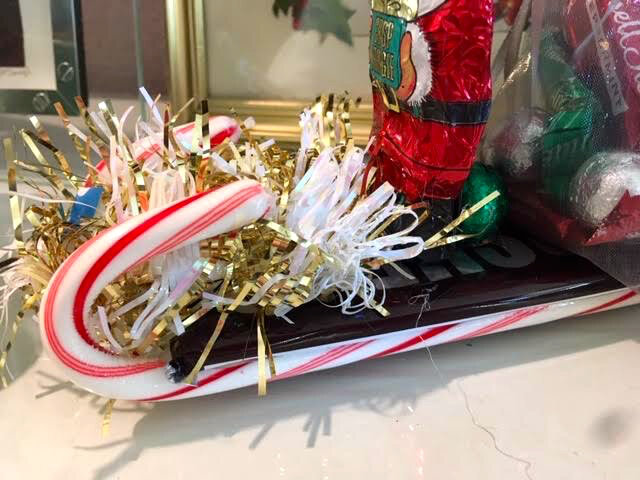
Chocolate Santa arrives on a chocolate sleigh carrying - well, yes, chocolates! (Photo by Charlotte Ekker Wiggins)

Chocolate Santa arrives on a chocolate sleigh carrying - well, yes, chocolates! (Photo by Charlotte Ekker Wiggins)

Sweet Santa Gifts

One of my neighbors and her grandson sang “We wish you a Merry Christmas“ as they dropped off this charming chocolate Santa on a chocolate sleigh. It reminded me of one of my favorite holiday lap quilts with Santa in a woodland setting. Maybe it’s because we both enjoy our hillside wildlife, we often exchange stories about what creatures have been spending time in our hillside gardens.

Tag these to make later this year, so cute and easy.

Looks like you will need:

Hershey chocolate bars

Chocolate Santas

Chocolate goodies for the

Drawstring bag

Candy canes the length of Hershey bar

Some tinsel

Glue

A wrapped chocolate bar glued behind Santa helps him stand up. (Photo by Charlotte Ekker Wiggins)

A wrapped chocolate bar glued behind Santa helps him stand up. (Photo by Charlotte Ekker Wiggins)

In the drawstring bag, a little collection of more sweet goodies. The bag was also glued to the Hershey bar top and it was quite easy - too easy - to remove.

A drawstring bag holds more chocolate gifts. (Photo by Charlotte Ekker Wiggins)

A drawstring bag holds more chocolate gifts. (Photo by Charlotte Ekker Wiggins)

And what luck, Santa and his sleigh very nicely fit into my little winter scene with snowman cat, Christmas trees and the framed Christmas card collection next to my front door.

Chocolate Santa sleigh joins my other Christmas scene members. (Photo by Charlotte Ekker Wiggins)

Chocolate Santa sleigh joins my other Christmas scene members. (Photo by Charlotte Ekker Wiggins)

Charming way to be greeted every morning as I come down my stairs!

Charlotte

Winter Rose Poinsettias

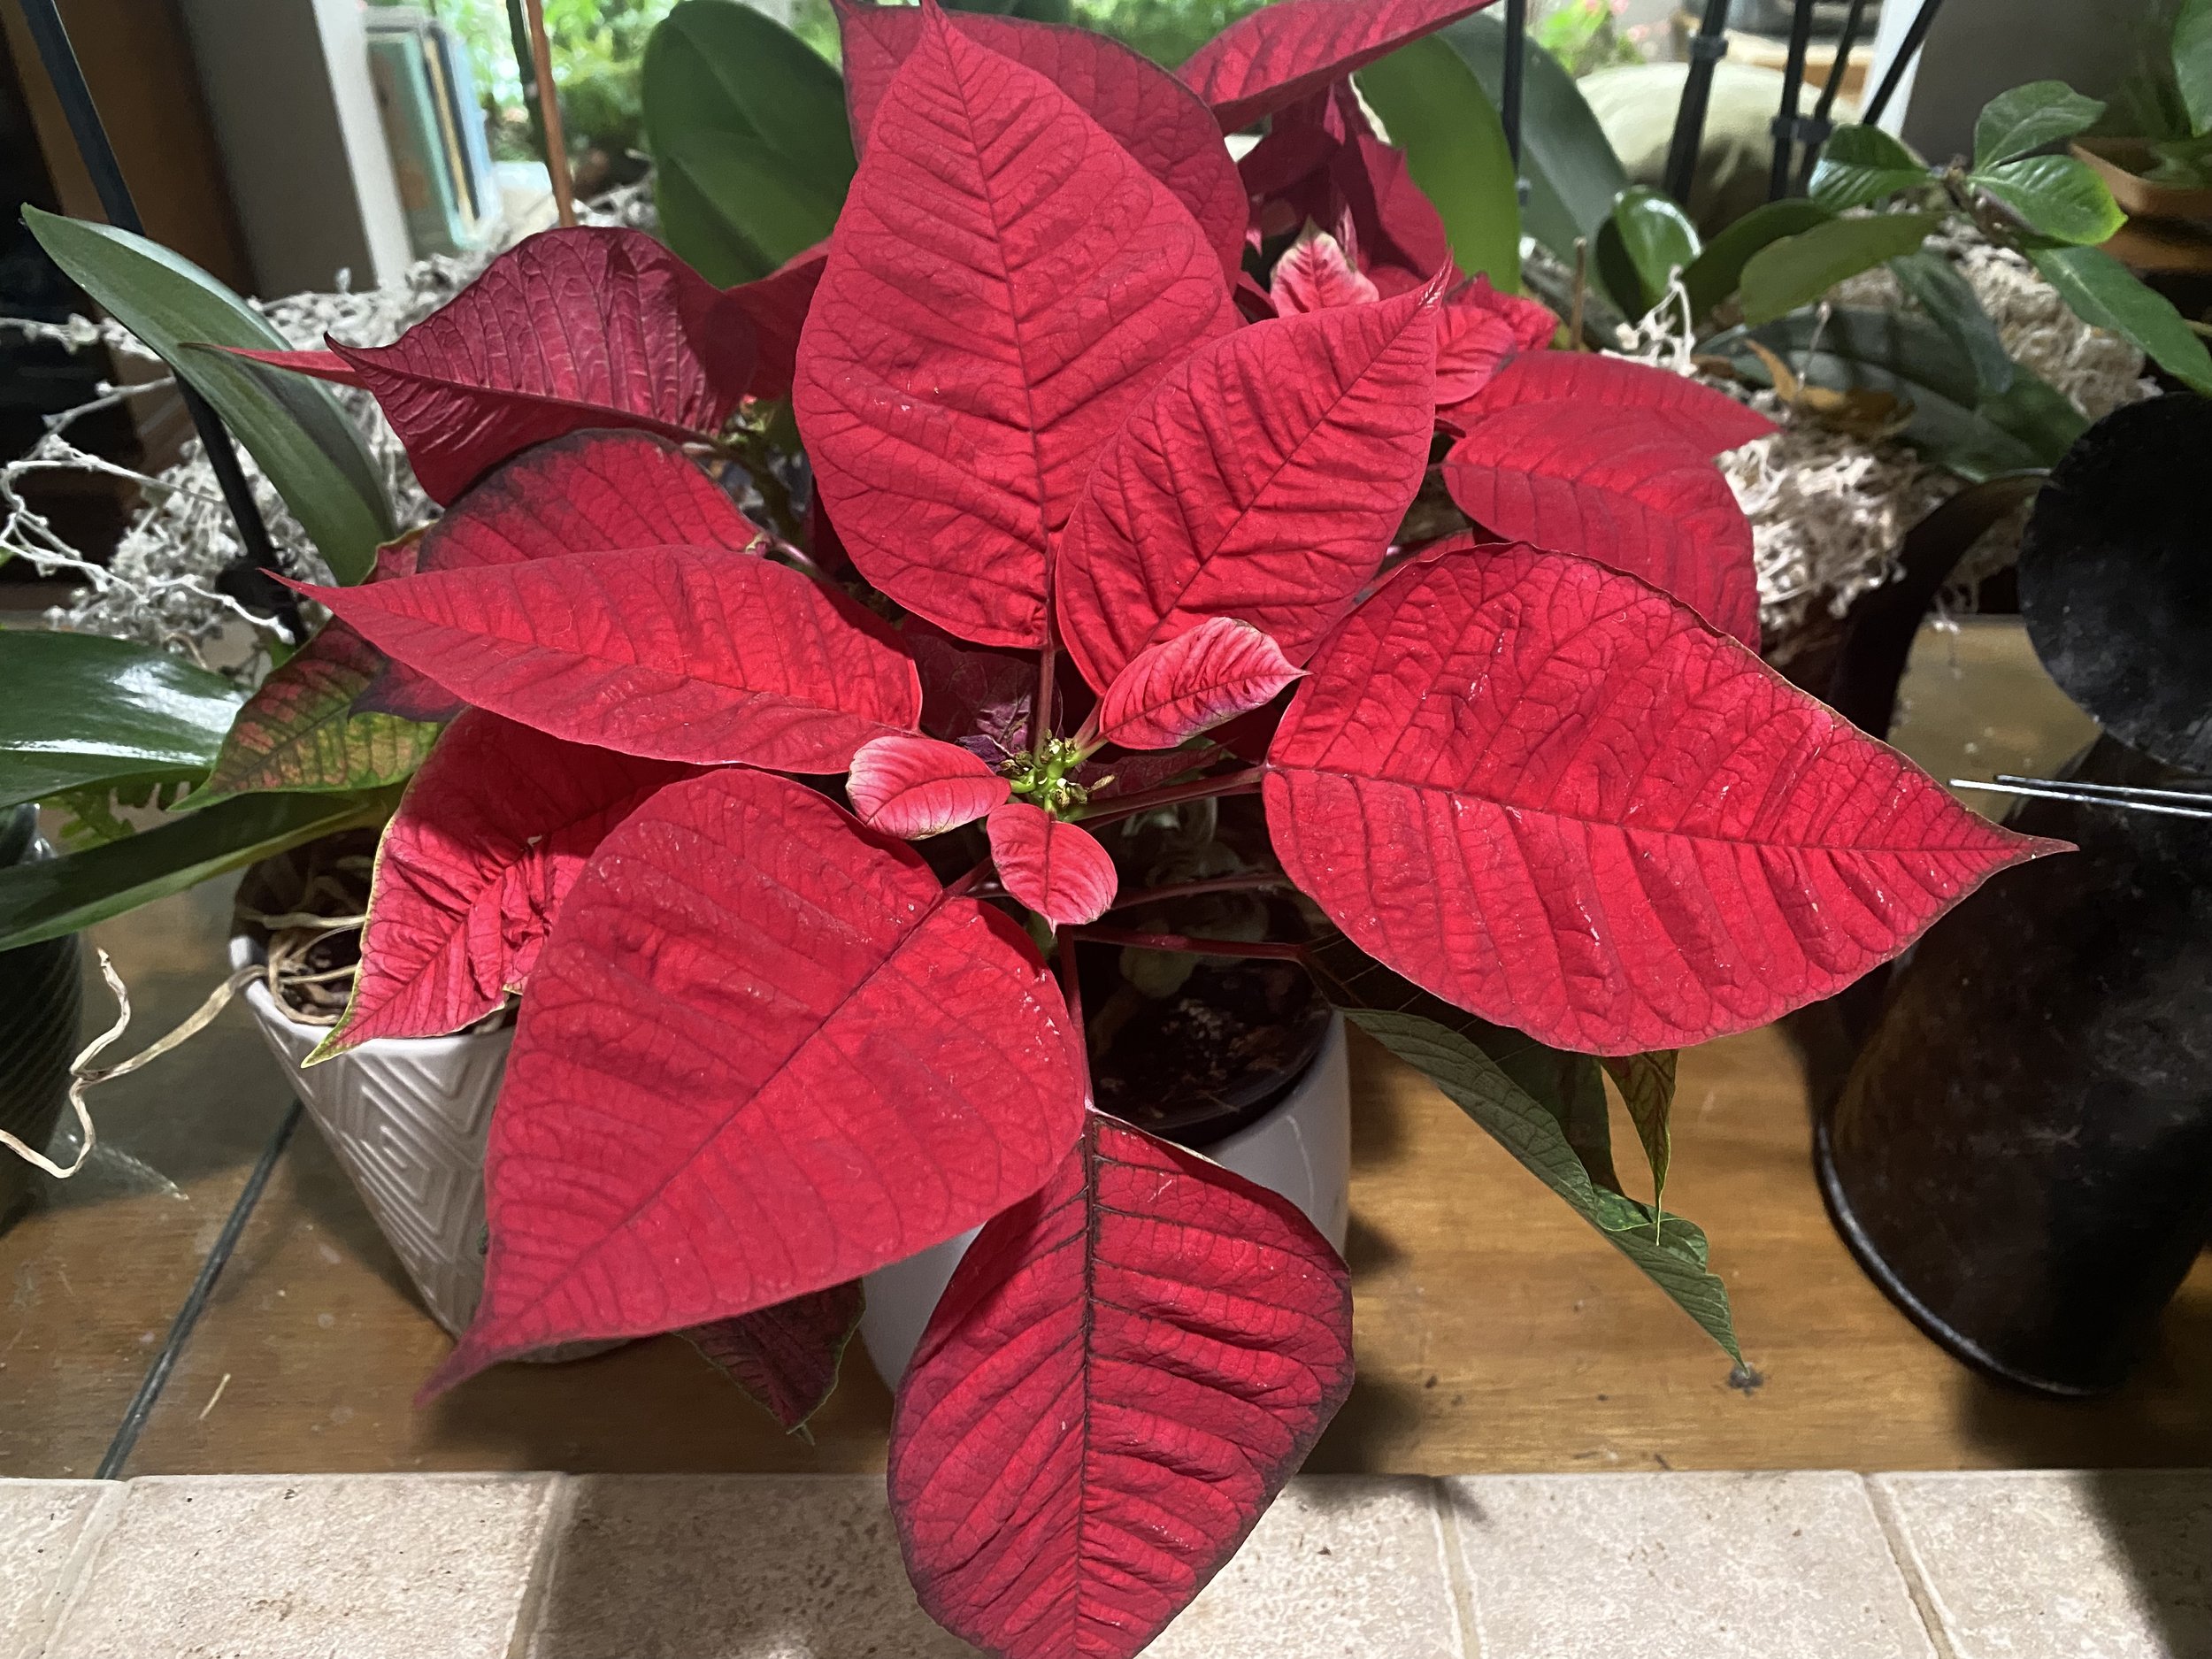
These interesting ruffled poinsettias are called “winter rose.” (Photo by Charlotte Ekker Wiggins)

These interesting ruffled poinsettias are called “winter rose.” (Photo by Charlotte Ekker Wiggins)

Winter Rose Poinsettias

I have to confess, I have been curious about this new poinsettia variety. I first saw one last year at one of our local home and garden centers, prompting me to think I need to get one when they are next on sale.

This year, a friend gave me one for Christmas, a medium-sized plant with 3-inch flower “heads” that indeed resemble roses. He called them a “ruffled poinsettia.”

This new poinsettia species resembles roses. (Photo by Charlotte Ekker Wiggins)

This new poinsettia species resembles roses. (Photo by Charlotte Ekker Wiggins)

According to my research, this plant was first developed by the Paul Ecke Plant Company. The leaves and bracts on the Winter Rose poinsettia variety are smaller and tend to curl under. The plant is usually shorter than regular poinsettias. More interesting to me, the plant is supposed to hold its colored leaves through May, a good couple of months longer than standard poinsettias.

The “flower heads” are actually plant bracts, or leaves that surround the tiny yellow centers that actually hold the flowers. The leaves are triggered to change color by exposing the plants to 14 hours of darkness from September to November. I have a standard red poinsettia from last year that is turning color after this light deprivation.

Besides red, Winter Rose poinsettias are available in white, pink and marble.

Now let’s see how long these “winter roses” last!

Charlotte

Last Minute Shopping

Last minute gift ideas don’t always come in gift-wrapped boxes. (Photo by Charlotte Ekker Wiggins)

Last minute gift ideas don’t always come in gift-wrapped boxes. (Photo by Charlotte Ekker Wiggins)

Last Minute Shopping

The call came in late last night, a male customer clearly exasperated with Christmas gift expectations.

Four daughters. One doting aunt. I waited to hear about a wife but there was no mention so I took him to be a single Dad.

At this point in the season, with five days until Christmas, I understood some of his frustration so I made the current suggestion of 4 gifts per person:

Something they want,

Something they need,

Something to wear,

Something to read.

There was silence at the other end. Oh, he said, that’s good “that gives me a place to start.”

Then we headed into each category for suggestions. He had the first one covered for the daughters but not the aunt. How about a framed photo of the four girls, does she have one? He liked that idea; he said the girls would have fun setting up the photo shoot. Framed photos are always a good choice!

In terms of what they “needed,” he made it clear he was a good provider. I suggested writing each of them a letter explaining what each meant to him and the good wishes he had for them as they grow up. It was something he could slip in their stockings and I guaranteed it would be something they would cherish. He loved that idea. It was something he “could make” for them.

We both groaned at the “what to wear” one although I said a good pair of winter gloves and a scarf for each qualified. “Sold” he said.

The reading list was frankly the toughest one but we sorted out favorite likes and hobbies that he now can use to shop online for books to match.

The relief in his voice was palpable. “So you make money doing this” he asked.

I laughed. No, I said, but hopefully the next time he needed a personalized birthday gift he would think of us.

He thanked me again, said he was going to “double check” his list and hung up, off to shop online for books, he said.

He will make it. Merry Christmas!

Charlotte

Poinsettia Care Update

Last year’s gift poinsettias re-blooming for this year. (Photo by Charlotte Ekker Wiggins)

Last year’s gift poinsettias re-blooming for this year. (Photo by Charlotte Ekker Wiggins)

Poinsettia Care Update

It’s been about 10 days since my last update on the poinsettias from last year. They have been sitting in indirect light during the day with no evening light since September. I forgot to give them fertilizer during their dormant period but did keep them on the dry side.

They are now getting more leaf color, which is what turns either red, white, pink and pink and white. And I saw a really furly red leaf at one of our local home and garden centers, not to mention the crocheted poinsettia lap quilt throw we have in storage.

No I didn’t buy any of the plants, I’m enjoying watching mine from last year turn.

This is how the one in the top photo started about a month ago. This is when I knew to pull it out of the back room and give it more indirect sunlight.

Same poinsettia a good 5 weeks ago, first showing leaf color. (Photo by Charlotte Ekker Wiggins)

Same poinsettia a good 5 weeks ago, first showing leaf color. (Photo by Charlotte Ekker Wiggins)

As with most plants, we don’t always have the space to give them the growing conditions they need so most of these tropical plants from Mexico get tossed after Christmas.

In their native habitat, they grow the size of small trees, similar to our native Missouri dogwoods.

My plan is now to keep them growing through winter, then repot and set them outside in shade over summer so they have more time to grow. It will be interesting to see how big they will get by next year.

The other poinsettias? Well, if I happen to find one on sale I just might bring another one home.

Charlotte

Christmas Tree Ornament

This handmade Christmas tree ornament uses up extra buttons. (Photo by Charlotte Ekker Wiggins)

This handmade Christmas tree ornament uses up extra buttons. (Photo by Charlotte Ekker Wiggins)

Christmas Tree Ornament

Most of us have them, jars of buttons we have cut off from blouses and shirts we could no longer wear. I know I do, and did several years ago when a friend stopped in with her two small children. She was moving across country and had most of her belongings in the back of her car. She was down in her luck and trying to put a brave face on for her daughters.

I was only too happy to give her a safe haven, even for just a few days. We spent most of the time giving her daughters a fun Christmas; which is where this ornament comes in.

I didn’t have much in craft materials in the house but we decided we wanted to make Christmas ornaments anyway. These are actual popsicle sticks I had saved to use as plant markers. One of the girls found the jars of buttons and I knew where i stored green and brown paint. I keep a small plastic container full of small paint jars and brushes so that I can easily decorate when I need to.

My plastic container of small paints and paint brushes. (Photo by Charlotte Ekker Wiggins)

My plastic container of small paints and paint brushes. (Photo by Charlotte Ekker Wiggins)

Sitting around my butcher block kitchen island covered in newspapers, we glued, then painted, then glued buttons on. We talked. Some of us were silly, and not necessarily the two little ones. The girls loved the hot chocolate with marshmallows. I could see Mom starting to relax.

She didn’t have money for gifts so the girls made these ornaments for their family members. We cut cat faces out of cardboard and added them to the top of the tree ornament instead of a star. They had left their pet cat behind; this was a wish that they would get another one. If you haven’t lived with a cat through holiday Christmas tree climbing, you are missing quite the adventure.

Another tree had a boot on it for a grandfather, and yet another one had a flower one of the girls cut out of one of my gardening magazines. We decided the tree topper on the Christmas tree tree ornaments were things they wished Santa would bring their relatives.

They signed their names and put a date on the back. Mom and I hand wrote little cards for each person explaining the wish expressed at the top of the ornament. I ended up with one of the ornaments with a star on top.

My friend went on to bigger and better things, and husbands. Her daughters are now married with their own children and cats I think of them when I find this simple ornament. It may not look much but to me it represents life. The tree of life. And hope that things would get better.

It still does today.

Charlotte


Renewed Poinsettias

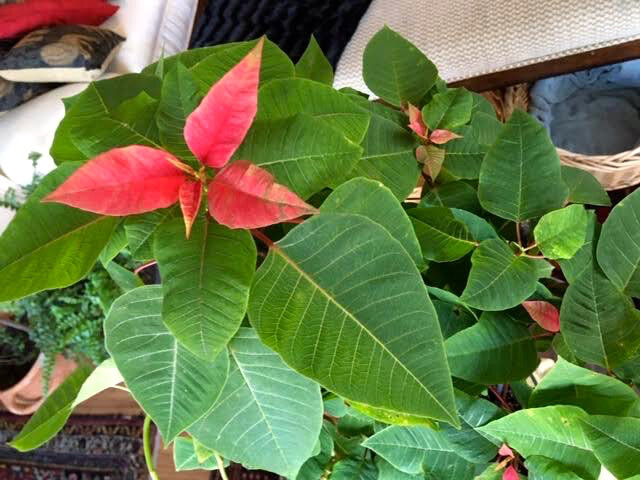
The first new red bract from last year’s gift poinsettias. (Photo by Charlotte Ekker Wiggins)

The first new red bract from last year’s gift poinsettias. (Photo by Charlotte Ekker Wiggins)

Renewed Poinsettias

It’s an early Christmas at Bluebird Gardens. My gift poinsettias from last year are setting new color in their leaves, also called bracts.

These popular annuals from Mexico are the quintessential holiday gift and home decor plant. The traditional red colored plants have in the last decade or so made room for pink, white and candy cane, a red and white variegated variety.

I can remember these growing in Mexico City, Mexico as trees, similar to Missouri’s state tree, the flowering dogwood.

These gift poinsettias from last year were lovely with their beautiful leaf color lasting for several months. After a short summer spent outside in the shade, I set these plants in a basement room where they could get bright daylight but no light at night. They need 14 hours of darkness and little water, which frankly was the hardest part for me to do. I was regularly checking them during the day to make sure they were not dropping leaves. There’s a fine line between moisture deprivation and outright killing these delicate plants.

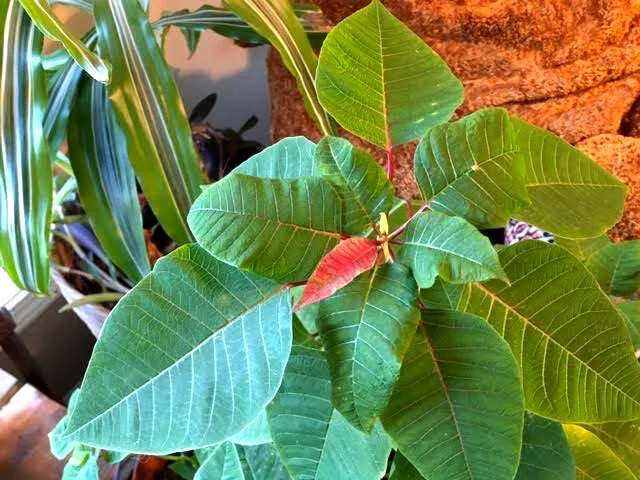
Then the watch began. Not every day but I was regularly sneaking into the room to see if there was a change. Any change. When the new center leaves started to show a dab of red, I knew we were headed in the right direction.

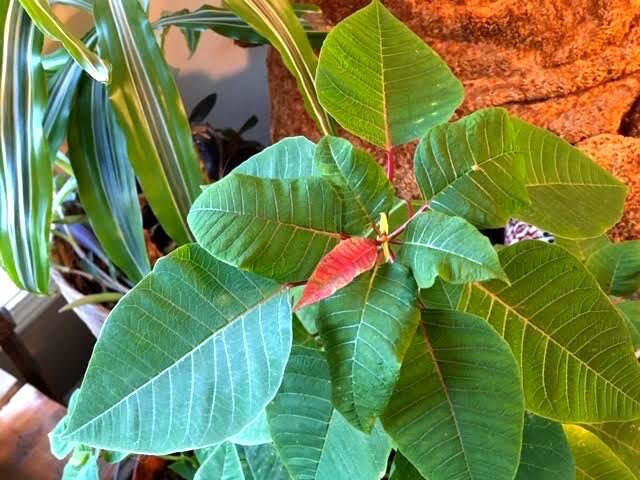
This dab of color was confirmation the plant leaves were changing color. (Photo by Charlotte Ekker Wiggins)

This dab of color was confirmation the plant leaves were changing color. (Photo by Charlotte Ekker Wiggins)

It’s tempting to look for the larger leaves to be changing but it’s the new, tiny center leaves that will be the first to show a change.

New tiny center leaves or bracts with a hint of the changes to come. (Photo by Charlotte Ekker Wiggins)

New tiny center leaves or bracts with a hint of the changes to come. (Photo by Charlotte Ekker Wiggins)

Time to find the bag of new potting soil to give this poinsettia a new lease on the holiday.

My other poinsettias are lagging behind with no signs of color. So the biggest lesson from this is that, as in most things in life, it’s all about timing.

The plants need to start their light deprivation in September, when we in mid-Missouri are still going into evenings with a lot of light. To give them their 14 hours of darkness a day, they need to be moved into dark closets or get covered with a box every day. Or located somewhere where there isn’t so much sunlight into evenings.

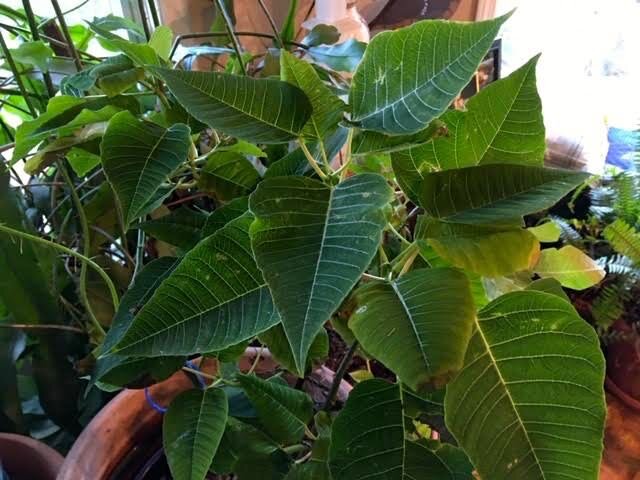
My other poinsettias are still all green. I suspect I will be welcoming the new year with color when they start changing.

The other poinsettias are still all green. We shall see if they turn. (Photo by Charlotte Ekker Wiggins)

The other poinsettias are still all green. We shall see if they turn. (Photo by Charlotte Ekker Wiggins)

There’s a nice sense of accomplishment getting the first poinsettia to start turning color. Now the fun is watching as the rest of the plant follows suit!

Charlotte

Repurposed Snowman

This cute snowman was quickly repurposed into a cat. (Photo by Charlotte Ekker Wiggins)

This cute snowman was quickly repurposed into a cat. (Photo by Charlotte Ekker Wiggins)

Repurposed Snowman

I was at one of my favorite thrift stores Saturday when a lady with a shopping cart full of home decor items said she really shouldn’t be buying more, she already had a lot of Christmas decorations at home. And she wished she could keep them up after the holidays were over.

Although the Christmas season is a lot about tradition, we all have items at home that hold memories and are hard to part with, whether it be the end of the holiday season or to clean house. Some that have fallen out of favor or lost their glow can be repurposed with a little thought, and a dab or two of paint. If you have kids helping, even better.

For example, tired-looking Christmas ornaments can get a new life with a little creativity and paint, as long as they are not family heirlooms.

Some Christmas decor can also get a second life and stay out long after the holidays are over. Some former colleagues have a whole snow theme that follows Christmas into spring, which is a nice way to celebrate the cold and ice of winter. I thought about some of their office snowman decorations when I found this little smiling snowman. His orange nose was worn off, which I knew I could easily fix. The knit cap made his transformation possible with the following:

Orange craft paint

White felt

Needle with white thread

Pink craft paint

Black magic marker

Elmer’s clear glue

Found this snowman for a quarter at a local thrift shop, had to add orange to his worn off nose. (Photo by Charlotte Ekker Wiggins)

Found this snowman for a quarter at a local thrift shop, had to add orange to his worn off nose. (Photo by Charlotte Ekker Wiggins)

I love whimsy. This snowman ringing a bell reminded me of the bells on the collars of my two cats. One cat, who gets into a lot of trouble, sounds like a herd of reindeer. He has earned all of those bells on his collar.

The other cat only has one bell on her collar and yes, she’s very well behaved. Or she’s good at getting out of the way and letting the other cat take the blame.

Their collar bell sounds are quite distinct so I know which one is coming by the sound they make. I decided to make this snowman into a snowcat so he could join my little collection of framed Christmas cat cards, then stay out after I put away the holiday items.

I started by adding white felt ears. The knit cap made the white felt ears easy to add with a few stitches.

After sewing the ears on, I dabbed each with pink paint.

Two white felt ears sewn to the cap with a dab of pink paint. (Photo by Charlotte Ekker Wiggins)

Two white felt ears sewn to the cap with a dab of pink paint. (Photo by Charlotte Ekker Wiggins)

Next was a white felt tail, which was glued to the snowman’s back side. I wanted the tail to peek around the bottom so I had to trim the tail a couple of times to get the right length.

Another piece of white felt added a tail. (Photo by Charlotte Ekker Wiggins)

Another piece of white felt added a tail. (Photo by Charlotte Ekker Wiggins)

Finally, the whiskers, added with a black magic marker and a steady hand.

Snowmancat is now ready to keep me company after the holidays. (Photo by Charlotte Ekker Wiggins)

Snowmancat is now ready to keep me company after the holidays. (Photo by Charlotte Ekker Wiggins)

This little Christmas decor now greets me every morning. It keeps my framed cat cards company, reminding me that the bells getting rung are my real cats getting into trouble. After the holidays are over, I will keep this little whimsical figurine where he will continue to greet me through winter.

I could just as easily made this into a snowman dog with floppy ears and a skinny tail.

Two friends with cats have met my snowcat and now want me to transform one of their snowmen into a snowcat. I told them I would be glad to make the transformation as their Christmas present this year.

So take a look at worn holiday decor and see how you can easily refurbish and repurpose it. Not all of it can be changed but you may find some gems and enjoy them past this holiday season.

Well, except for keeping Christmas lights up all year. One of my brothers has the corner on why, he said he’s keeping the lights up for a UFO experiment.

Charlotte